Category Archives: Chassis

IRS stage 1 is complete!

OK, I should have written this up months ago, but my time is not my own these days. Despite lock-down my job has kept me very busy. I already work from home, so it’s been no real change for me. Only the occasional hour to work on the Mantula. 

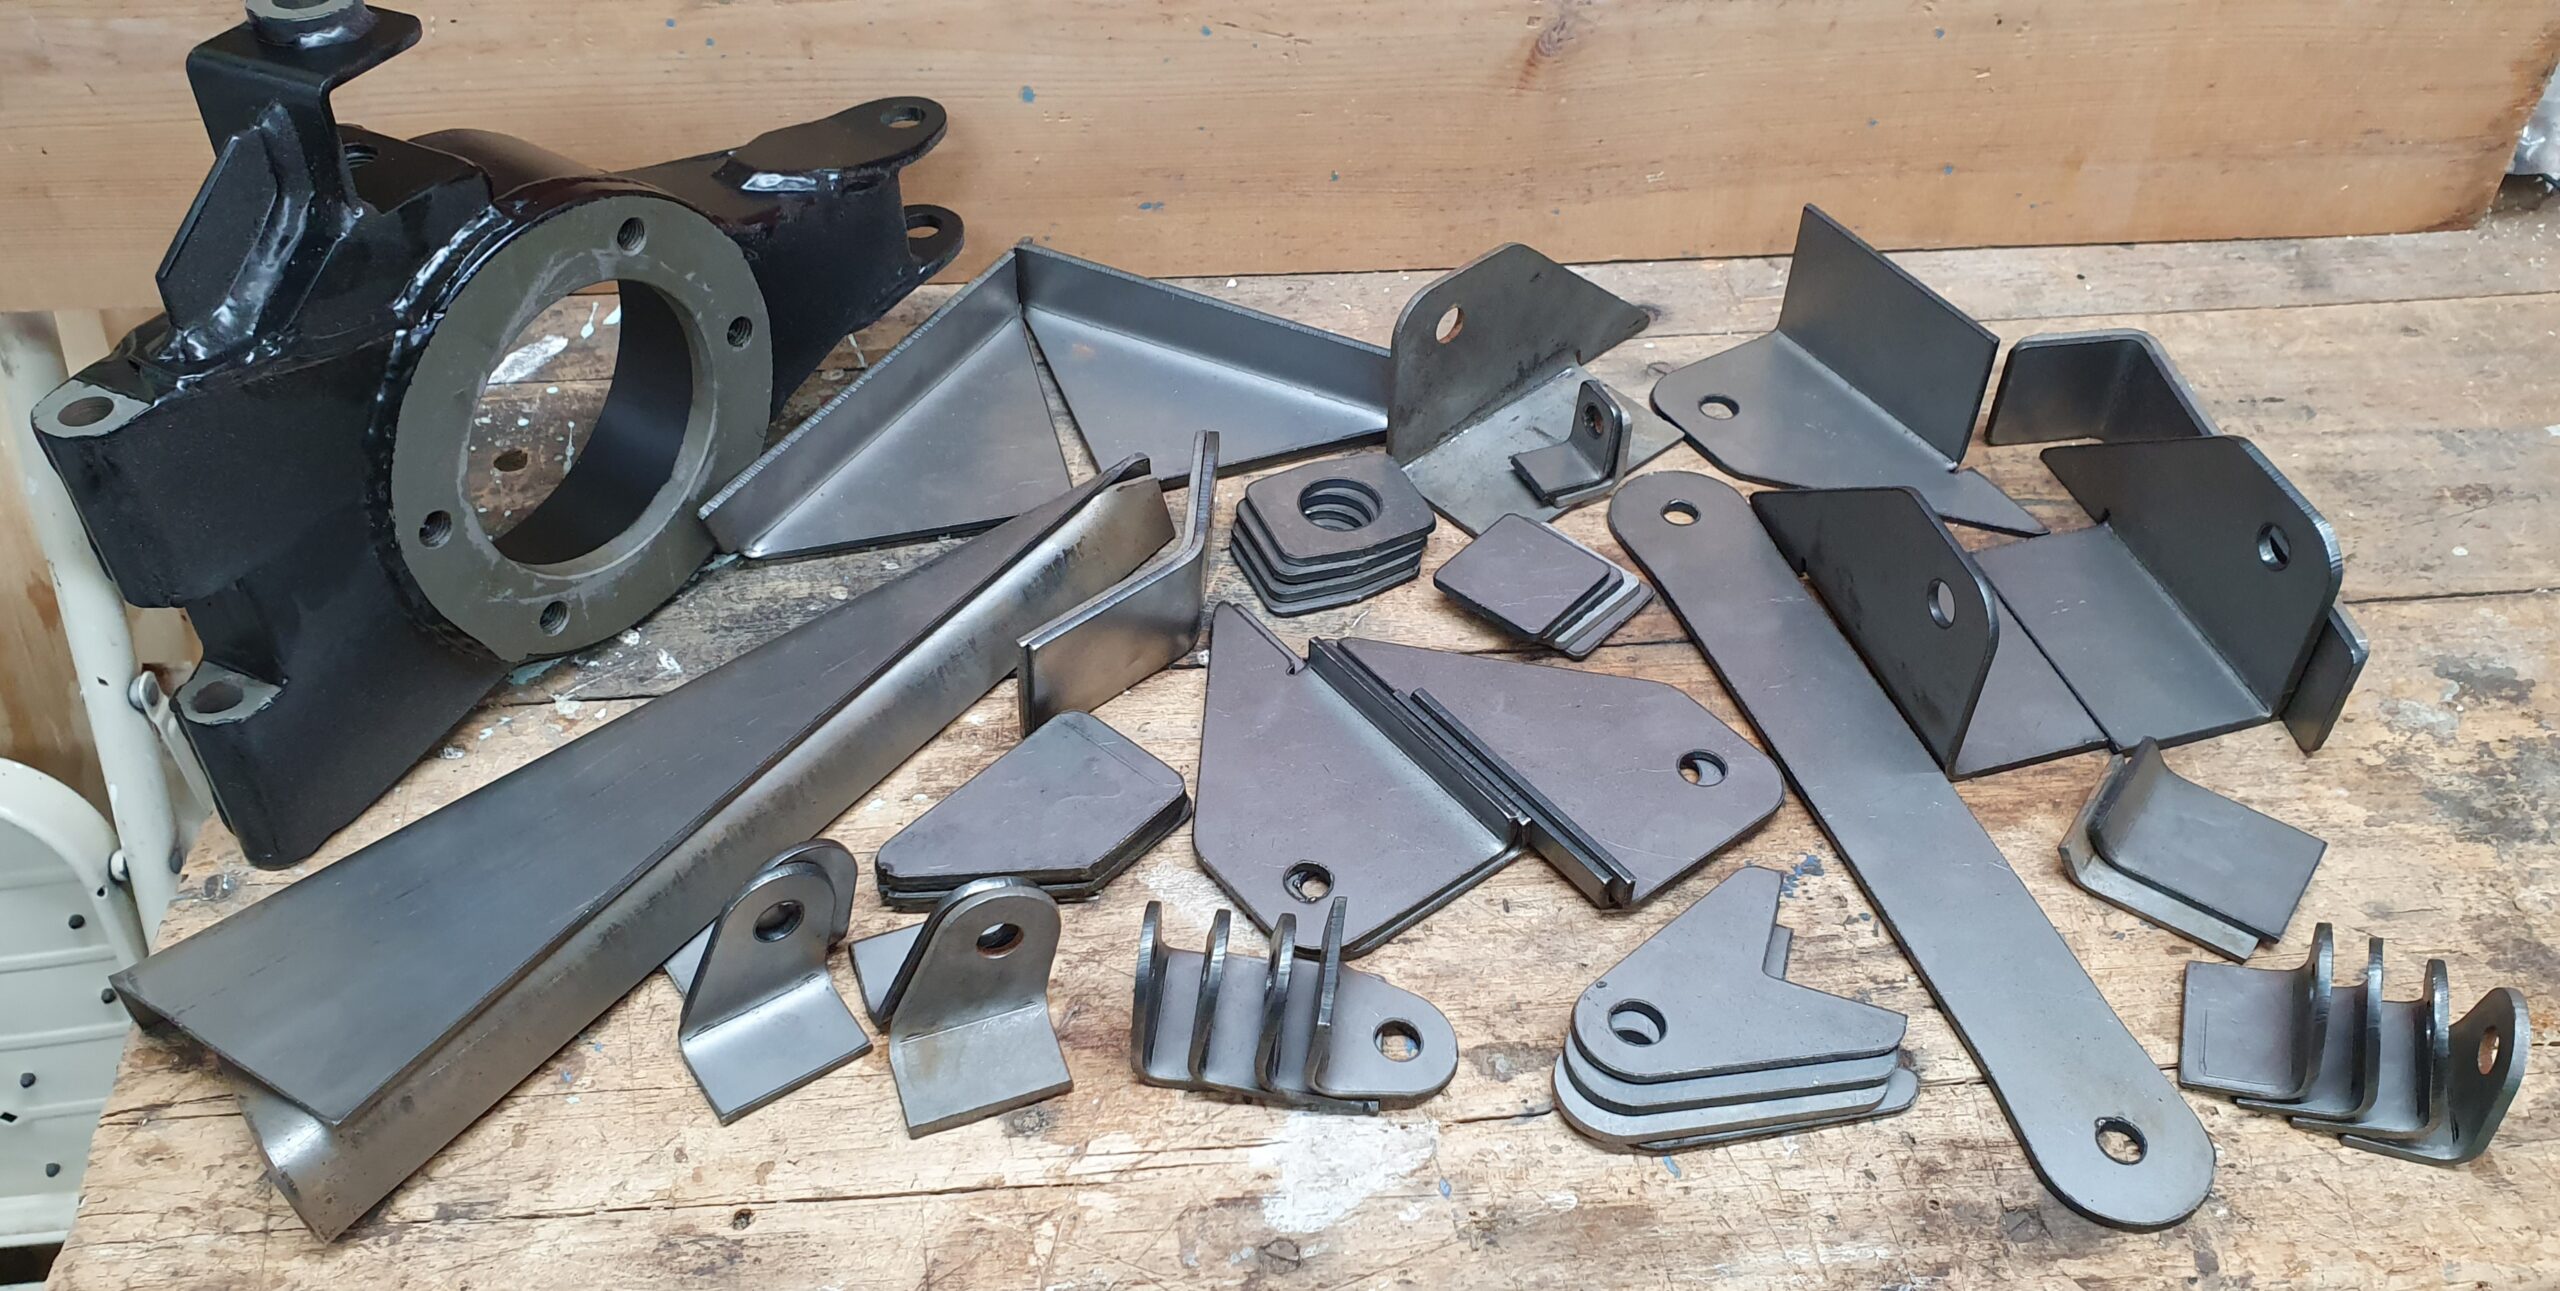
Back before the lock-down came into effect I was able to get the chassis over to George at Arch’s Speed Shop here in Bembridge. It was his job to make sense of my design and the 57 plasma-cut pieces that would eventually become the new IRS chassis update.

Plasma cut parts

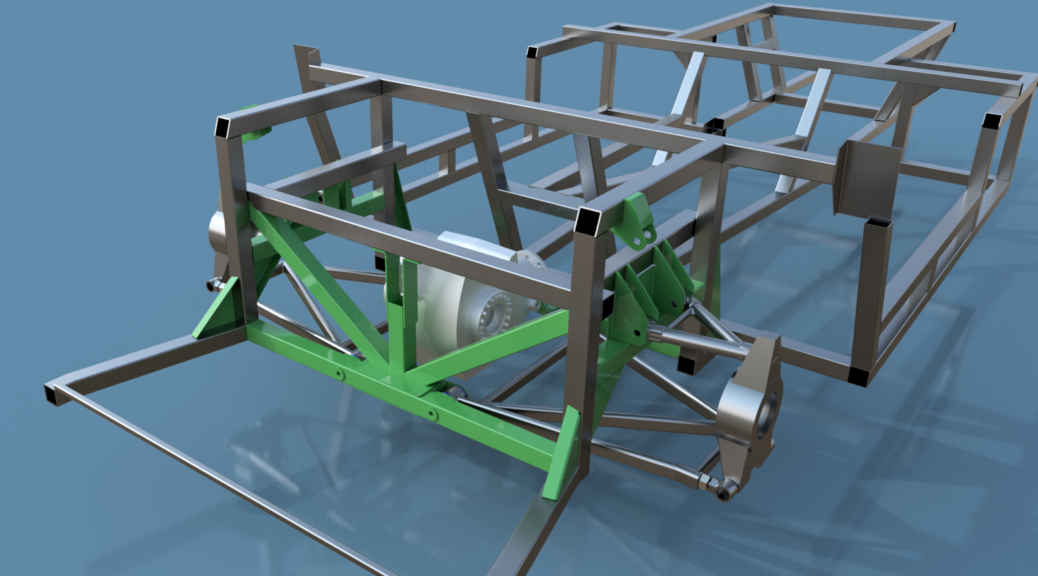
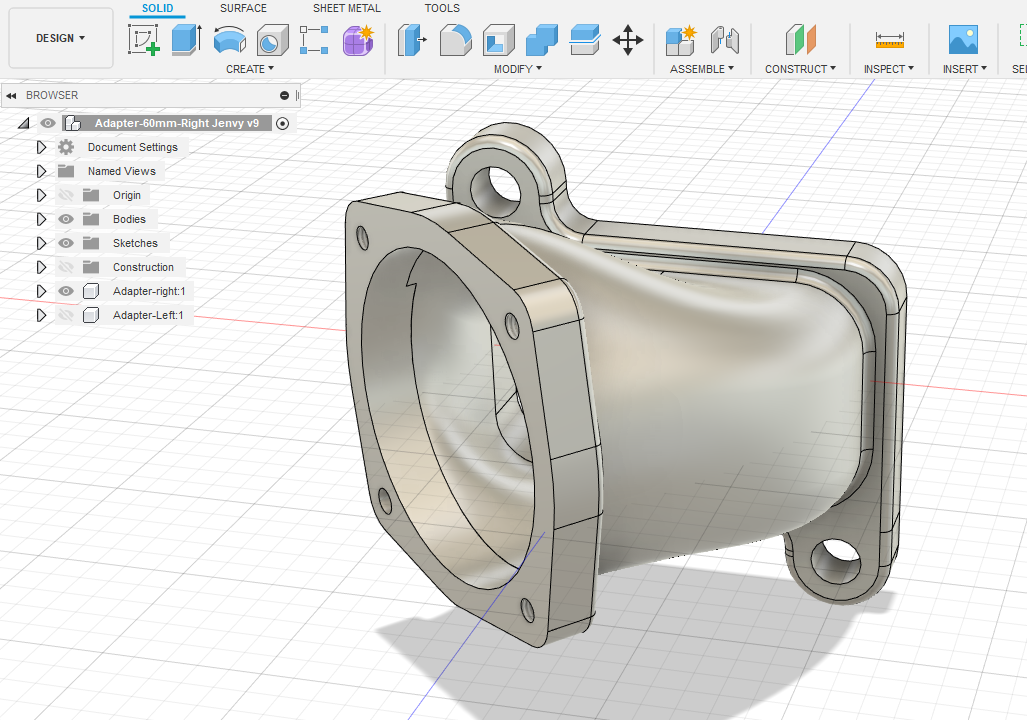
The chassis modifications were drawn in a 3D CAD programme, the excellent and versatile Fusion 360.  I really enjoy using it and it’s free for hobbyist users. 

The process of designing the CAD model is my preferred way to ensure that the job is right first time.  I can design everything to the fraction of a millimetre and see the problems before any metal is cut. Perhaps if I had the fabrication skills I would make it up on the car. Maybe for my next build…

Fusion 360 has a sheet metal design mode and I used that to work out the correct bends and then export the DXF files that are eventually loaded onto a CNC plasma cutter and cut out of 3mm steel. 

That plasma cutter is owned by Ray at Northshore Classics and he did a great job for me including the folding according to my drawings. I was very pleased with the quality. He’ll be doing more work for me as the build progresses.  

Plasma cut parts
Plasma cut parts ready for use.

Arch’s Speed Shop

I was very lucky to get the chassis conversion done before lock-down, but it was close. The chassis was collected on 9th March and returned on Friday 20th March. Lock-down started on the following Monday.

Before collection
Chassis ready for collection

I sourced the steel tube which was a perfect match to the original 1 1/2″ x 14 swg. Mine was supplied  by Metal Supermarkets.

First parts added
First webs added

These parts were supplied by Marcos Heritage Spares as part of the seat belt mounting upgrade kit. 

New Type approved style seat belt mountings
New Type-approved style seat belt mountings with improved door striker plates.

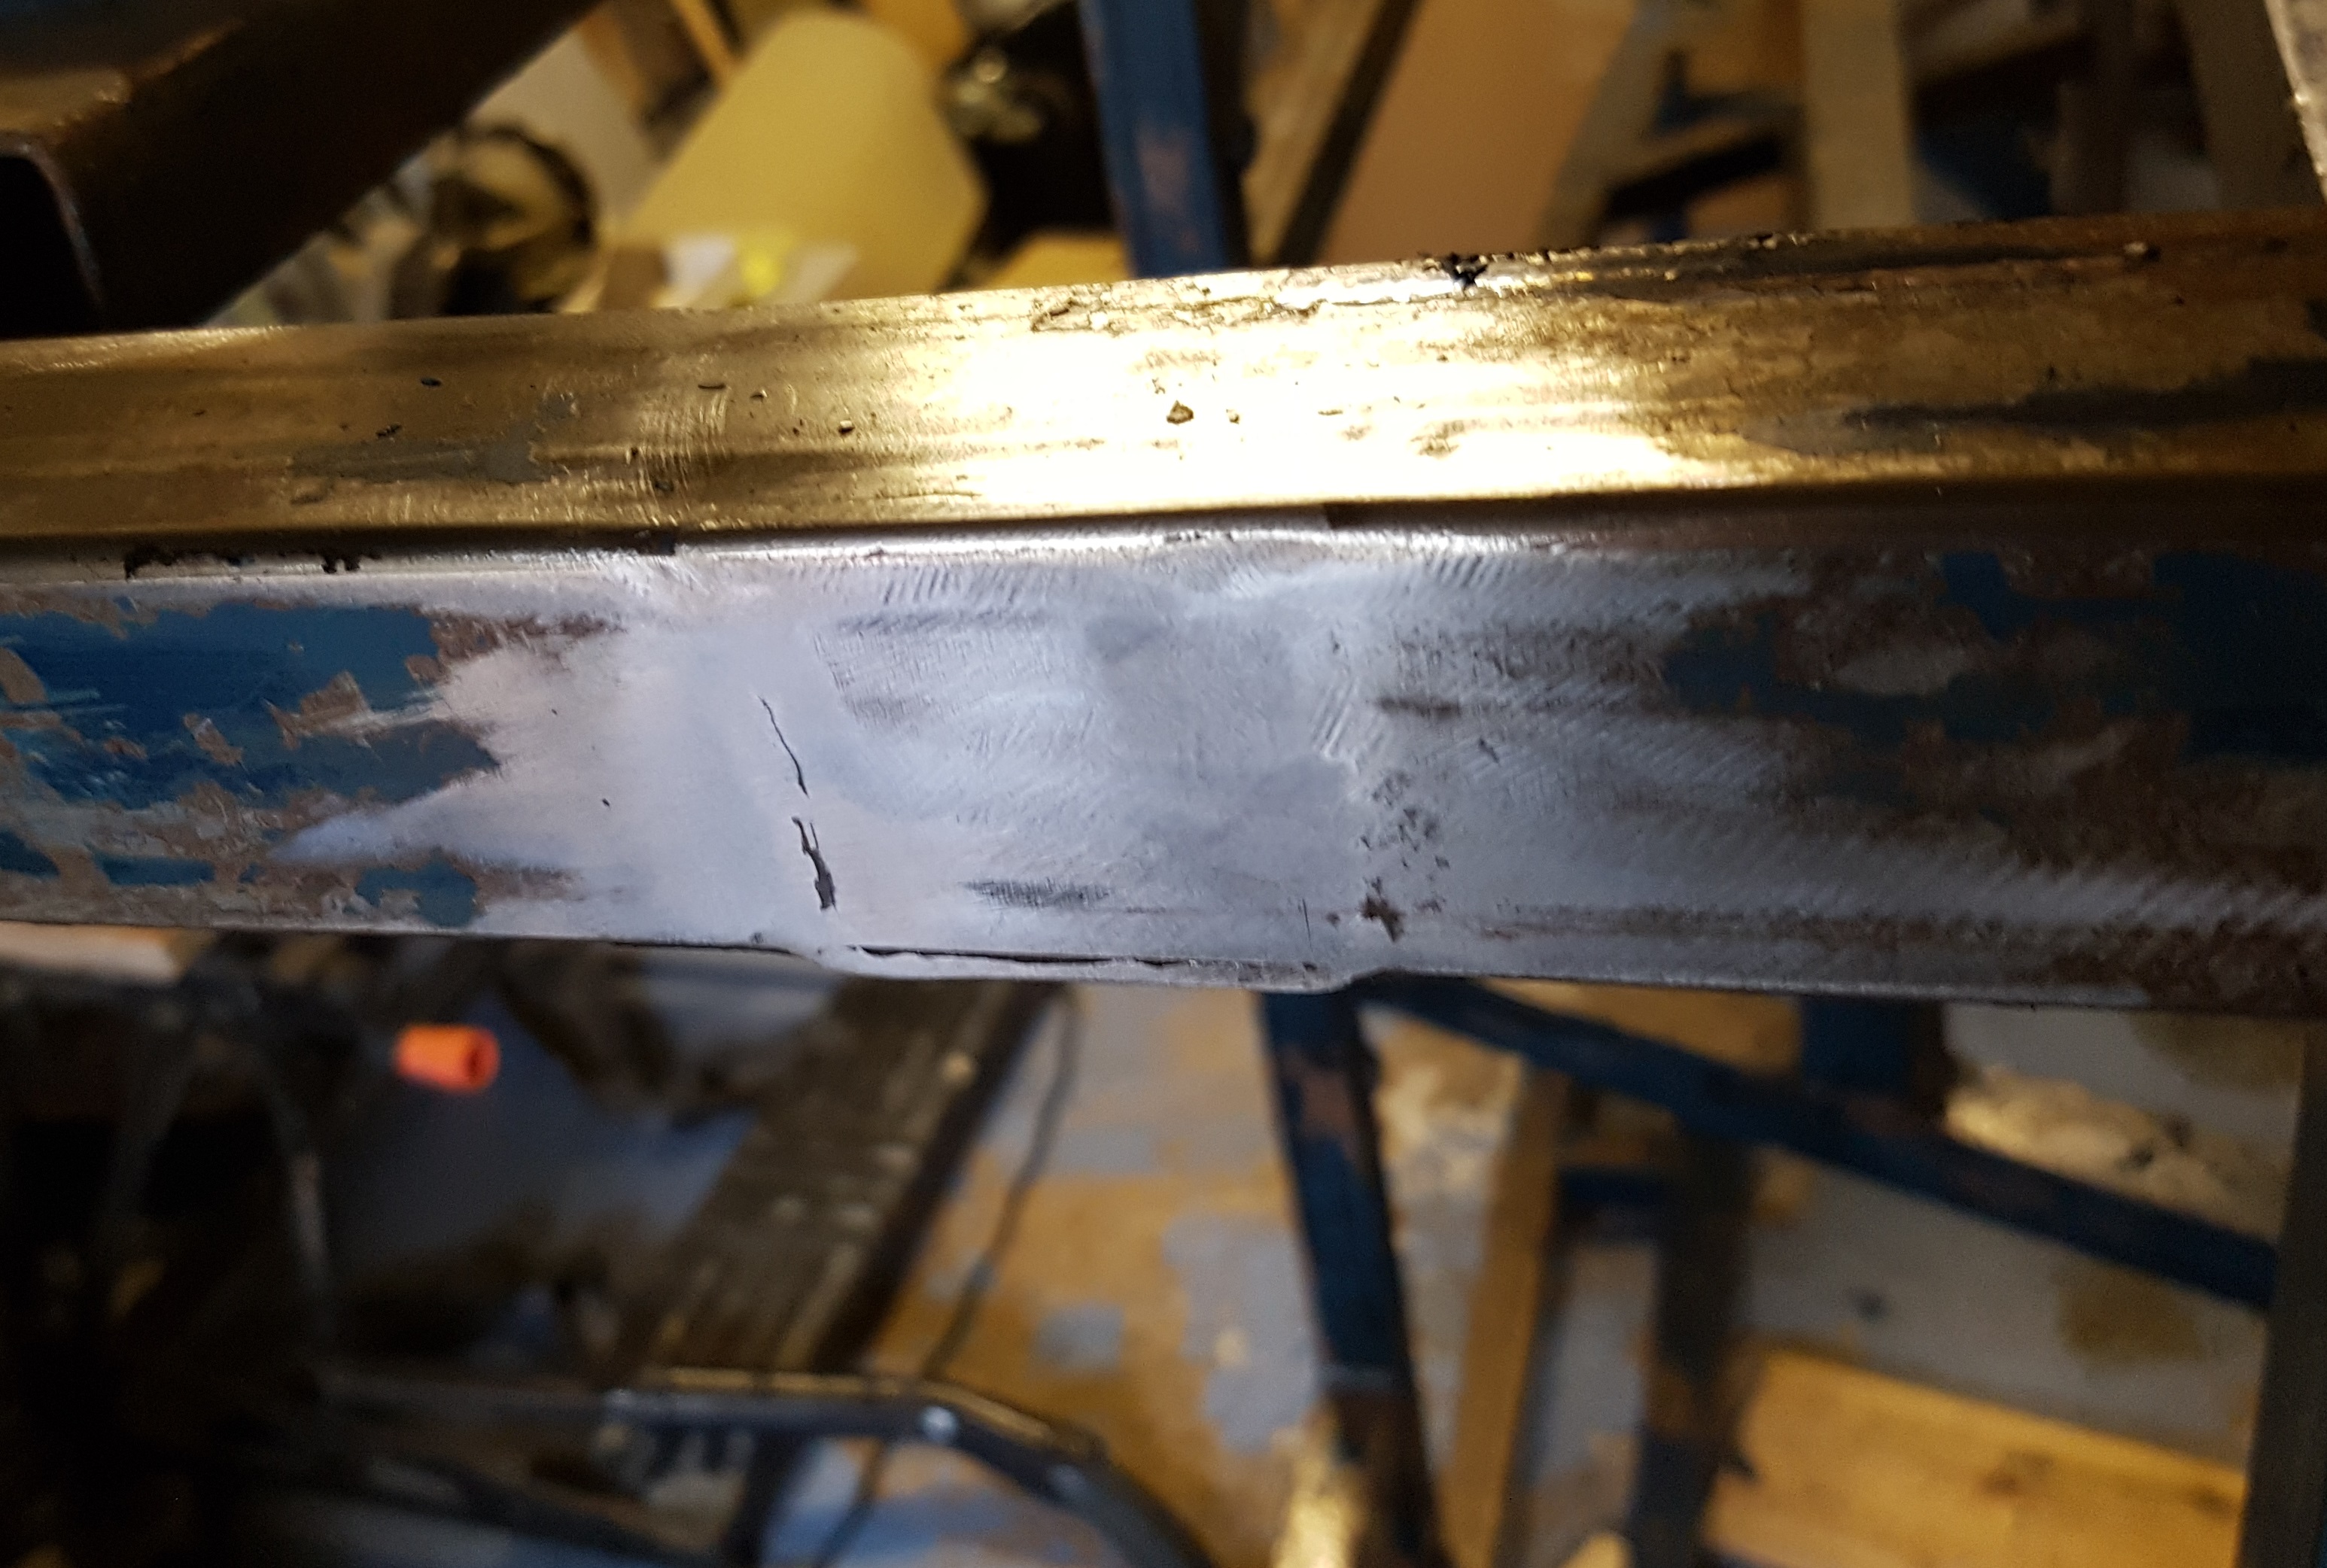
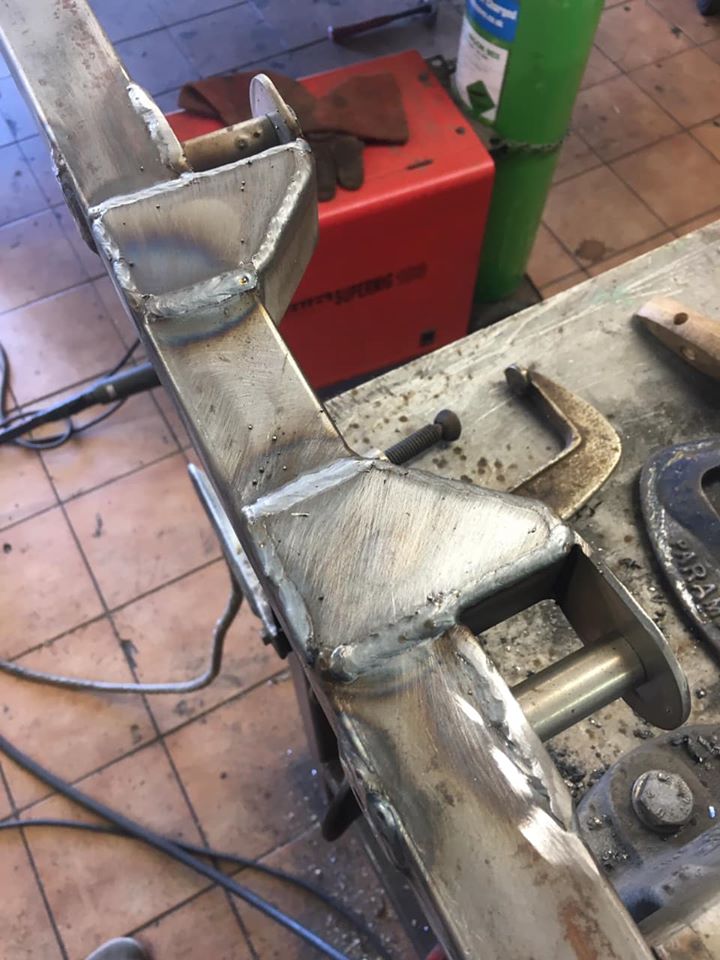
Rather than remove the existing door striker plates we decided to double-up.  The plates were spot welded together then welded all-round to avoid water penetration. This adds a little more stiffness in this relatively flexible area. It also ensures that the body will still fit. 

Seat belt mounting
Seat belt mounting

Rear view of the seat belt mounting.  As this area is open to any road debris thrown-up by the rear wheel it was later decided to fill any potential water traps. The welds were rather spattery probably due to contamination.  Maybe not the prettiest welds but we have very good weld penetration – this isn’t going to fail!

Rear cross-member drawing

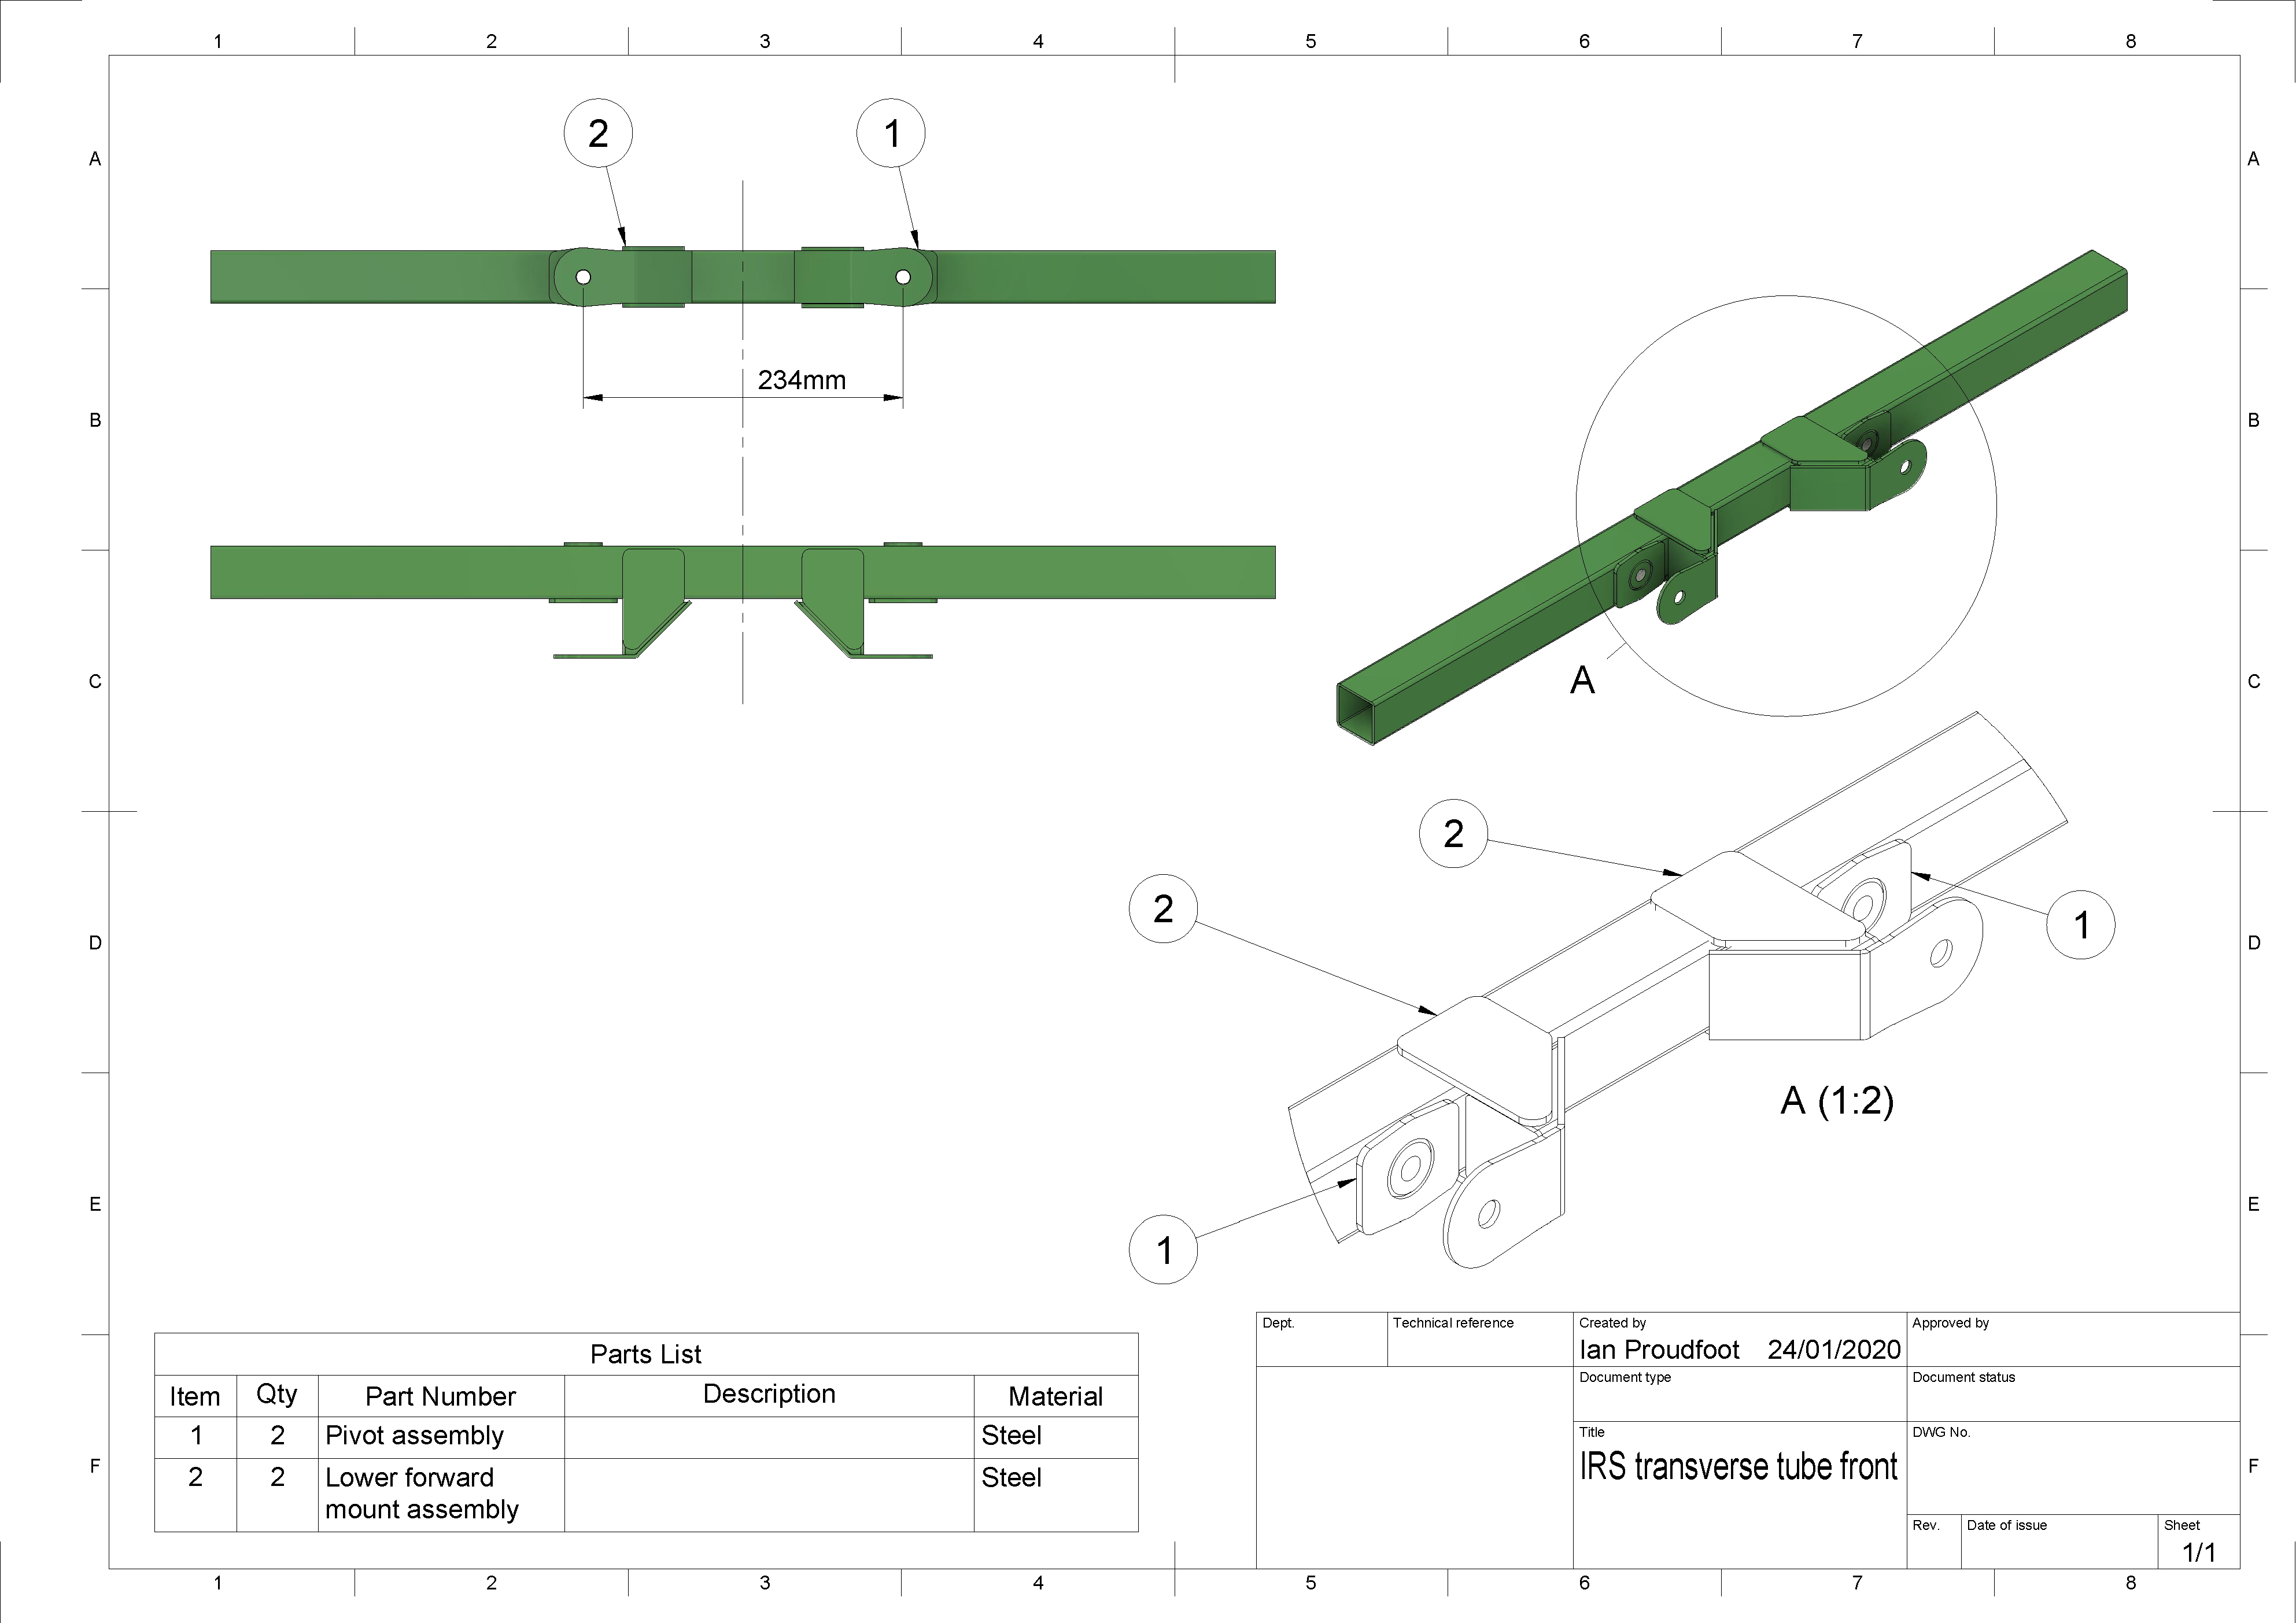
It’s easy to create working drawings from the 3D model in Fusion 360.

Front IRS pick-up tack welded

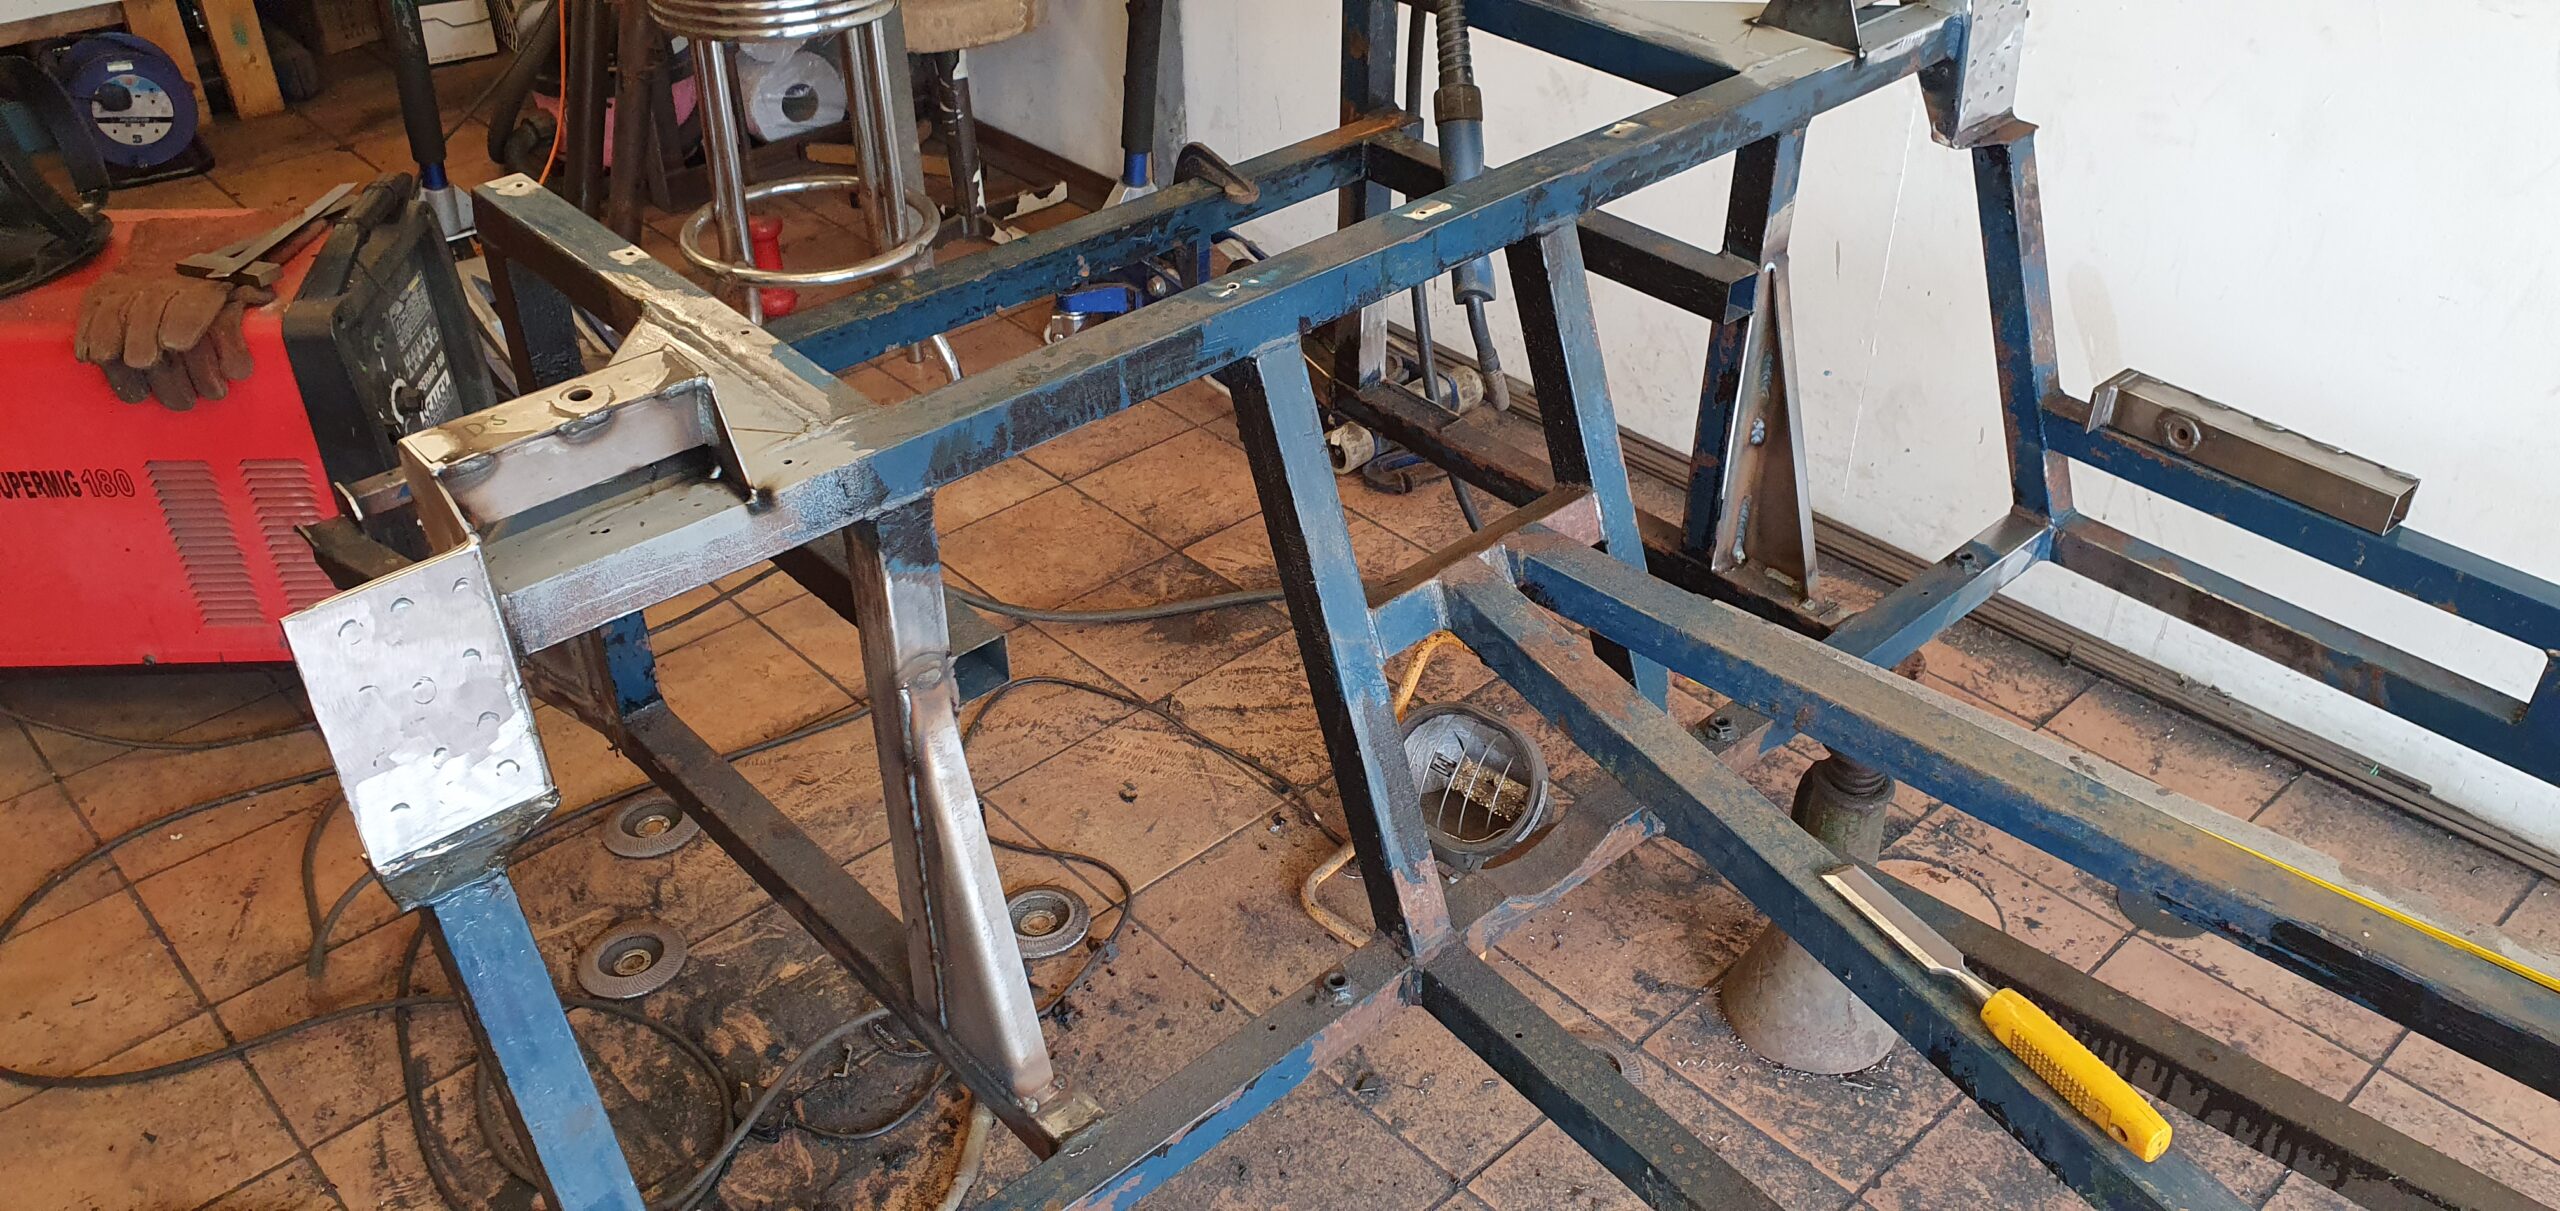
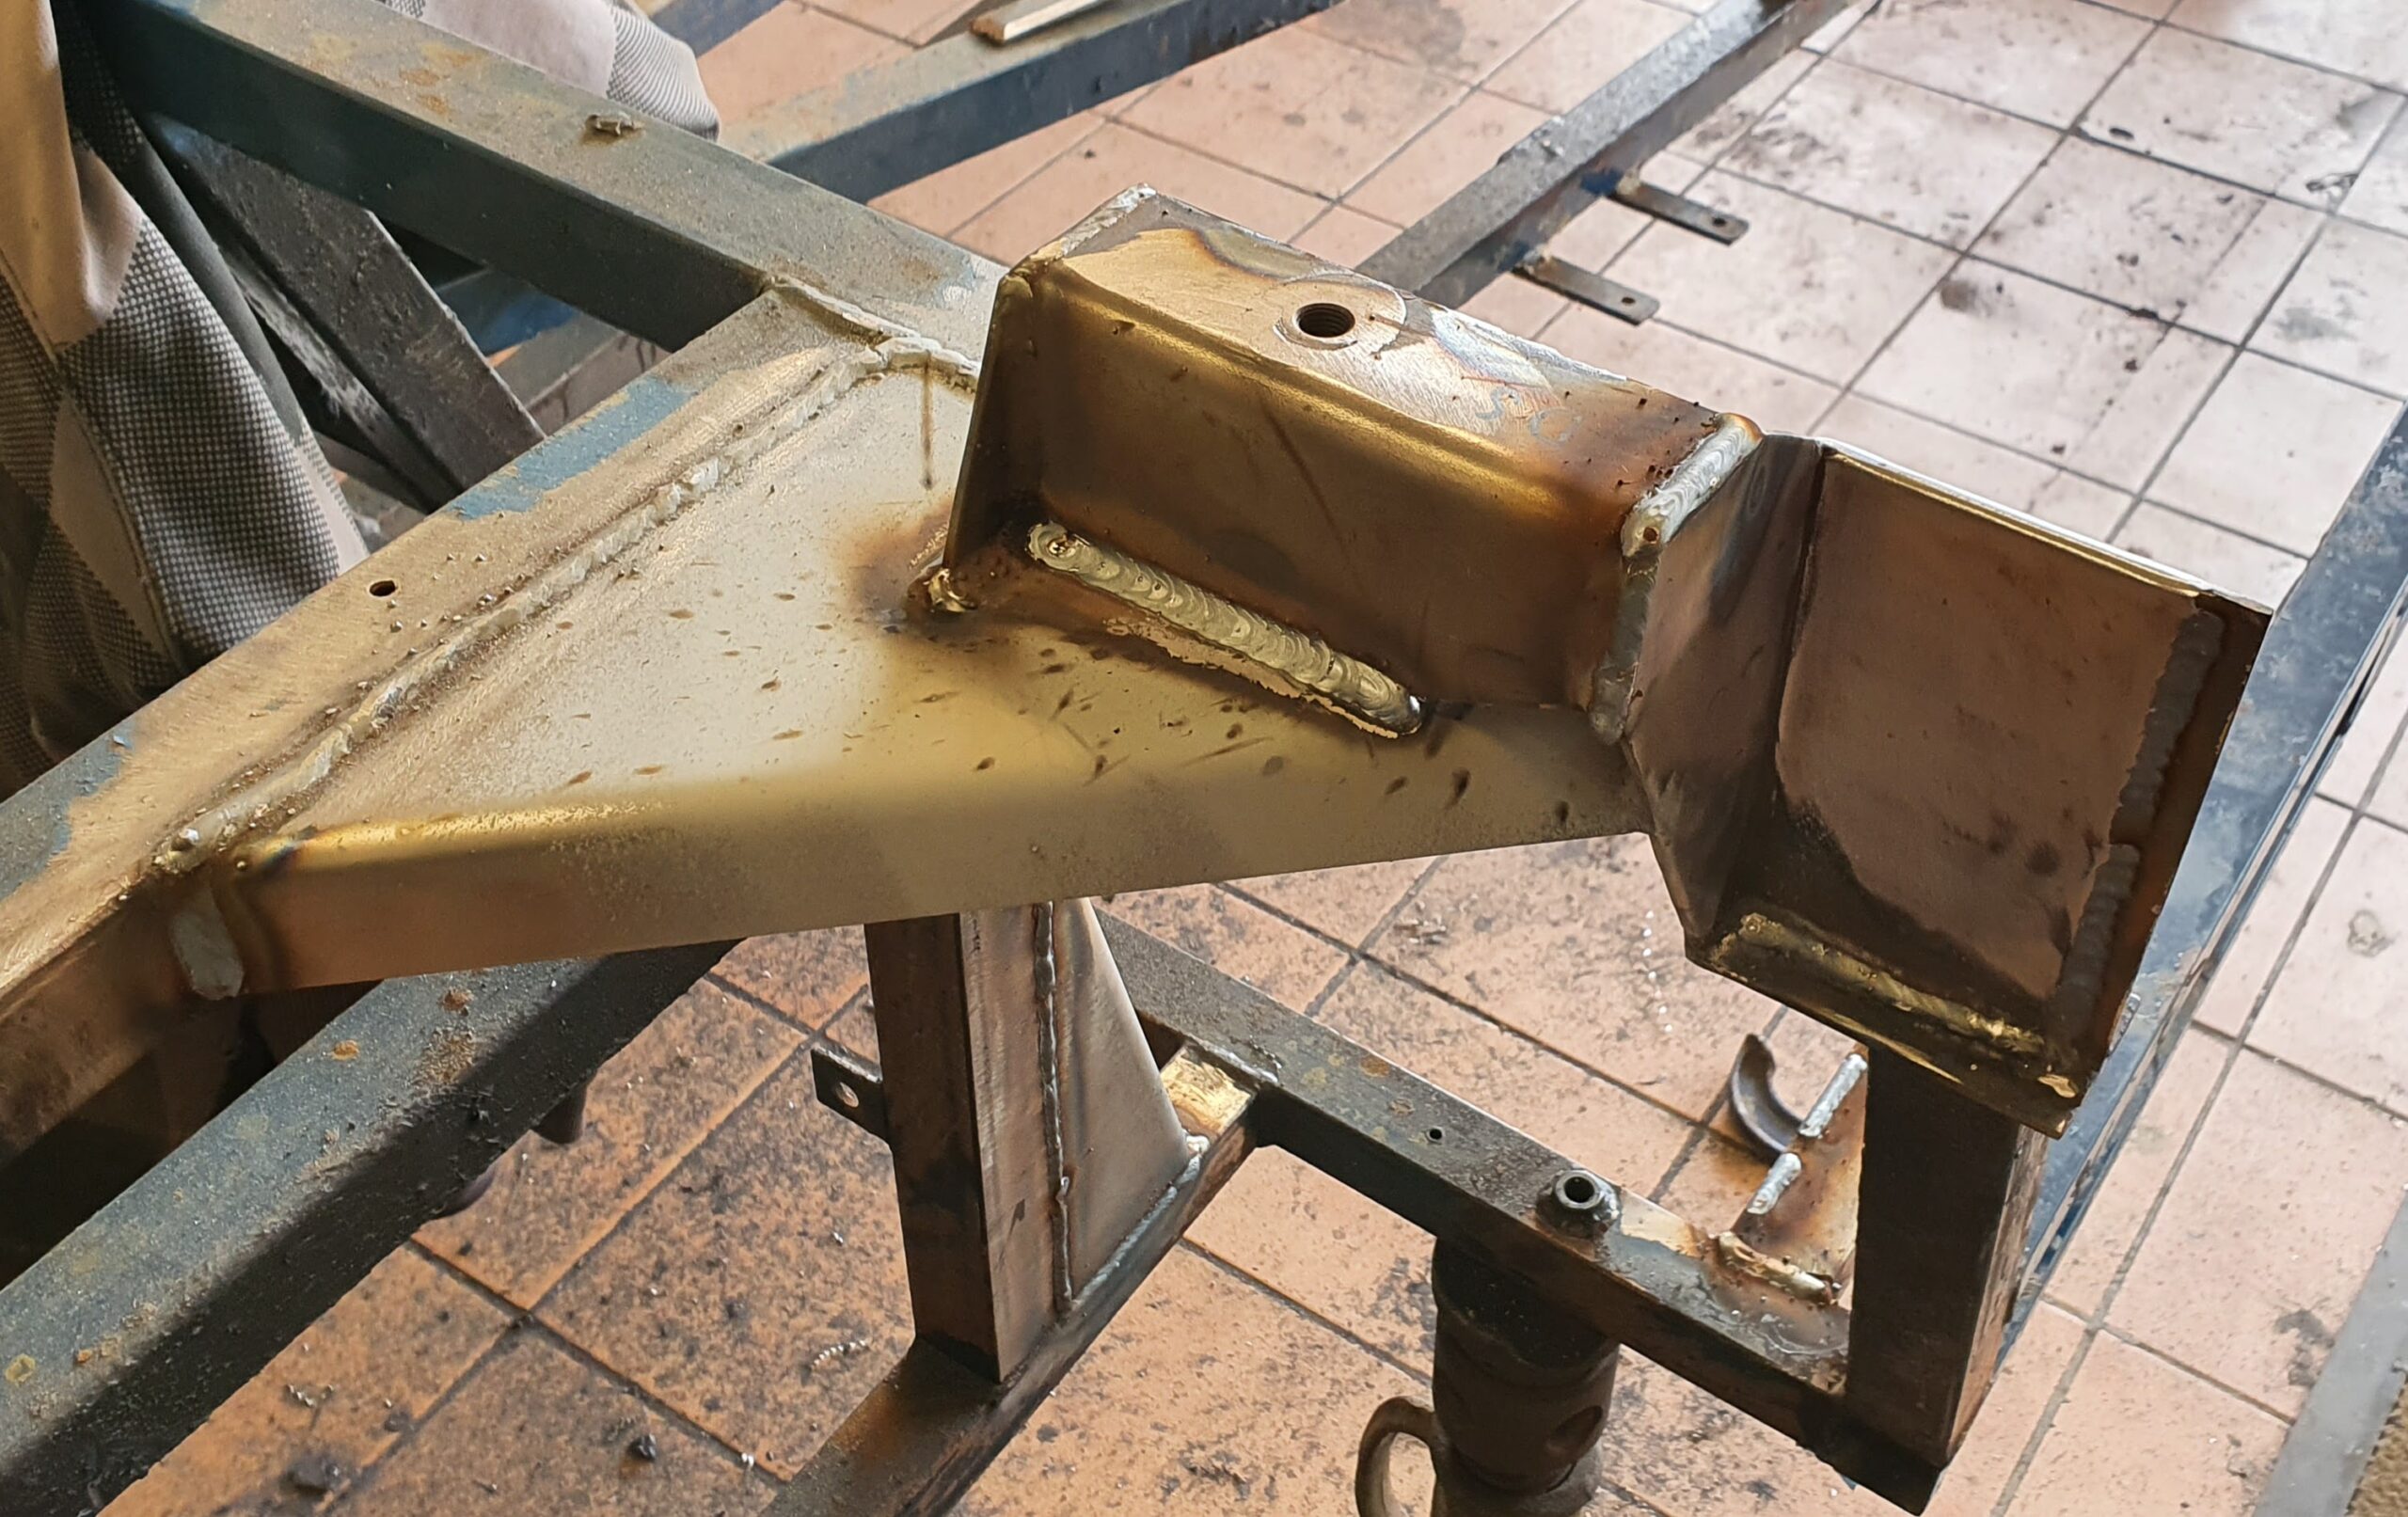
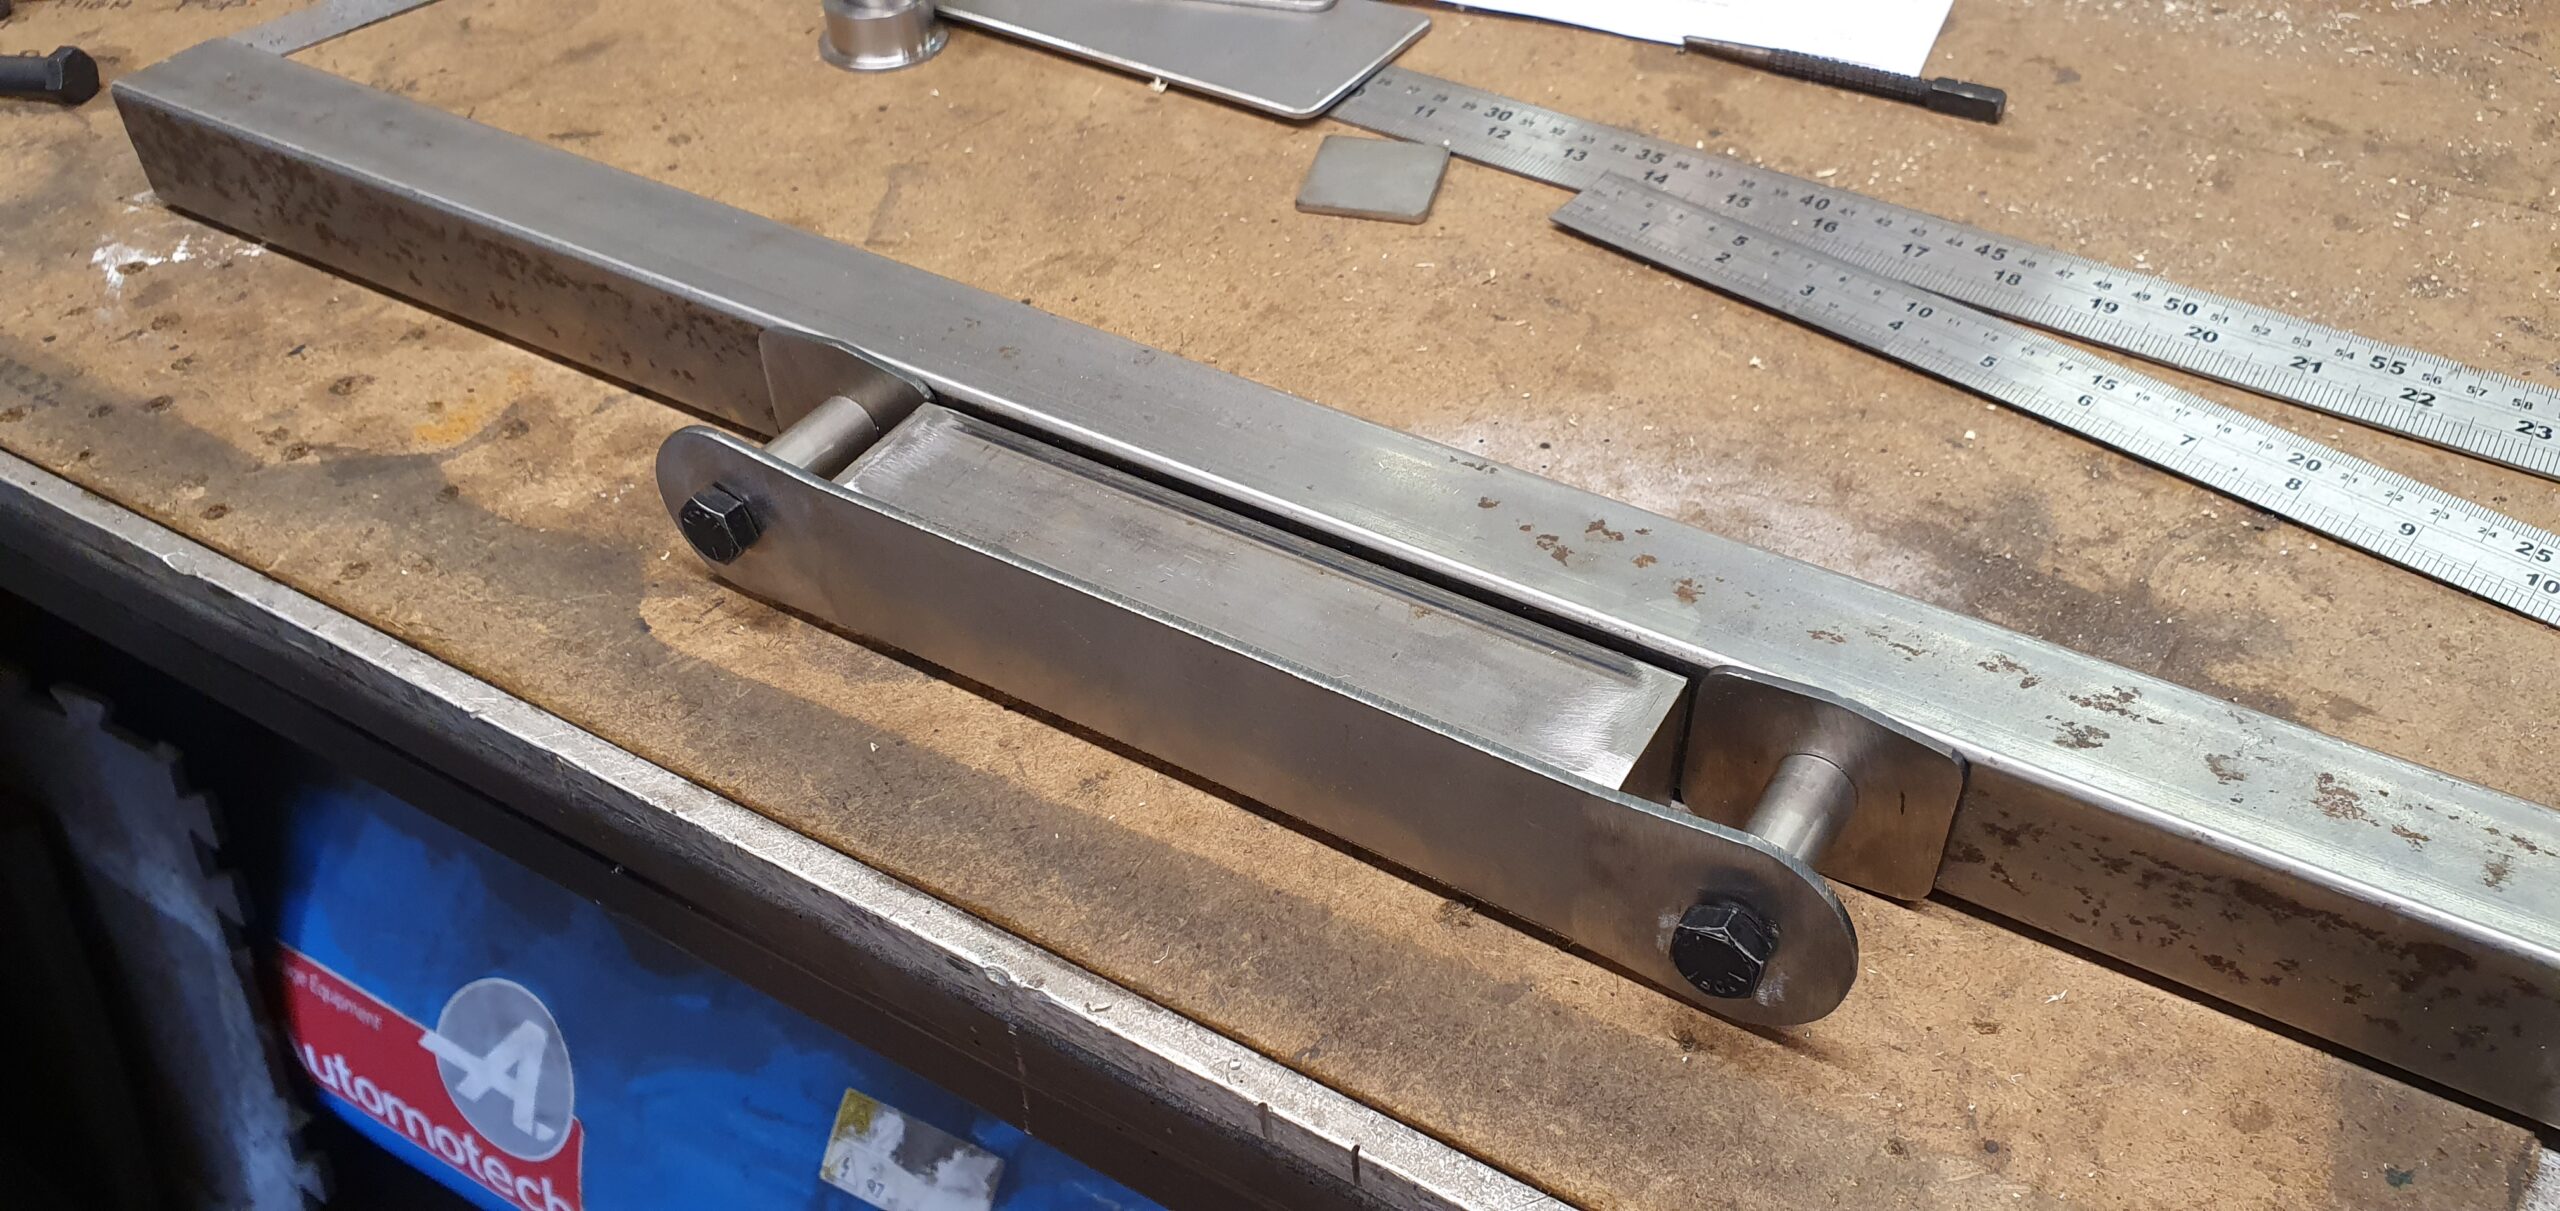
 This is about to be welded-up then top and bottom fish-plates added.

Finished front cross-member

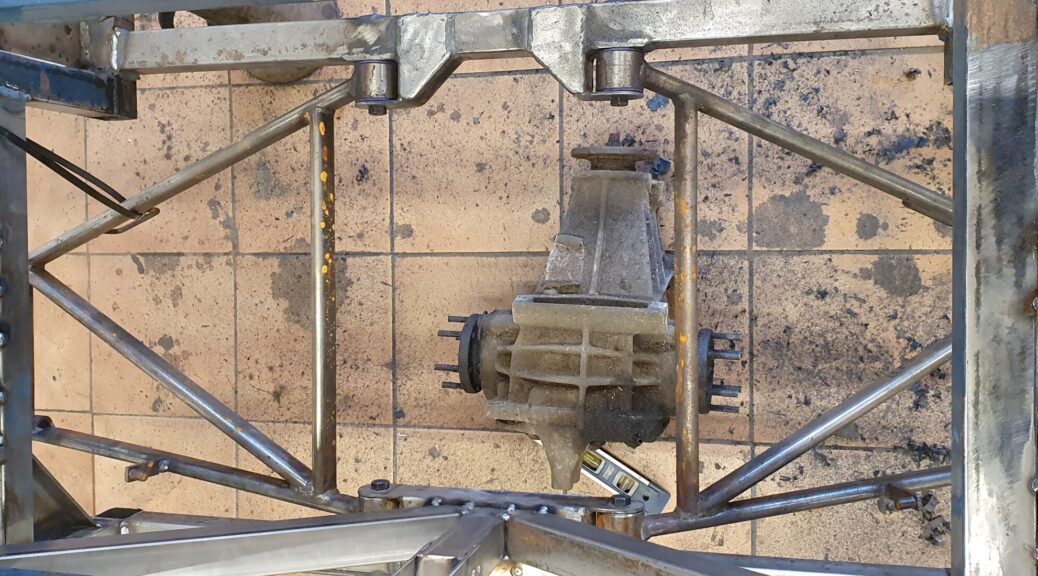
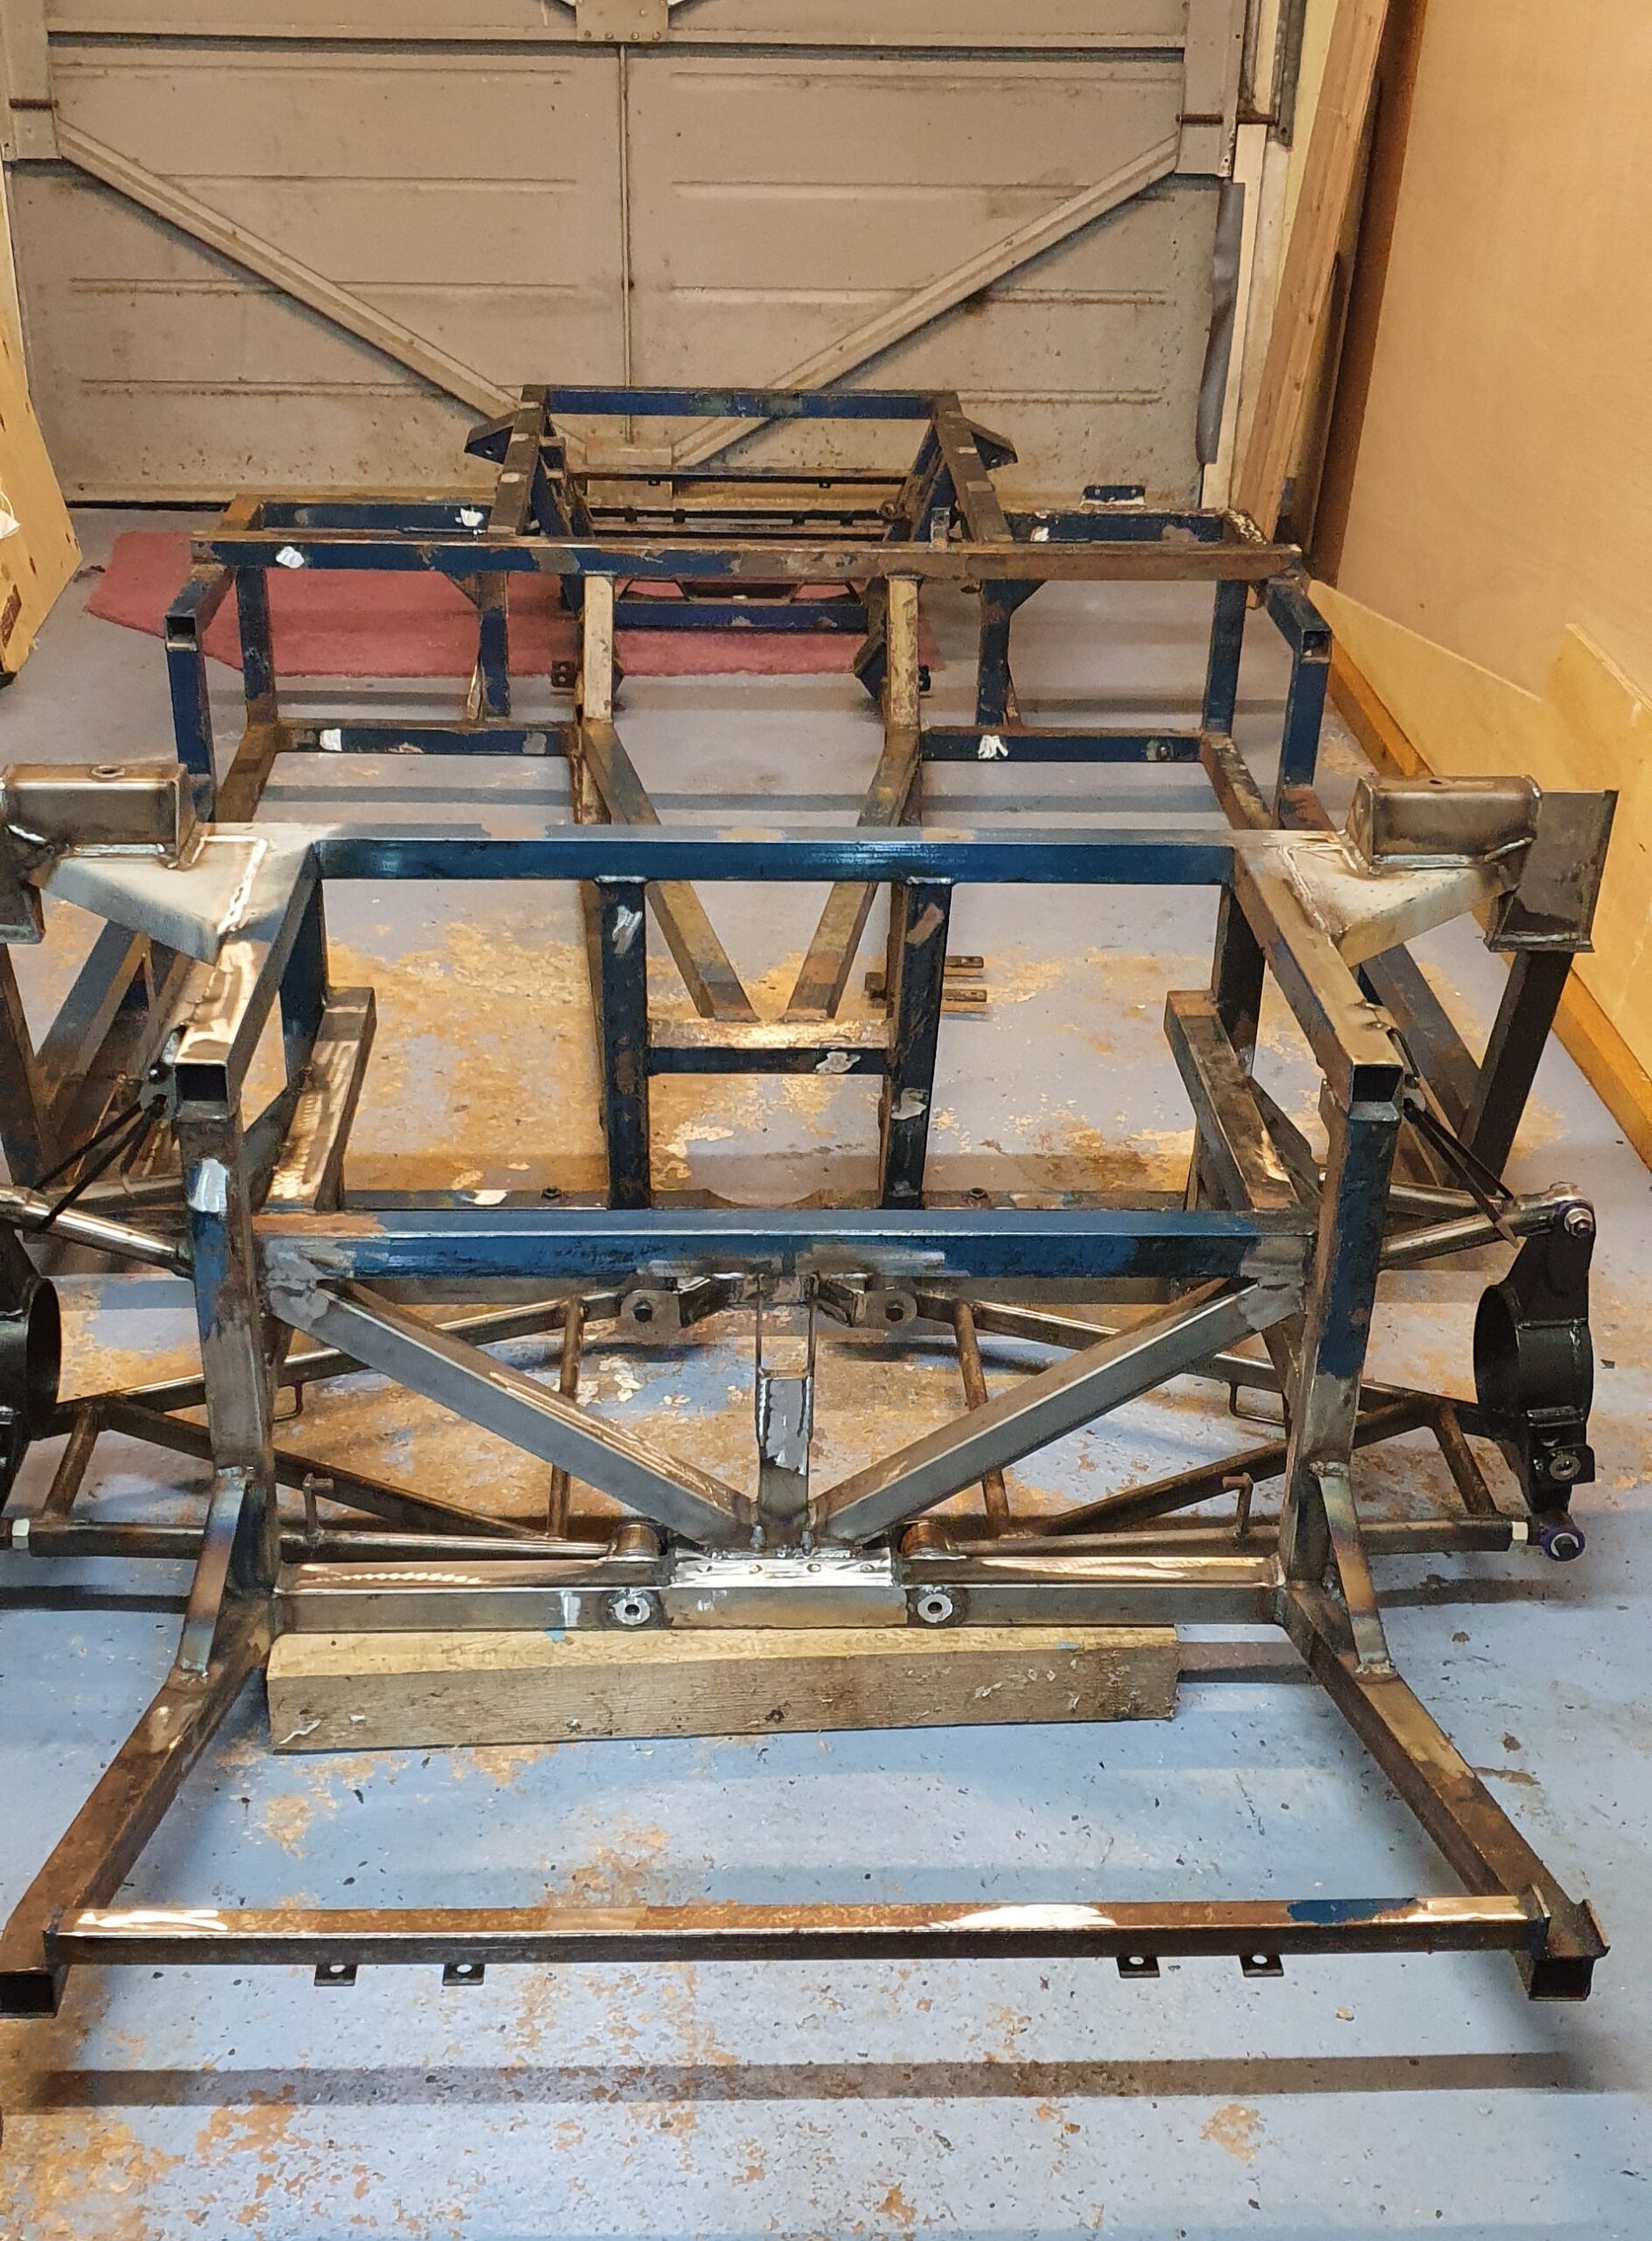
While it would have been easier to make a single mounting structure as we have done on the rear cross-member, there needed to be clearance for the front of the differential. That will make maintenance a little easier if the diff ever has to be removed.

Rear cross-member parts

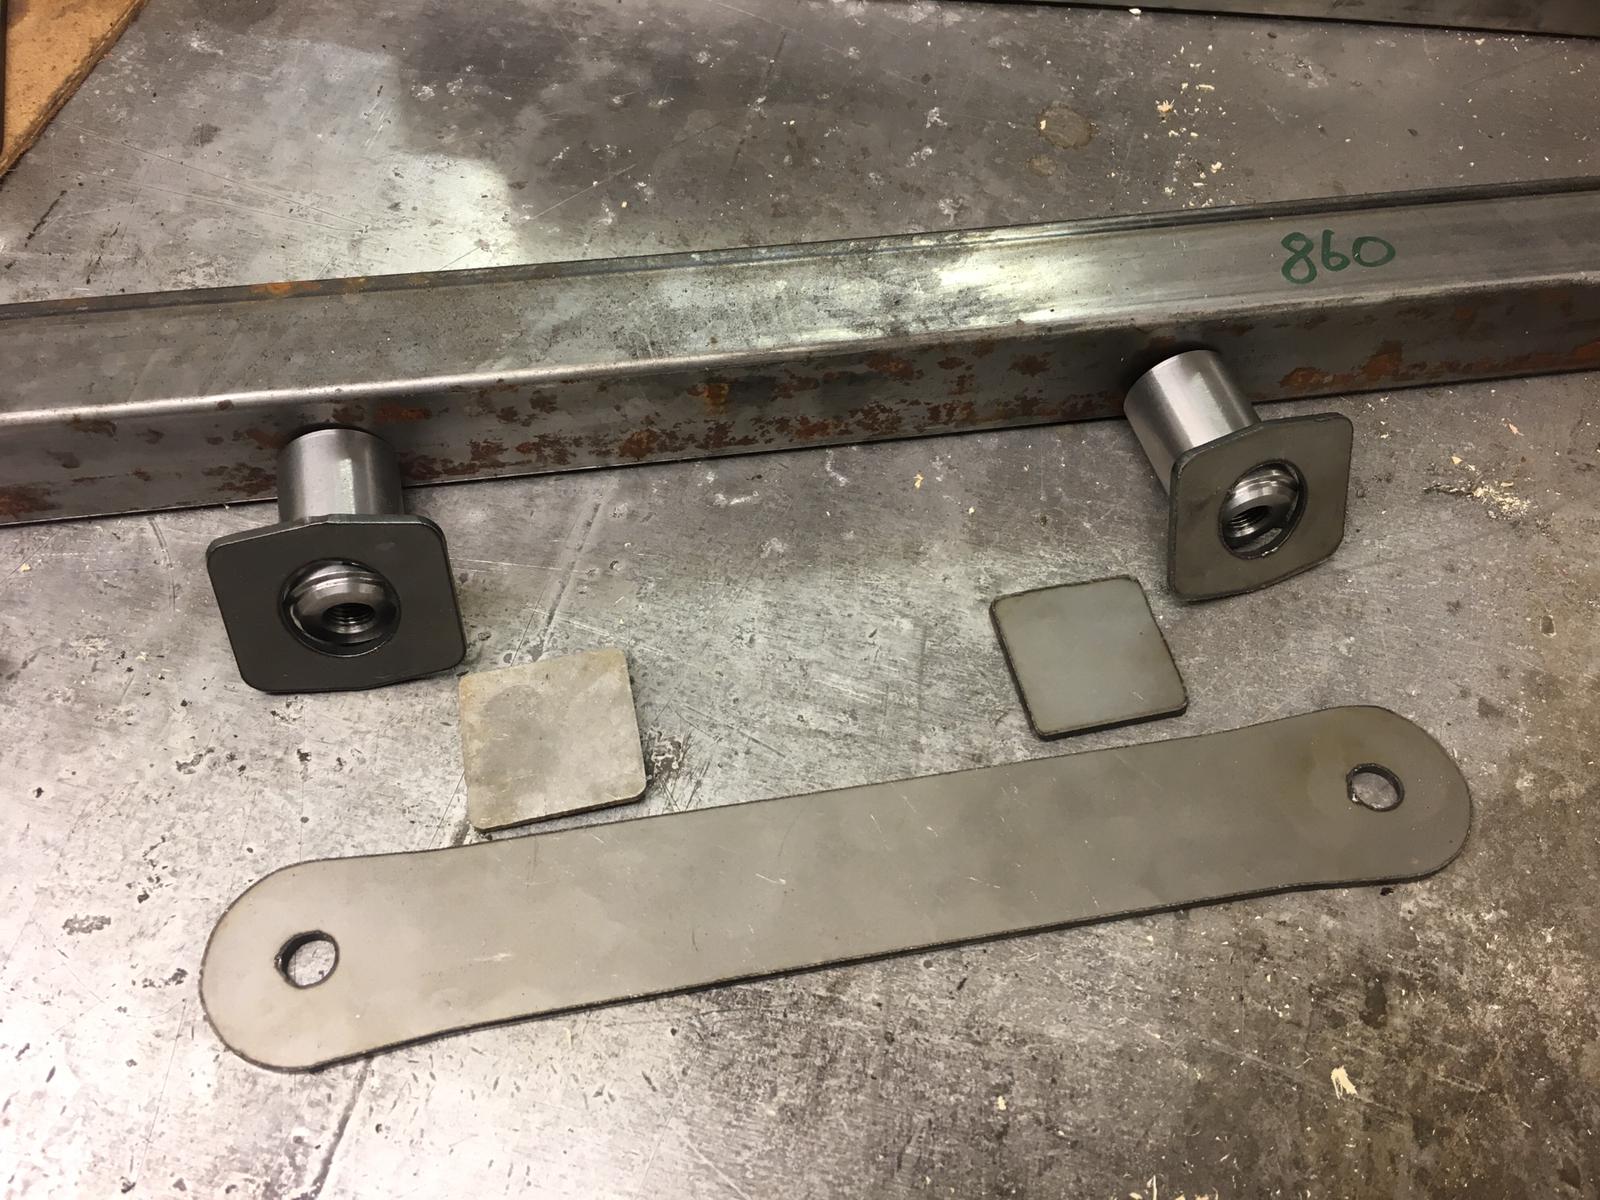
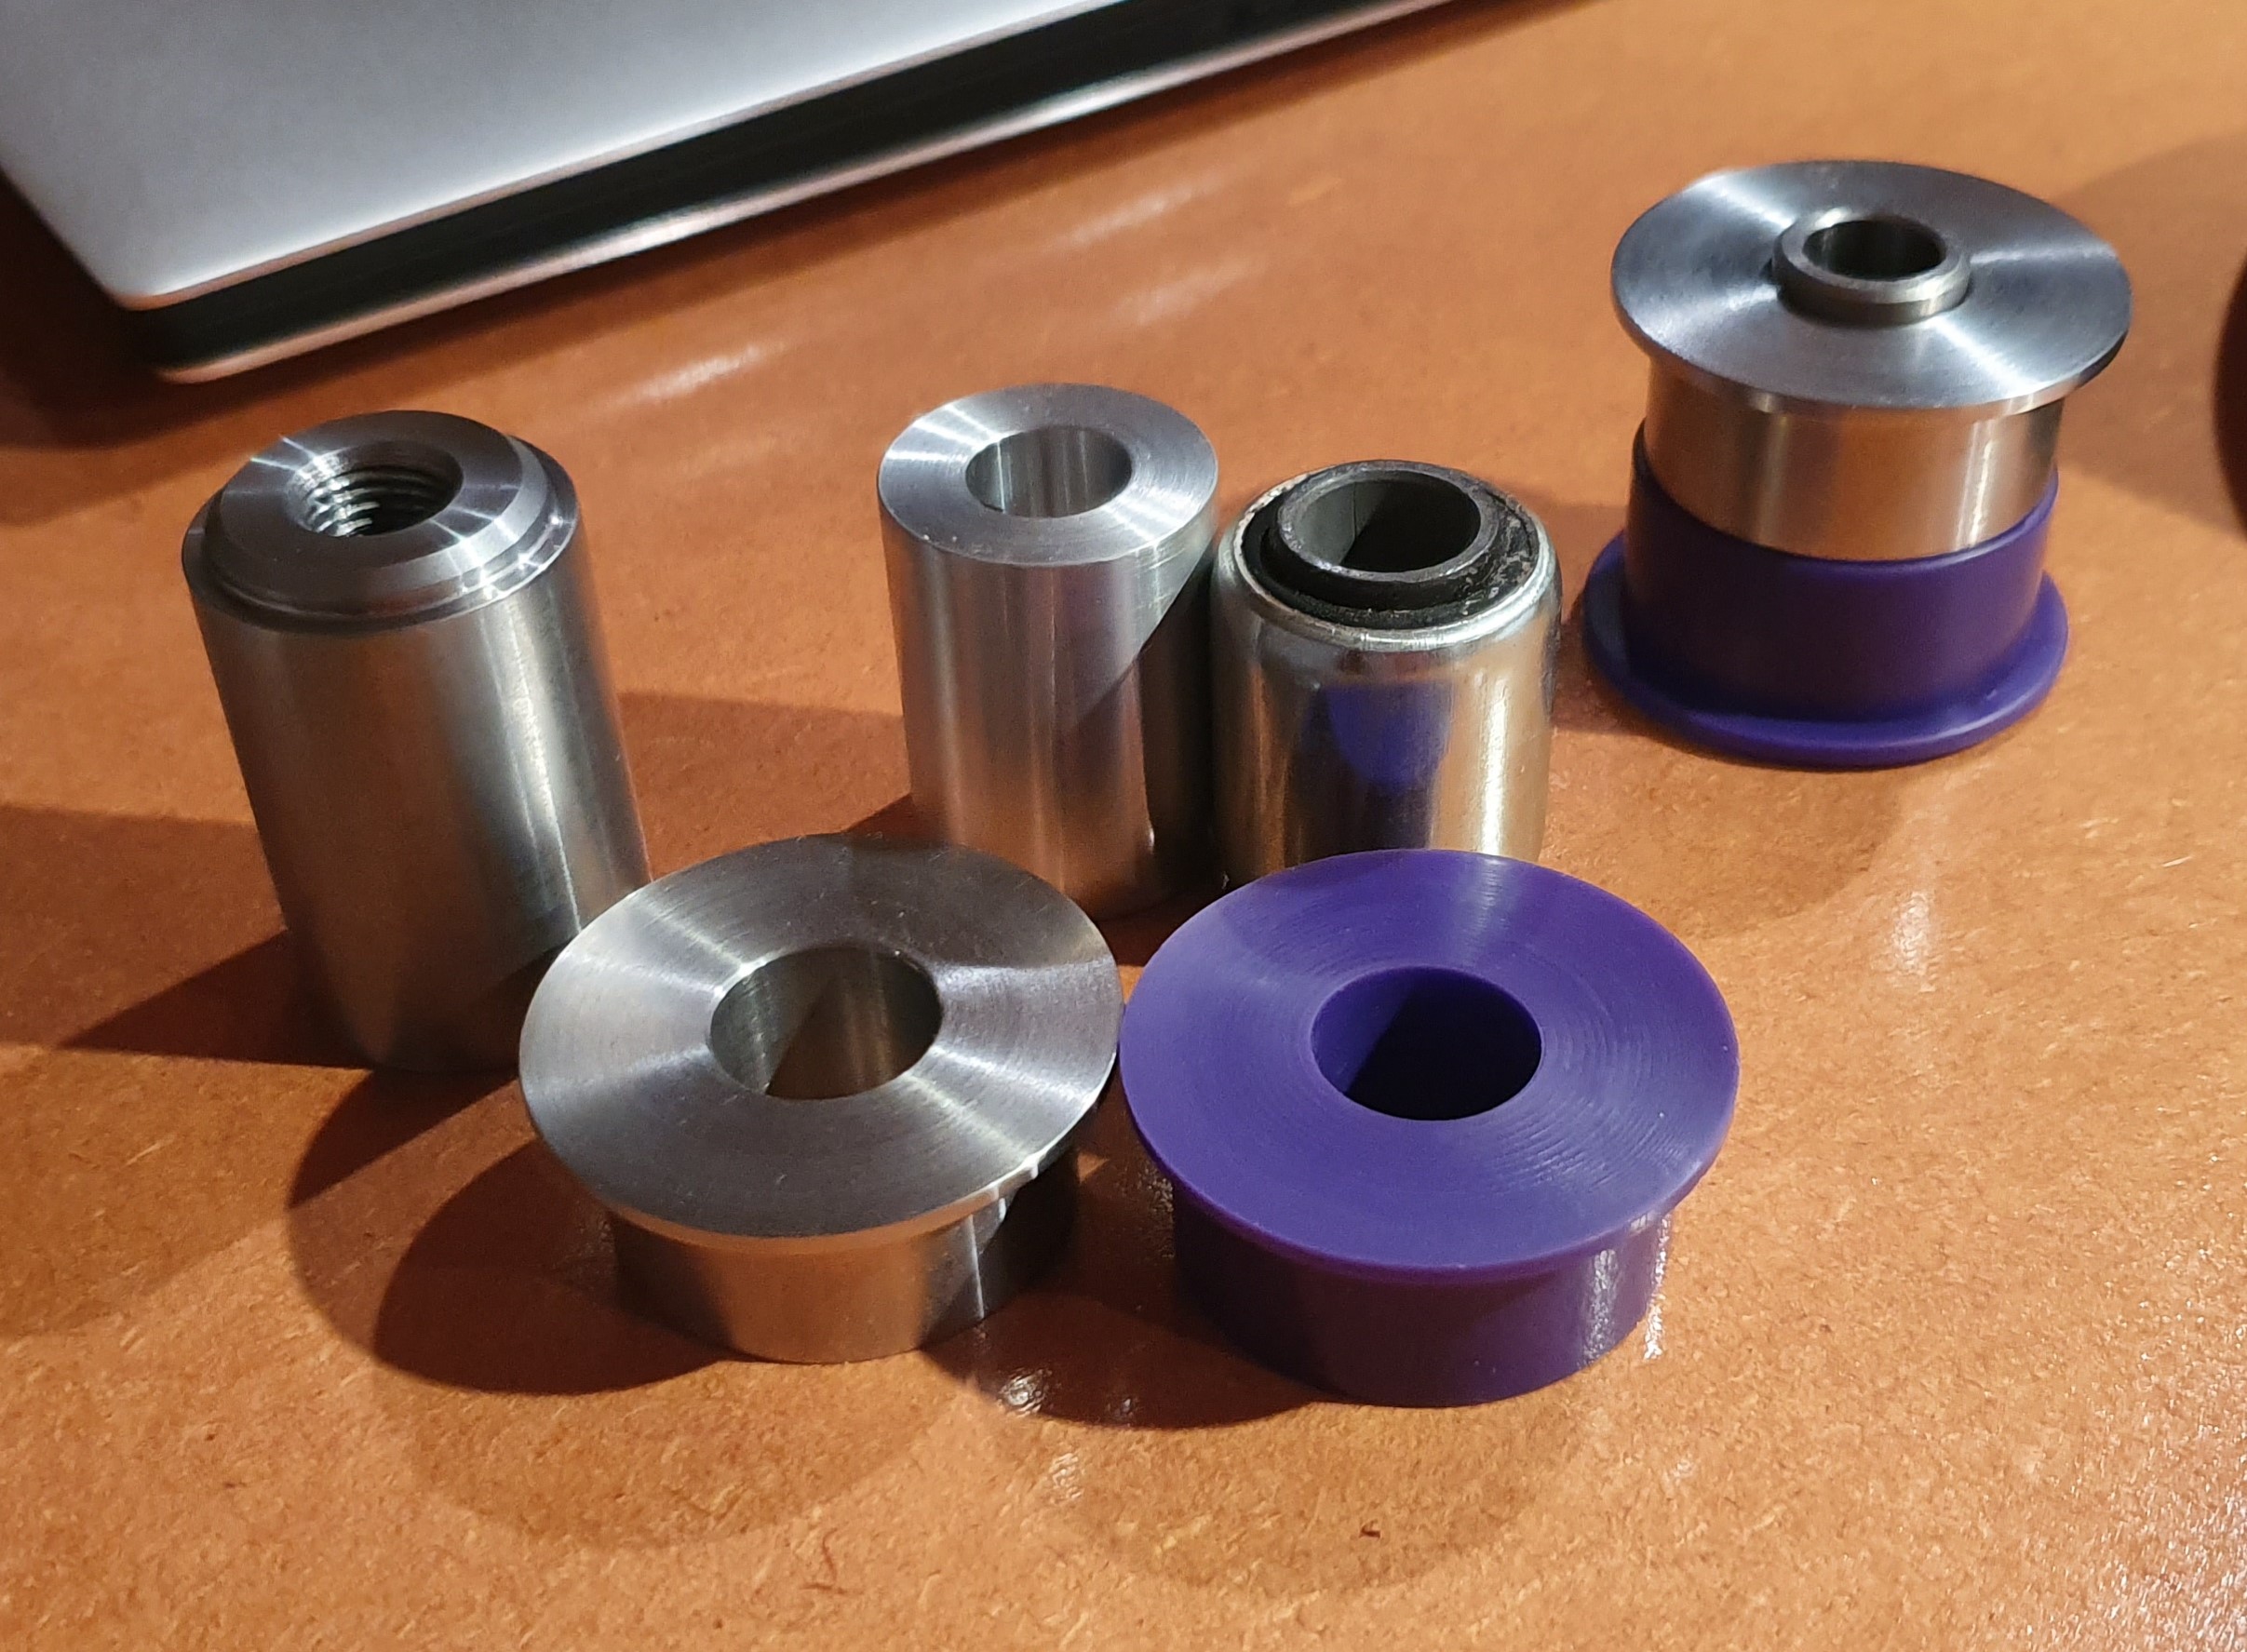
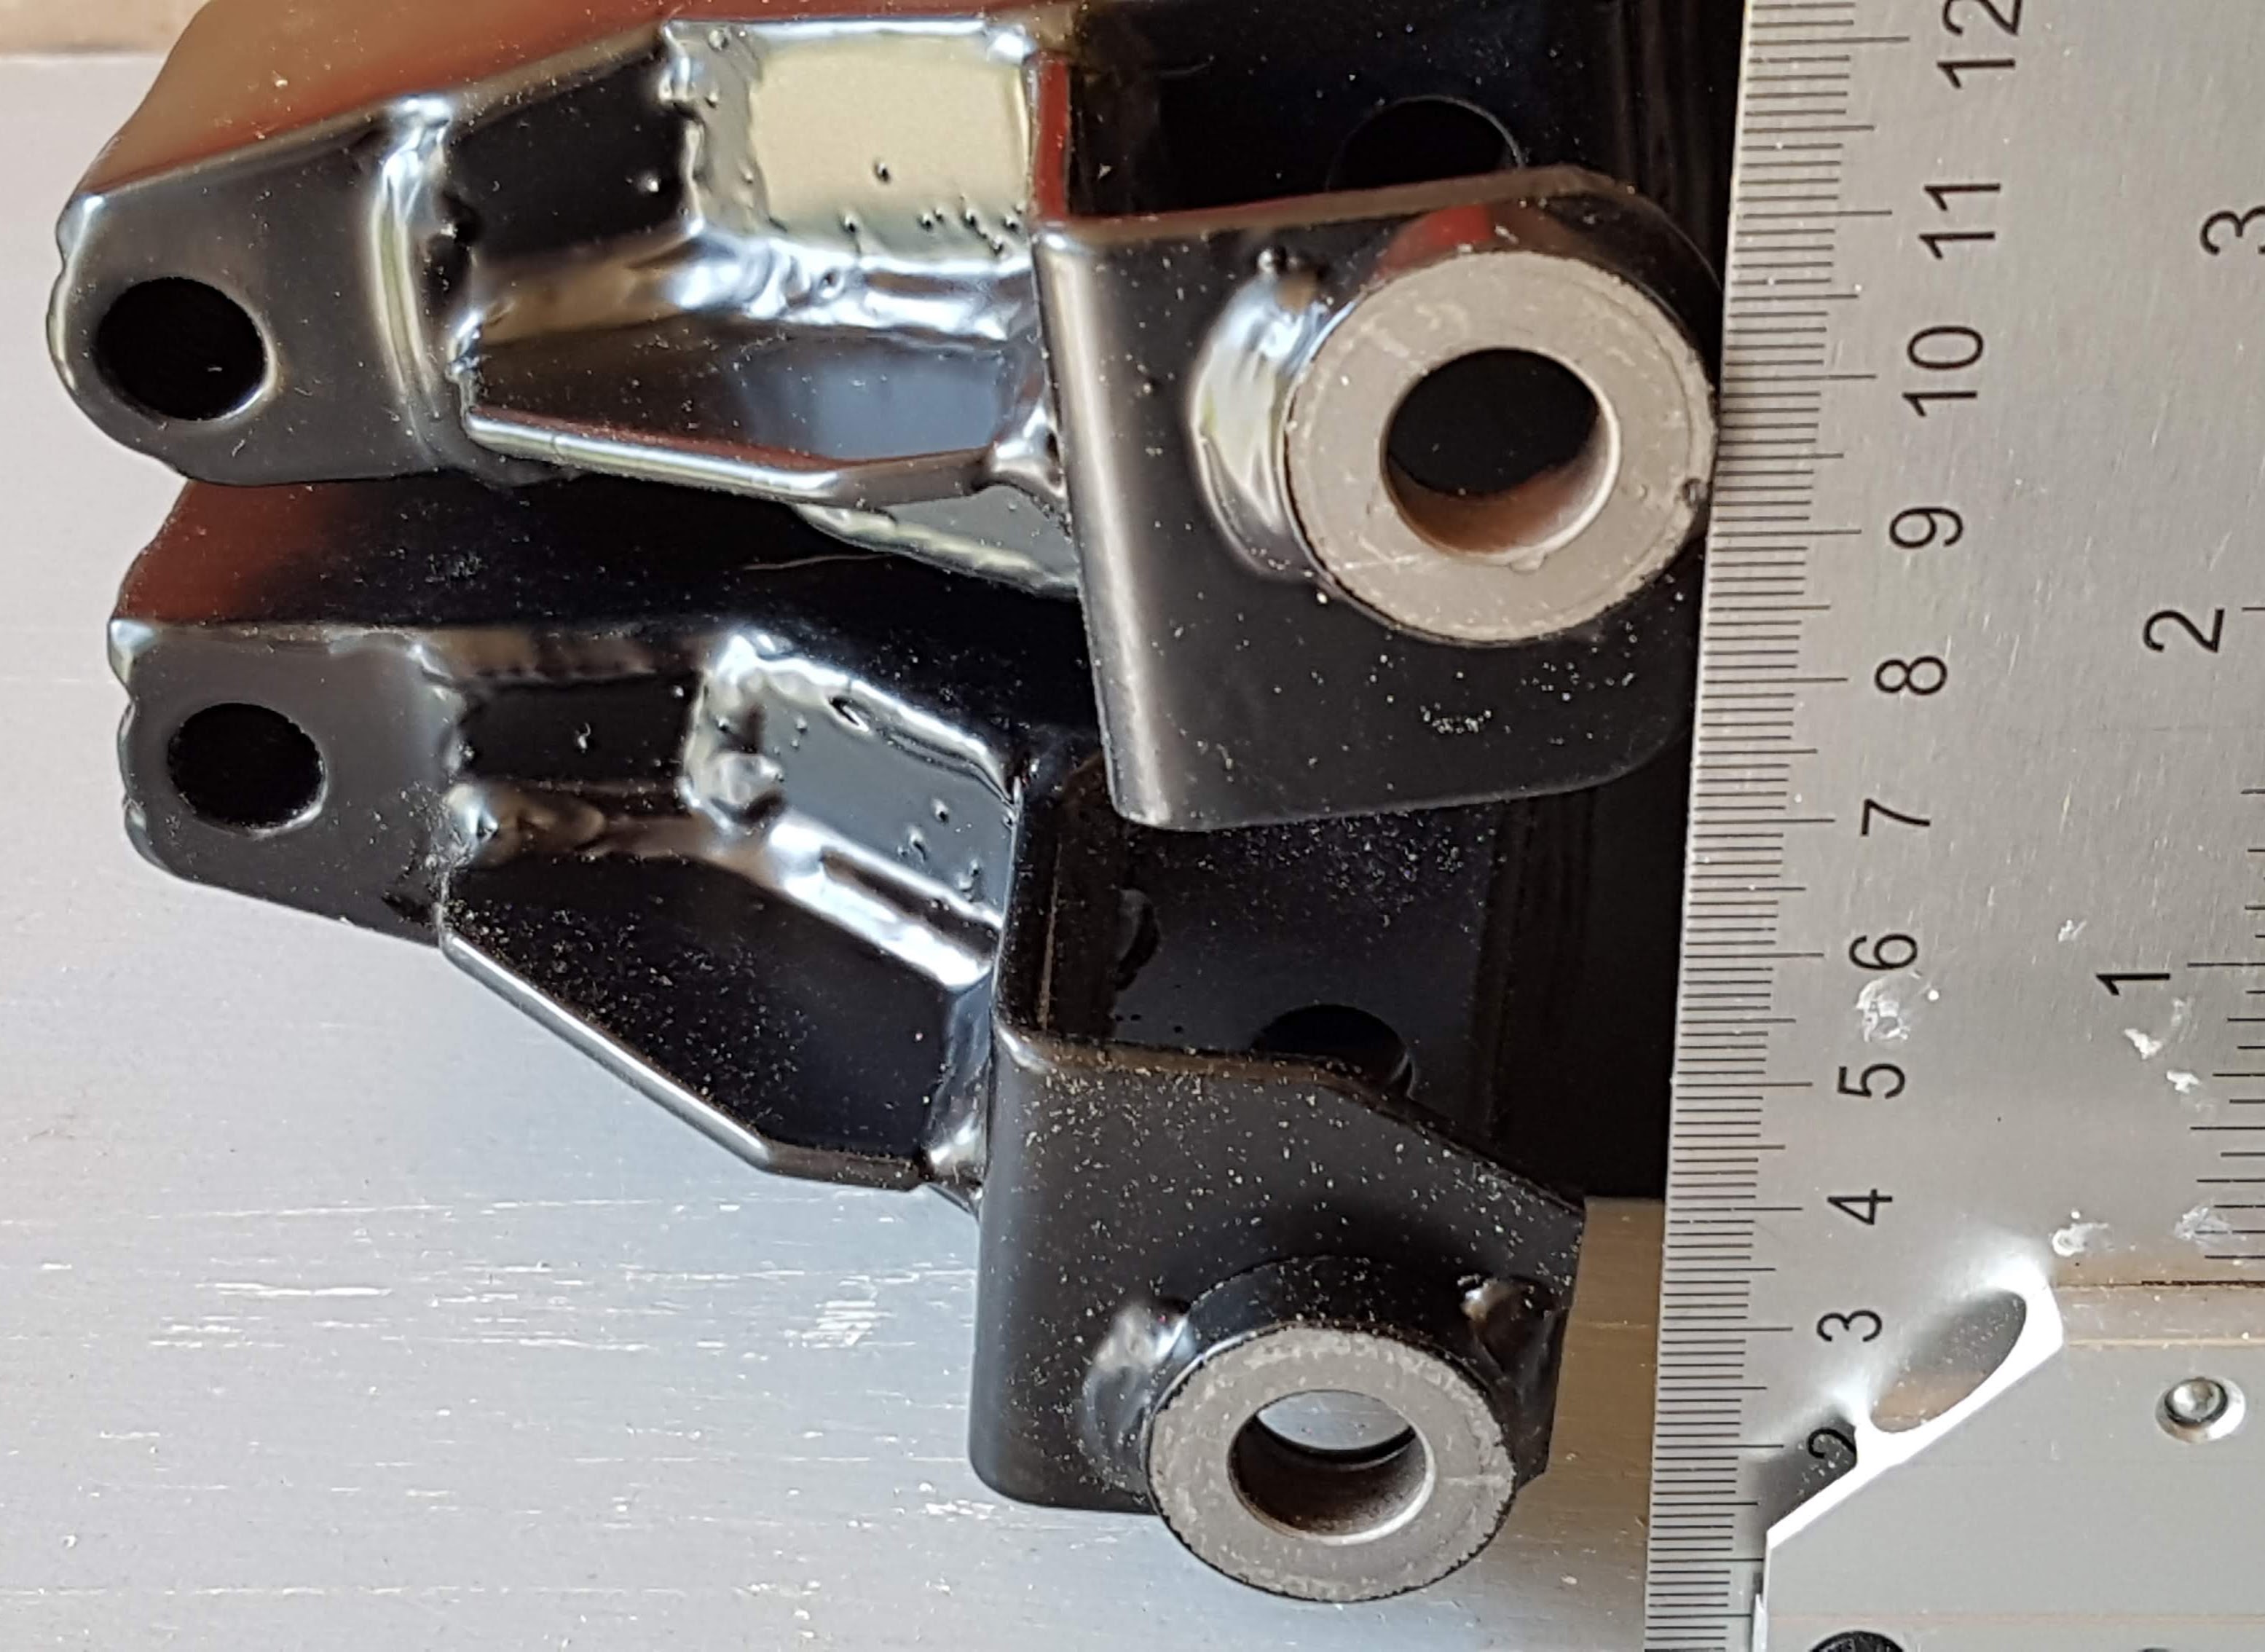
The suspension bolts will screw into the steel tubes which are welded through the chassis tube. 

 
Rear cross-member during fabrication
Rear cross-member assembly dry-run before welding

The plates on the chassis are slightly larger than the tube to protect the poly-bushes. Large fish-plates are to be fitted top and bottom to spread the load from the triangulation tubes and top-rear diff mount.

Cross-members in place
Cross-members in place.

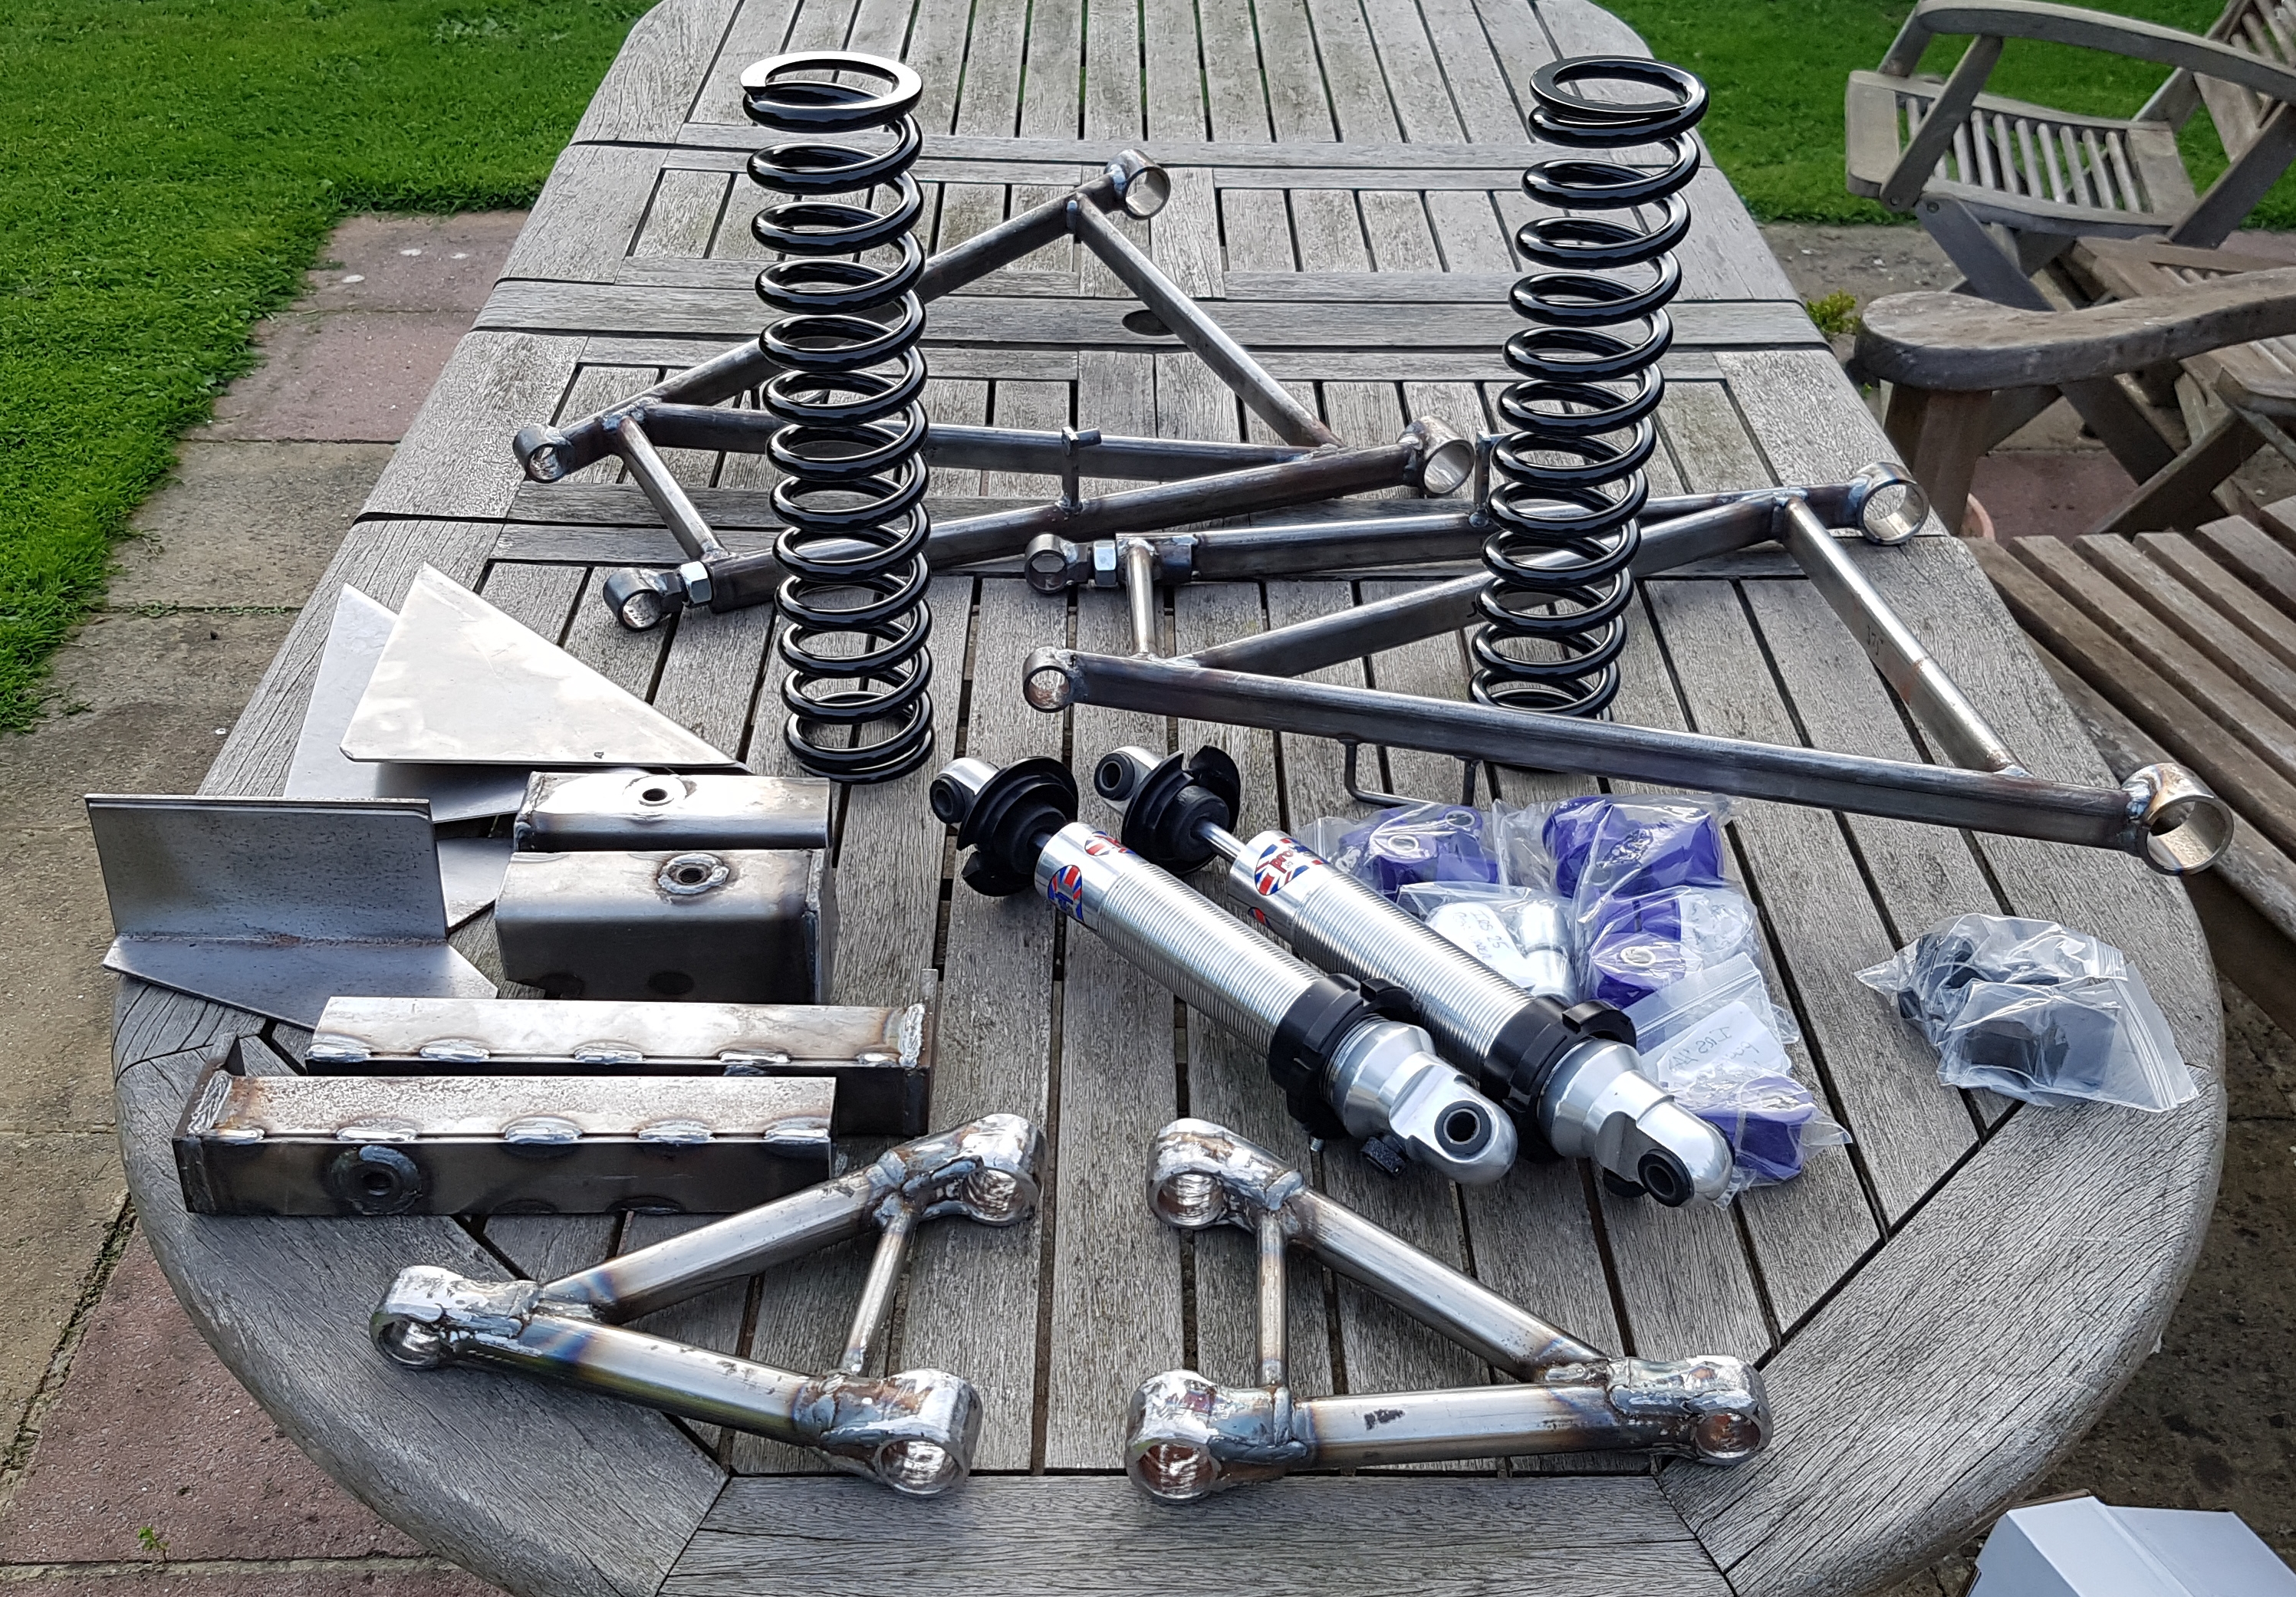
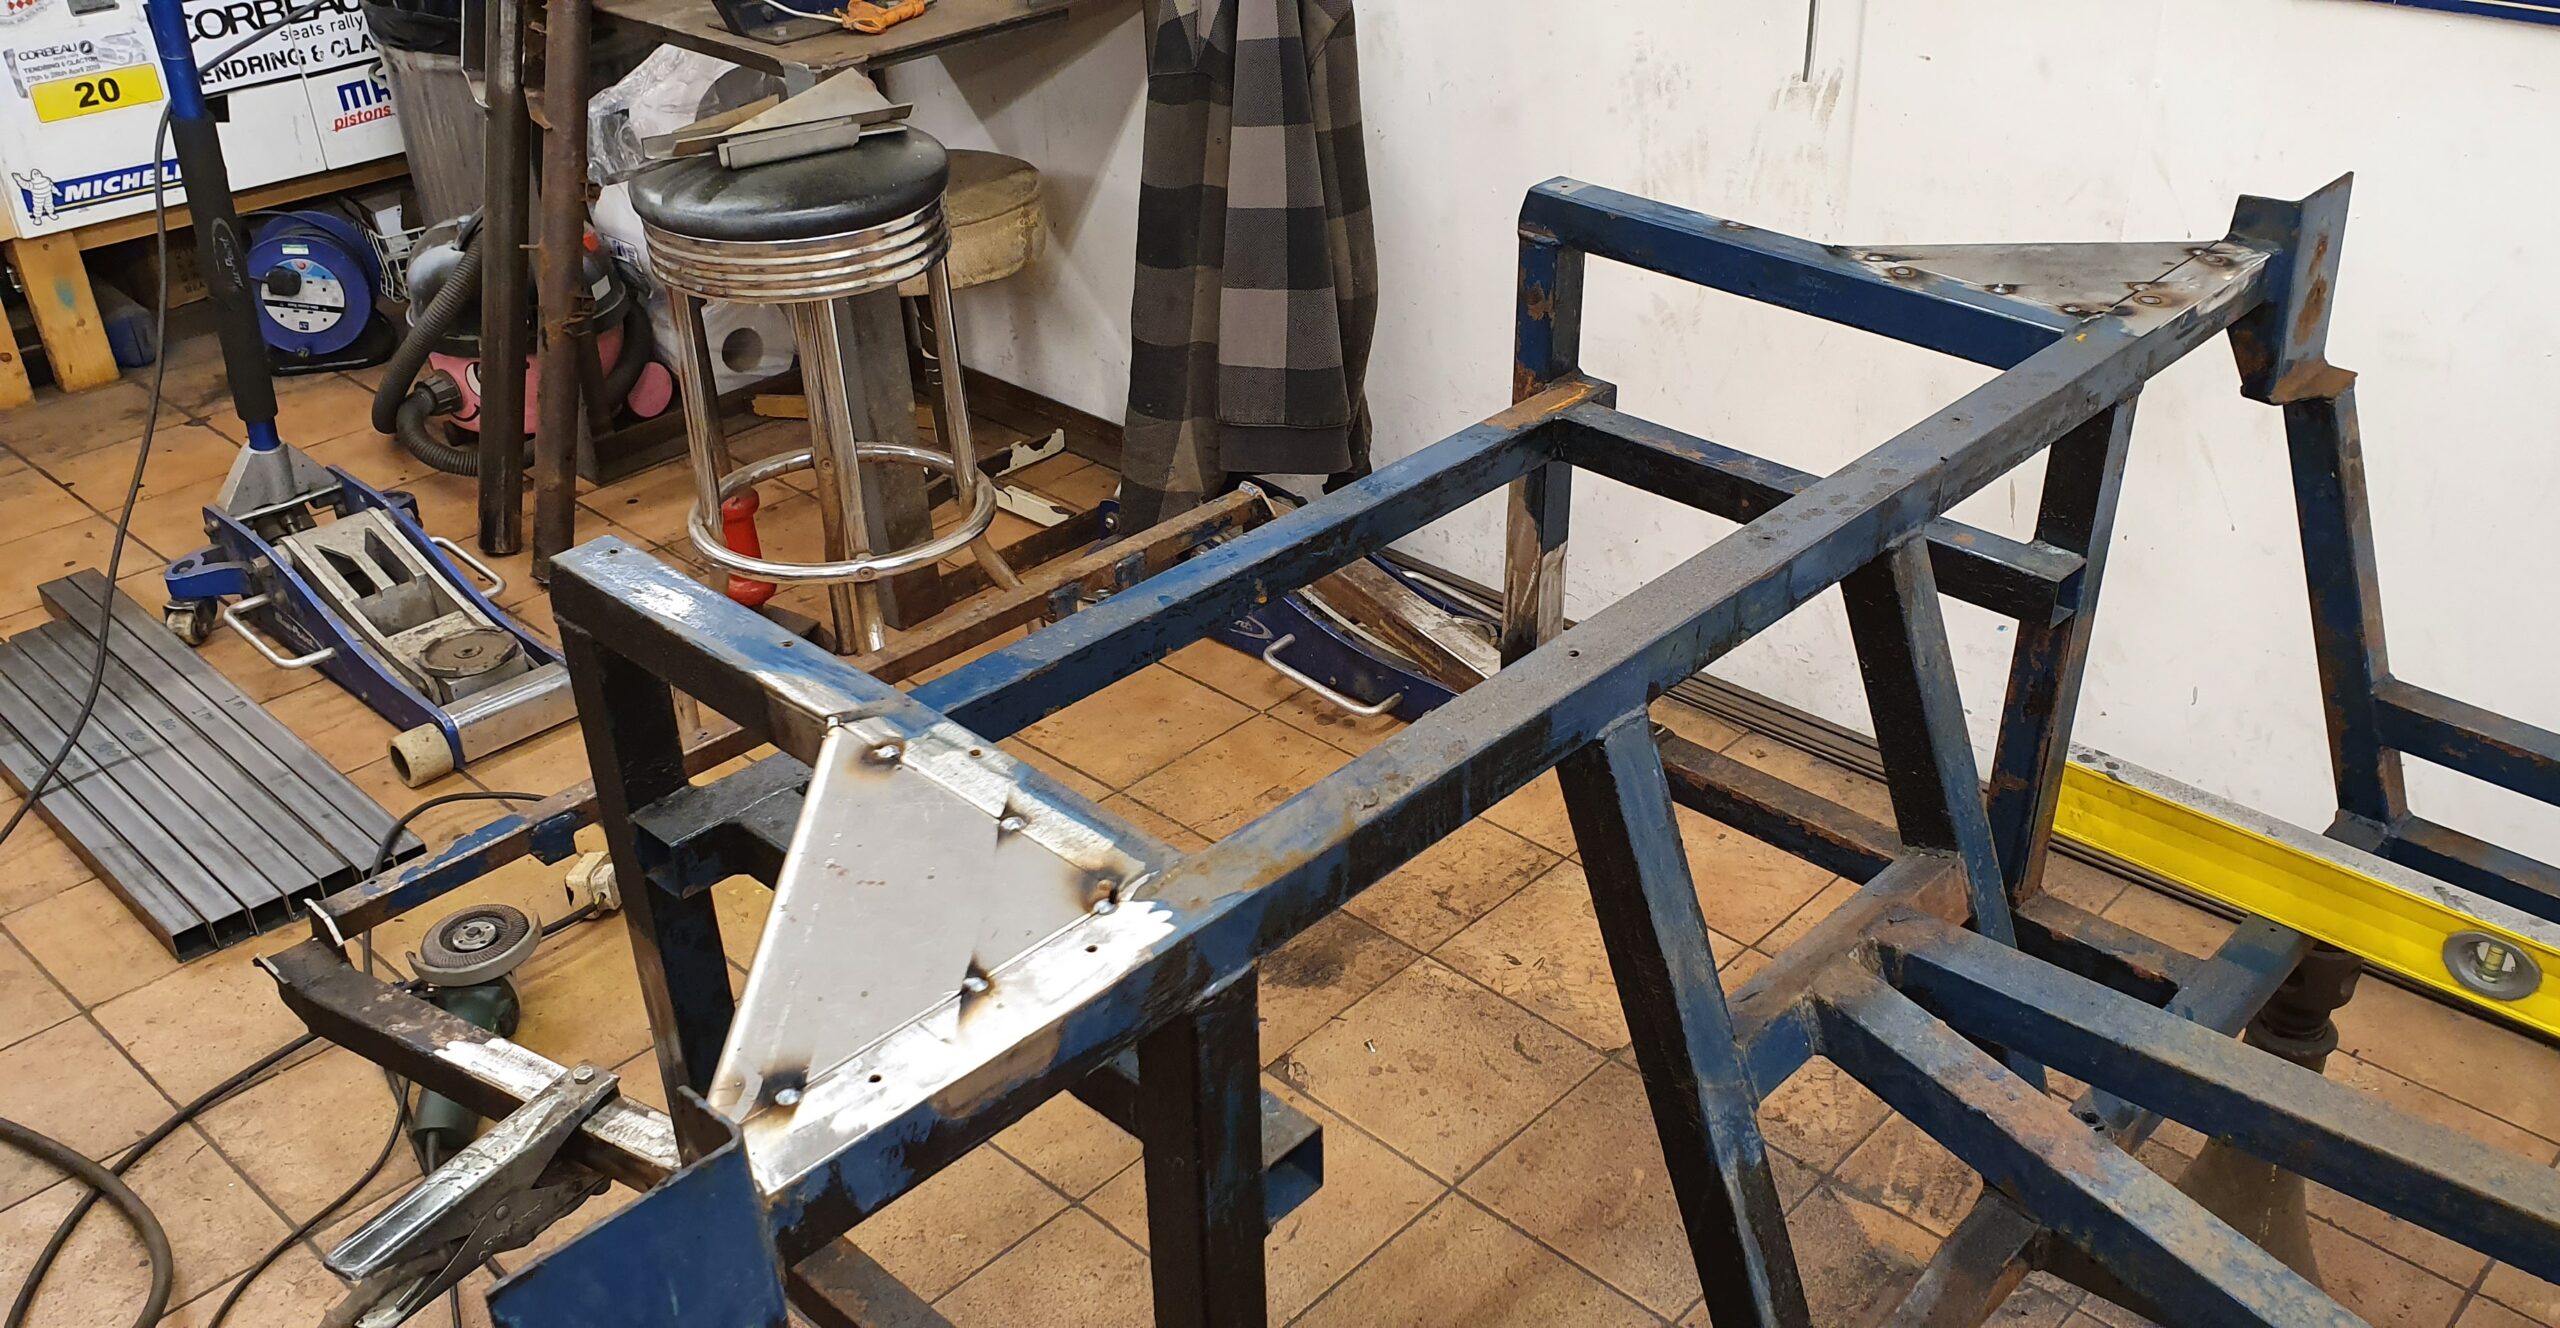
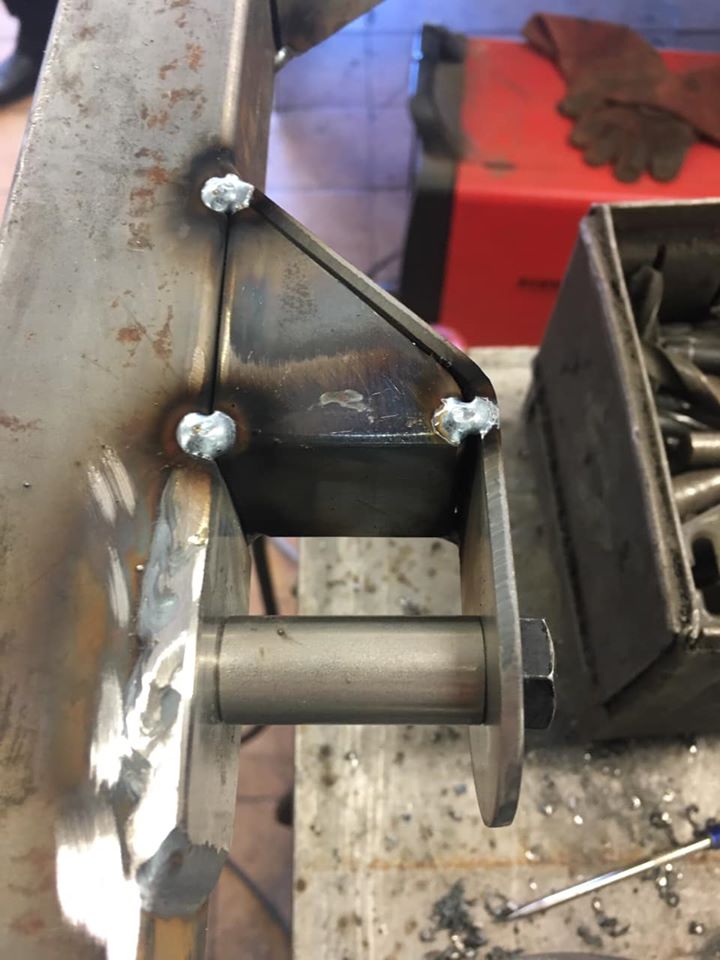
The rear cross-member position is easy to locate correctly and was used as the datum for all IRS components. First attach the rear cross-member then install the lower wishbones and tack the front cross-member where it needs to be.  That ensures no strain on the wishbones. 

From there the uprights are attached and the top wishbone position gives the exact location for the top wishbone mounts.

Top pick-ups in position
Top pick-ups tacked in position

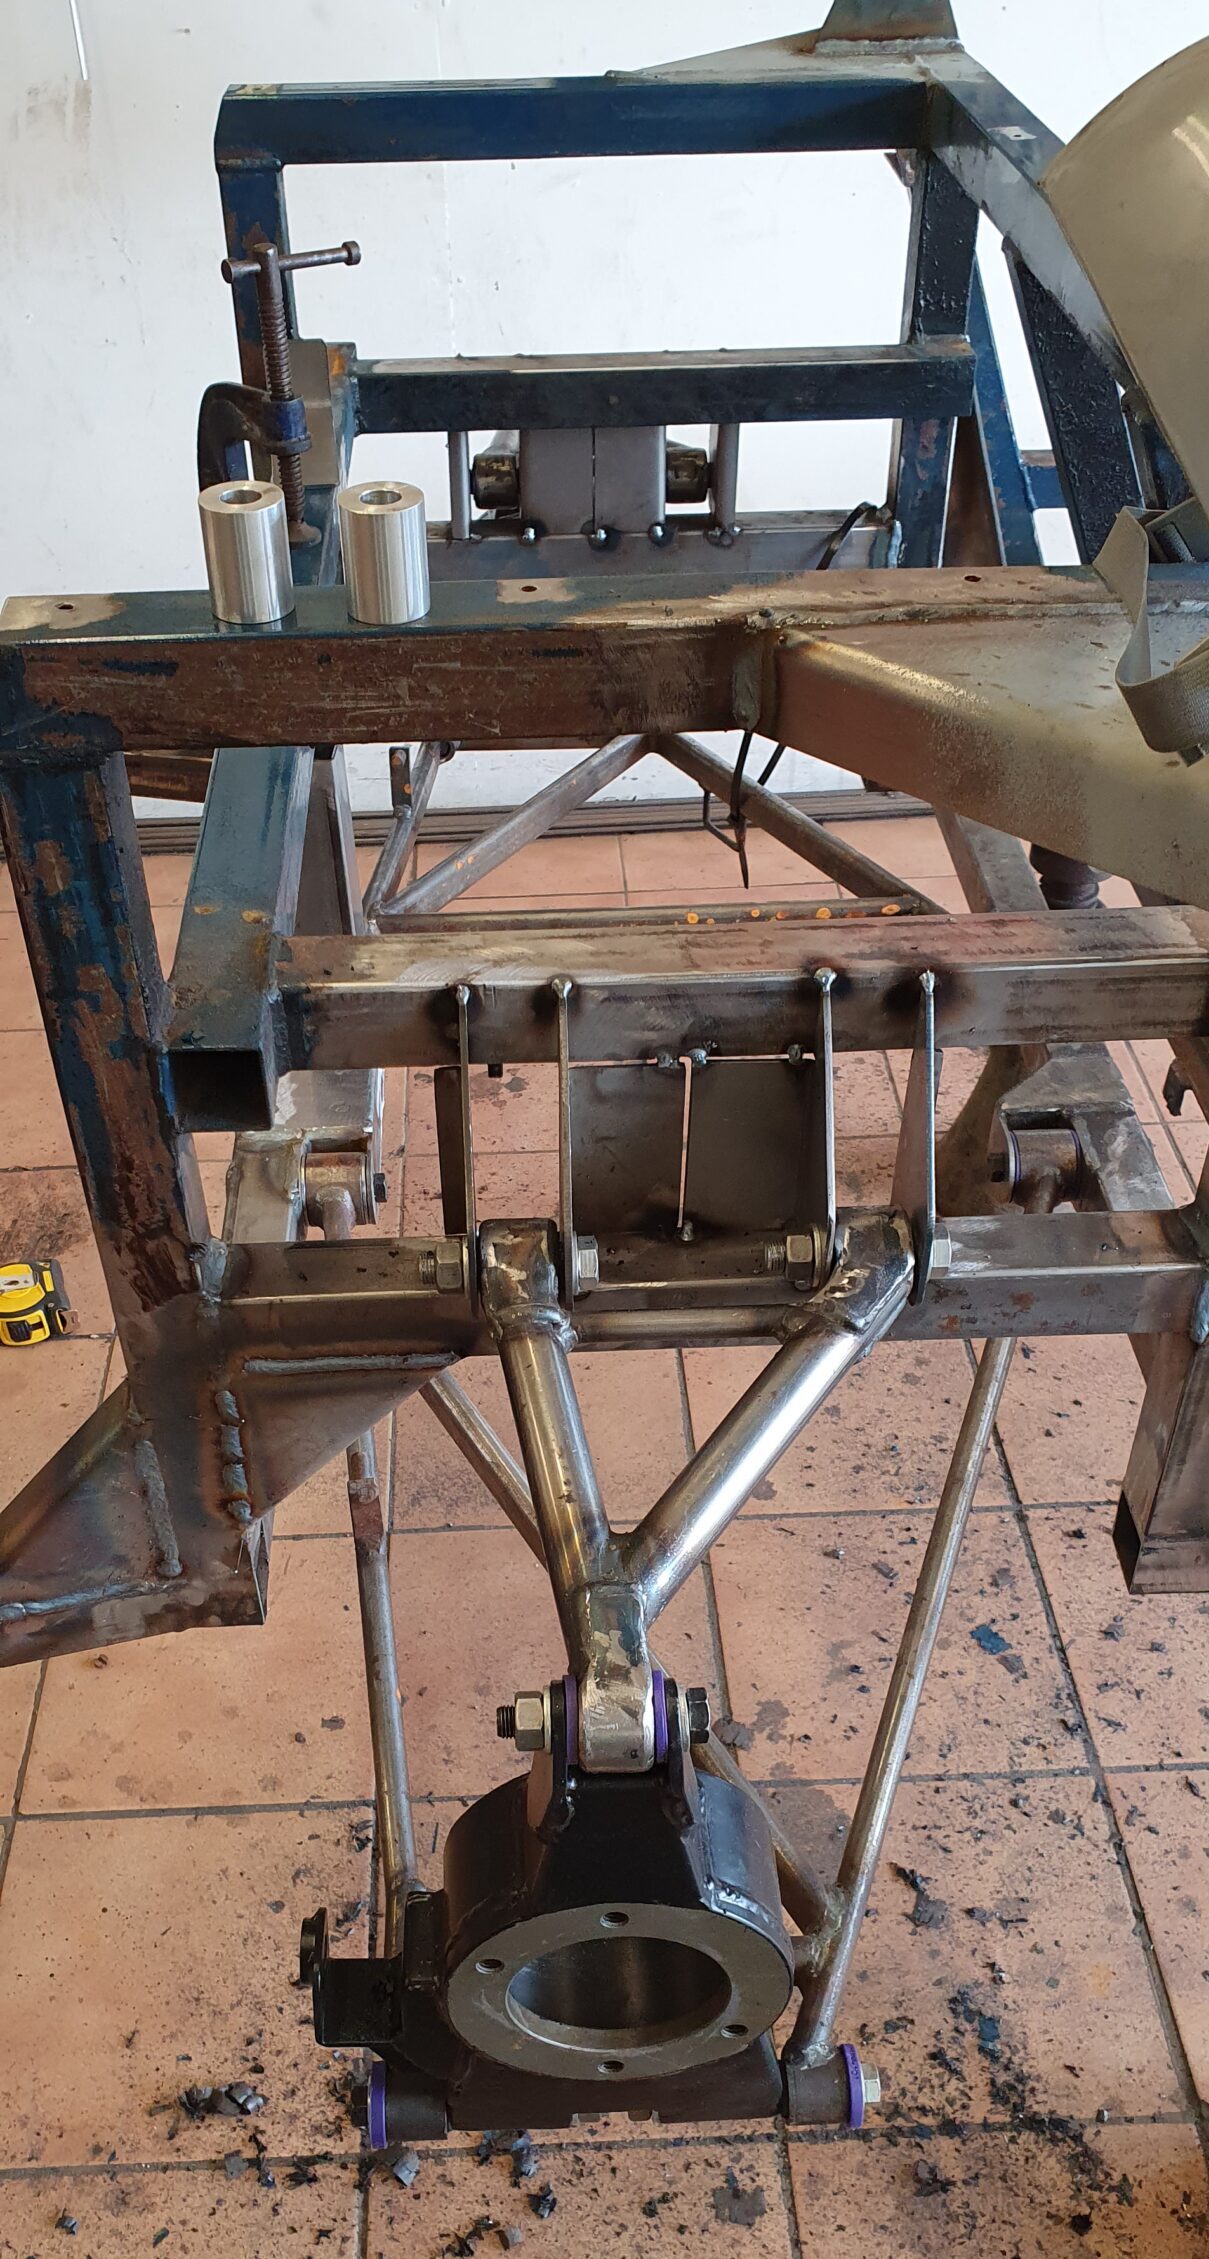
Its very satisfying that the geometry worked out perfectly. 

Before final weld-up

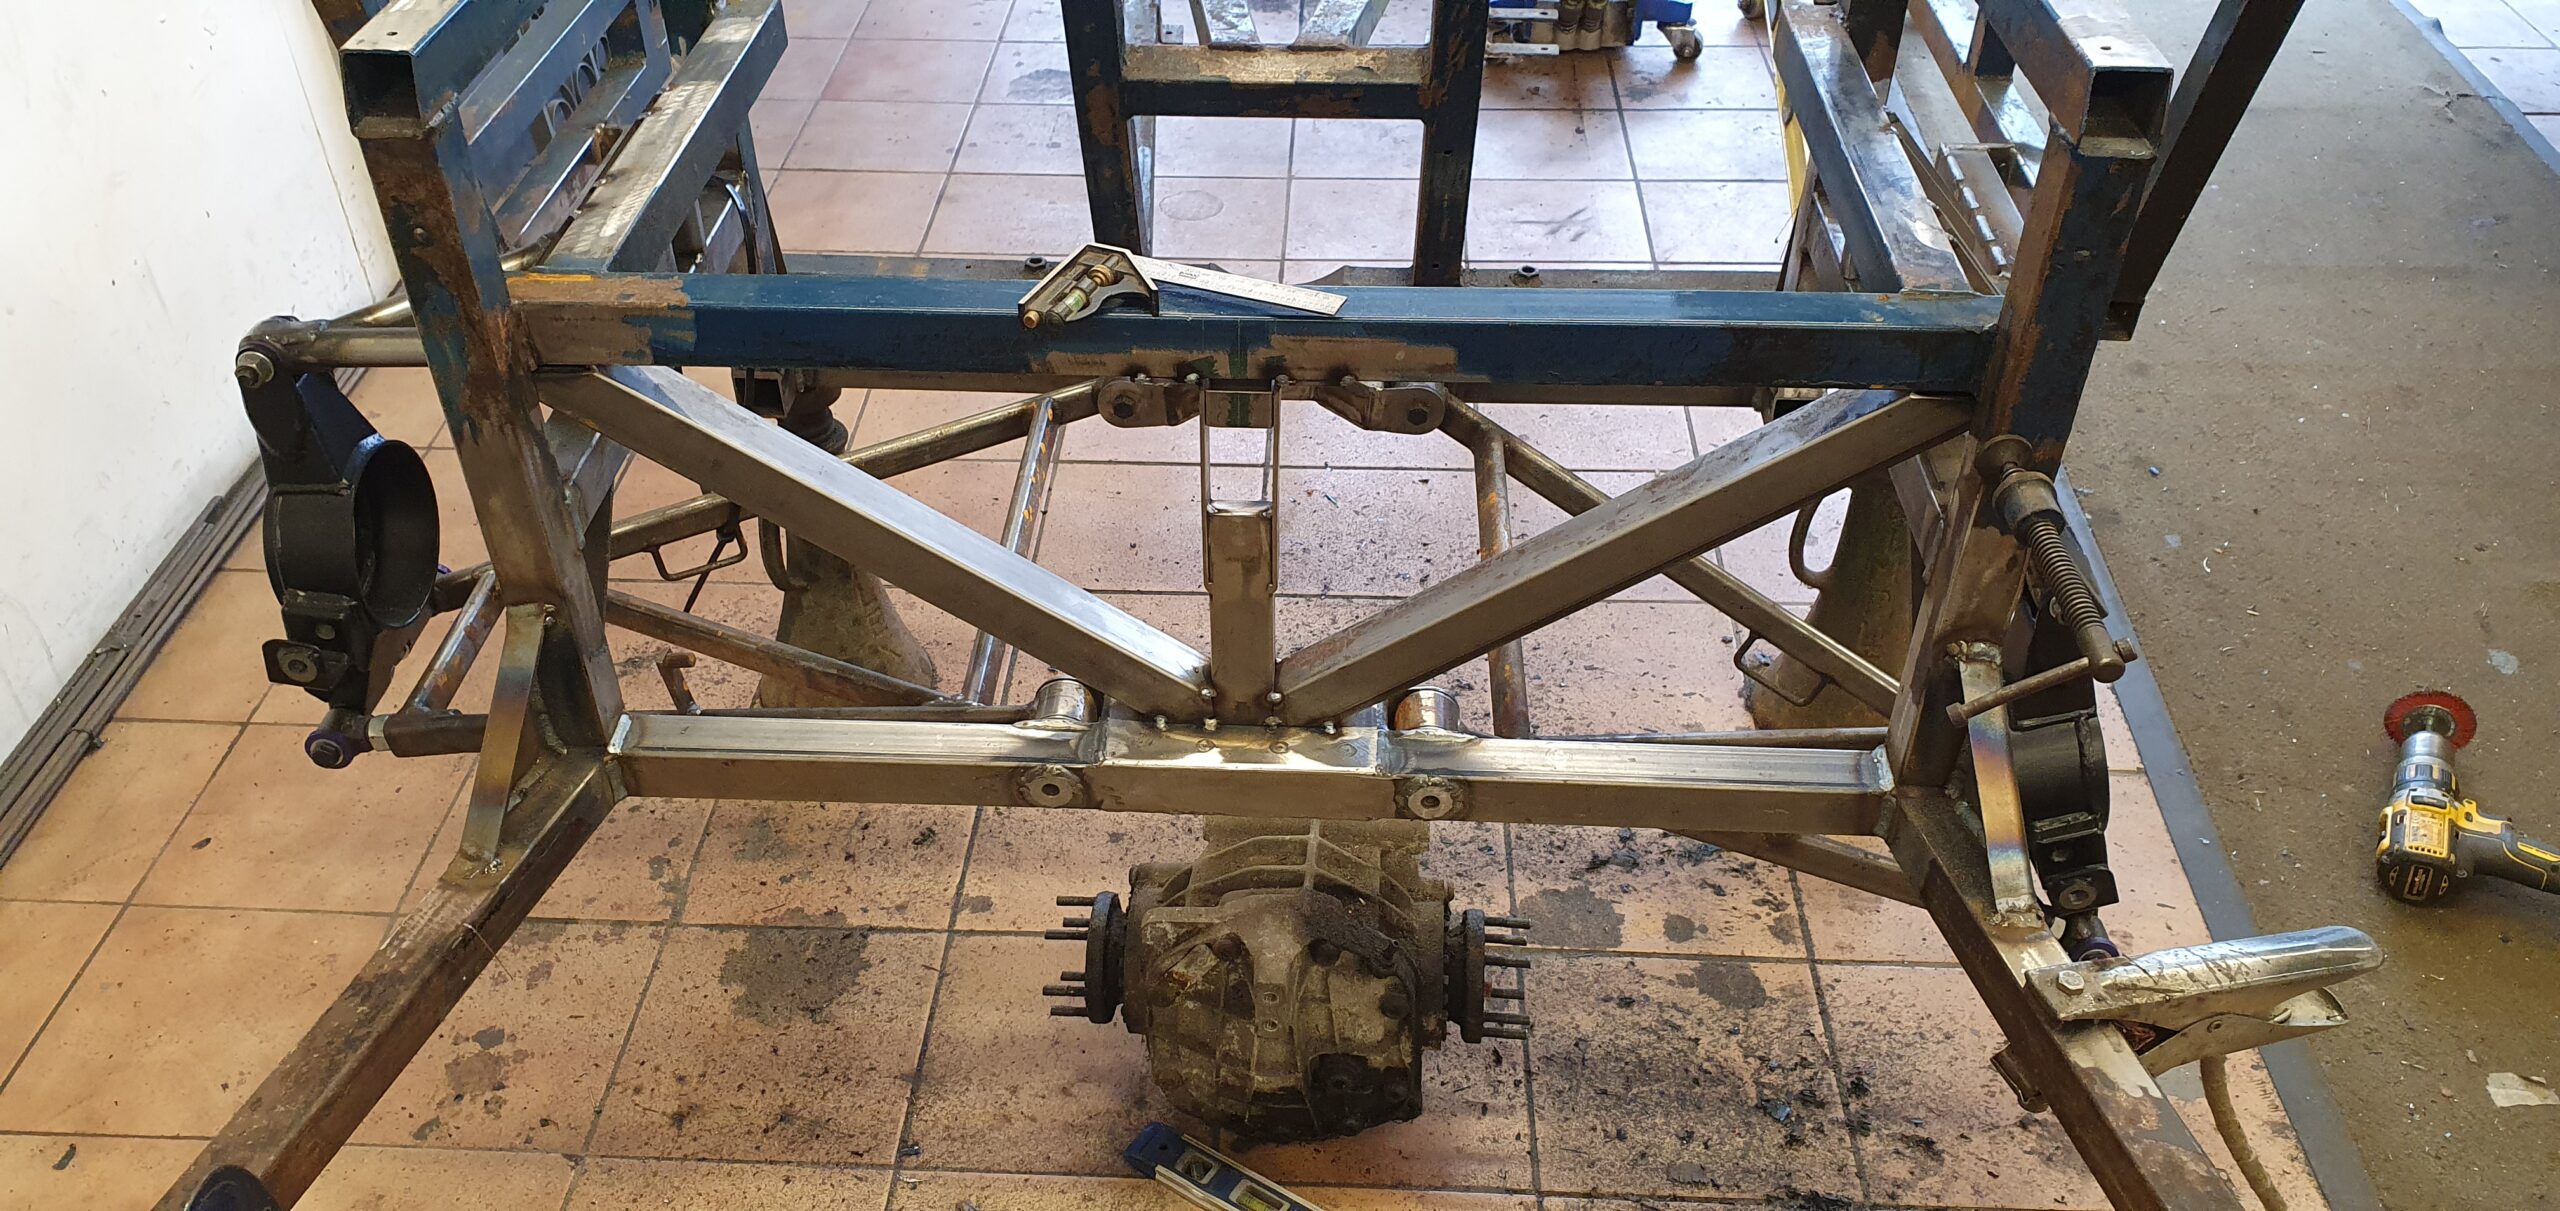
Triangulation tubes added along with the rear diff mount pick-up. The rear diff mount will not follow the standard Marcos design “P” bracket because that orients the poly bushes incorrectly.  In fact all of the standard Marcos diff mounting is wrong in my opinion. Watch for an alternative design in a future instalment…

Final weld-up
Final weld-up

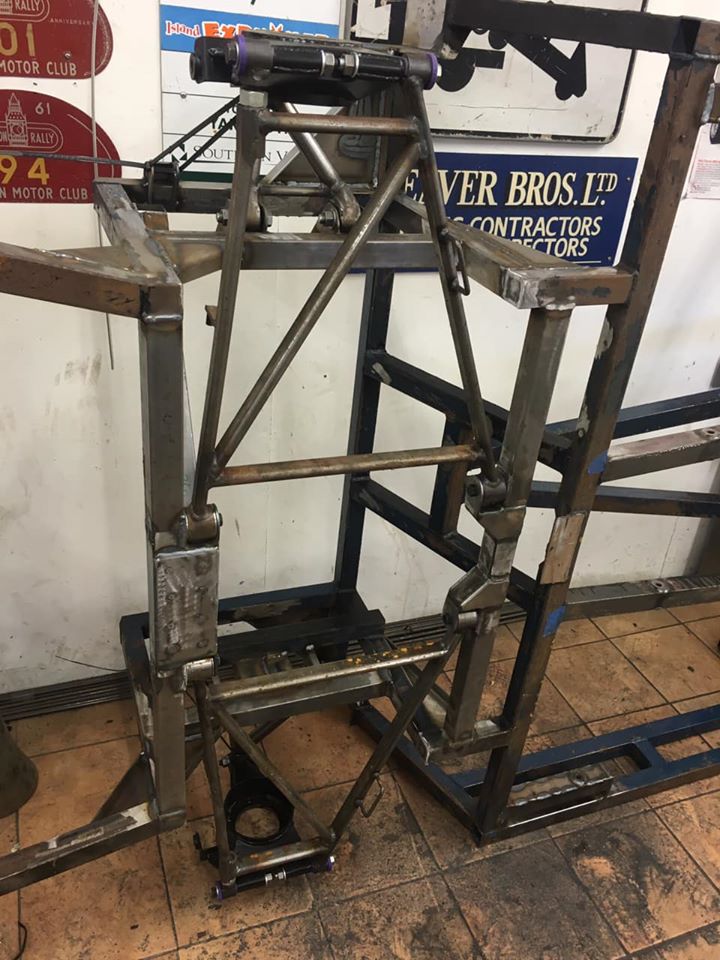
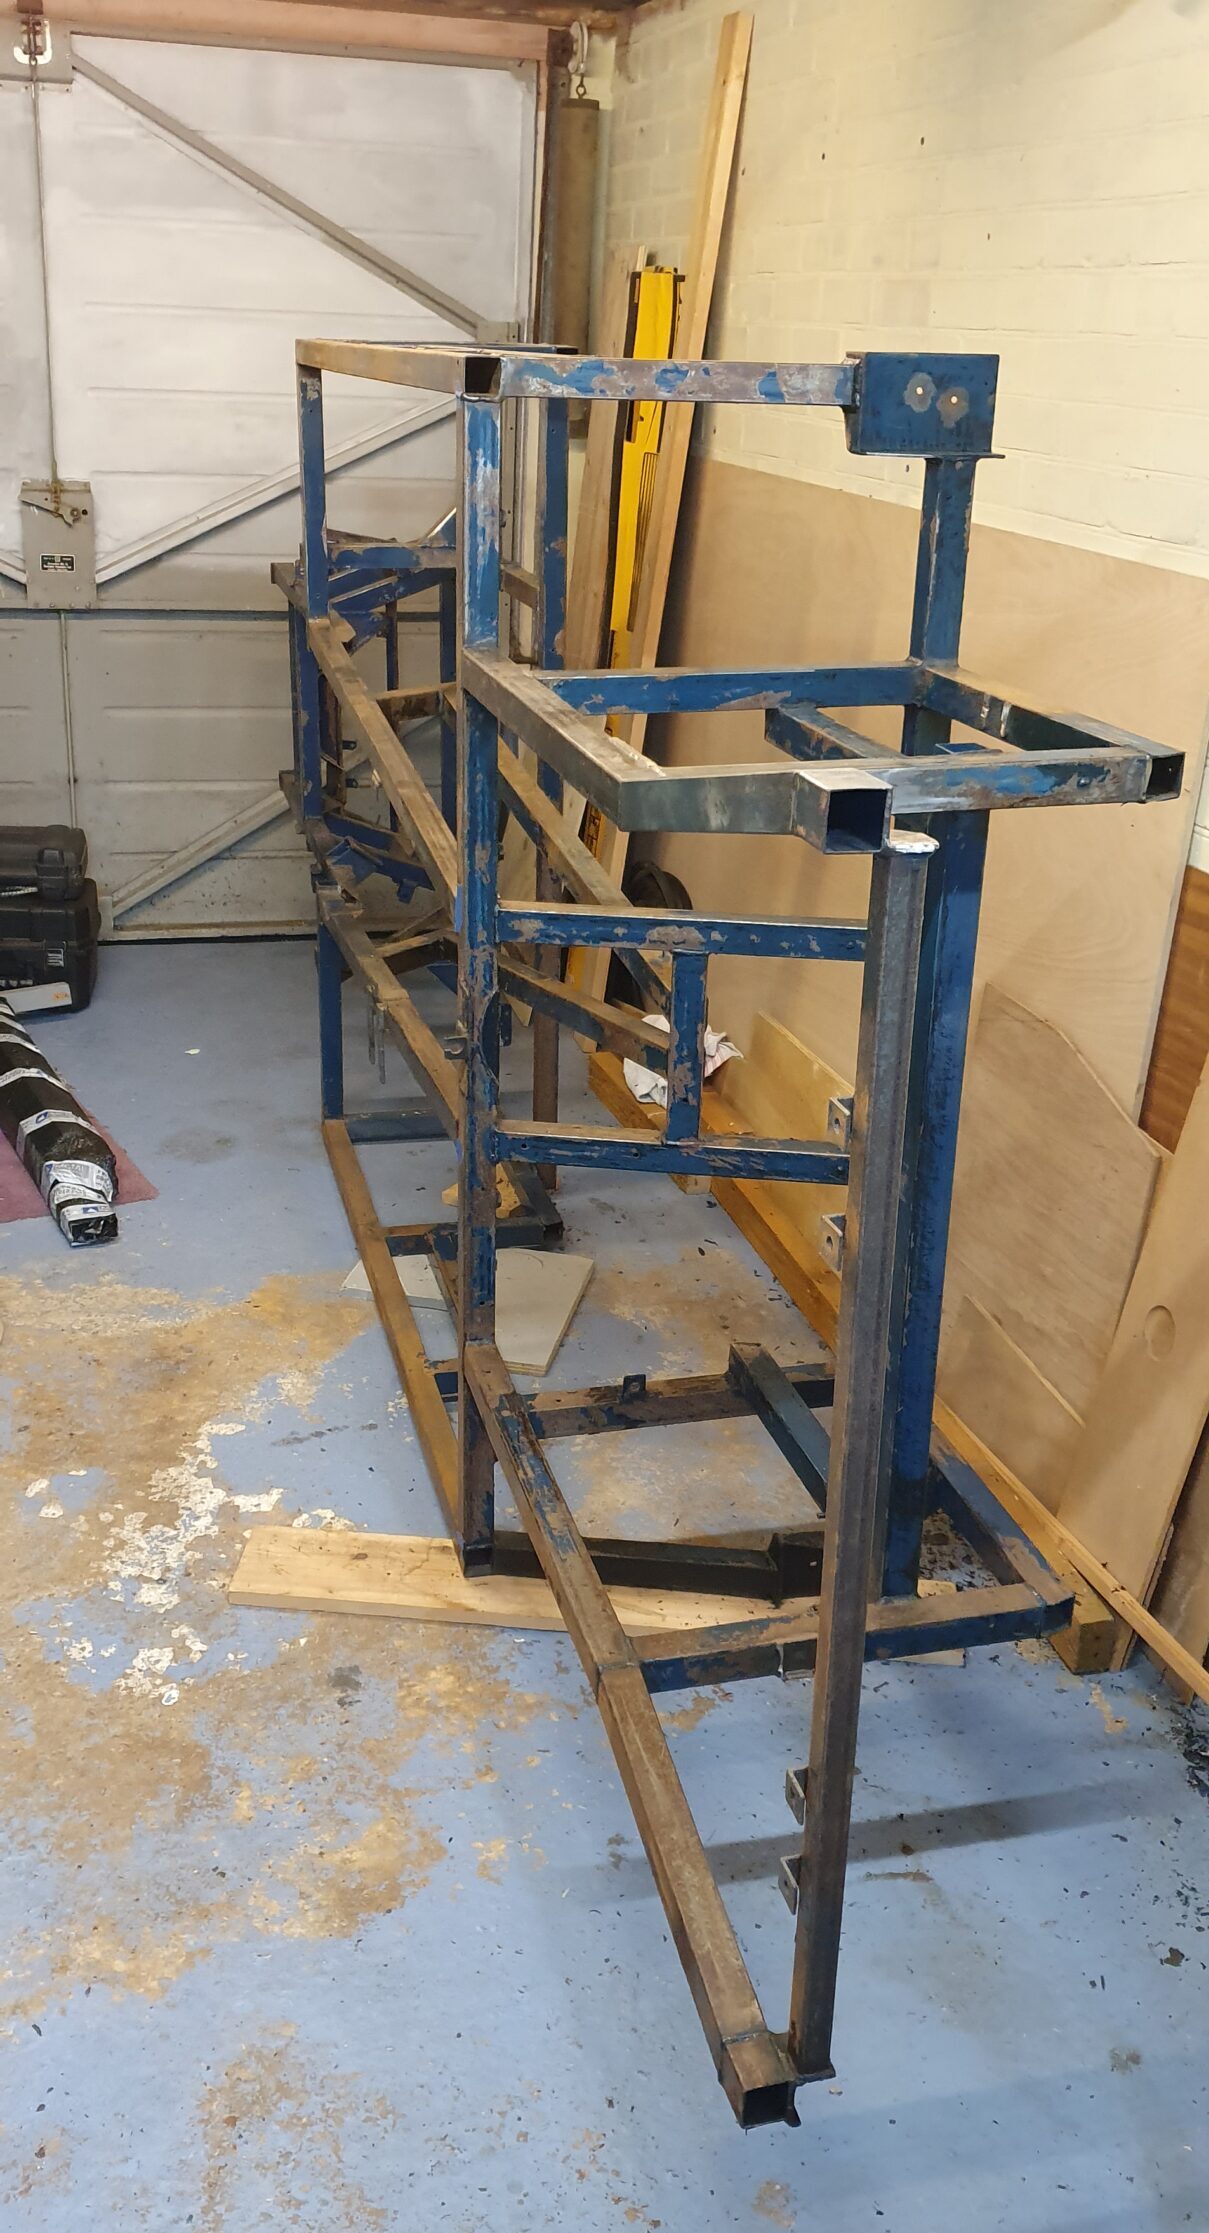
The last part of this stage of the build is the final weld-up. Yes there’s more to do but the next part of the design needs some real mock-up work to ensure the new diff mountings and additional cross-bracing work together and are still maintainable. I could do that in CAD of course, but I would have to accurately draw the diff and I honestly can’t be bothered! 

Back home!
Back home!

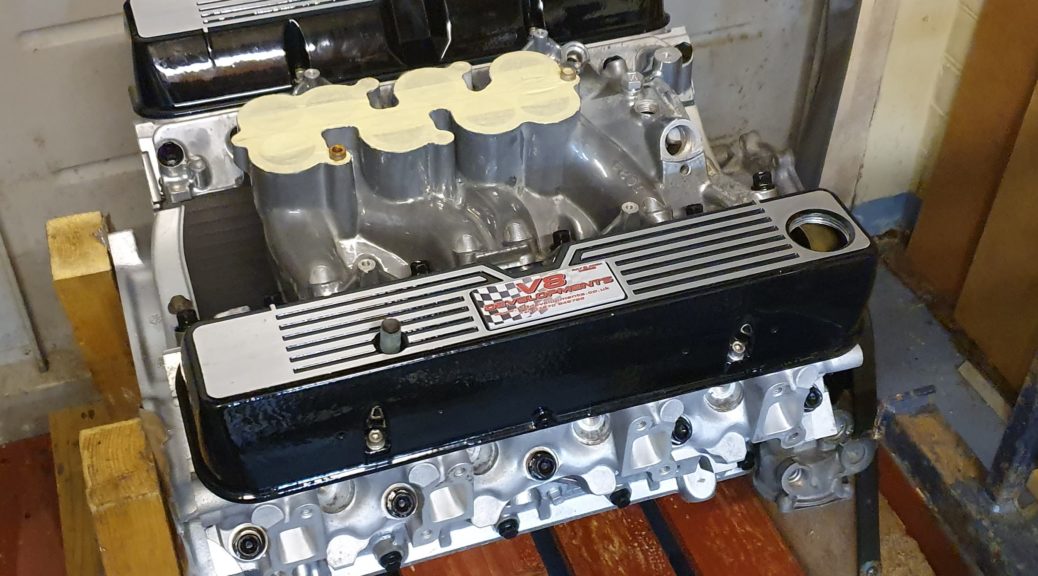
Here it is taking up a lot of valuable space! Unfortunately around this time despite the start of lock-down I had to start a complex contract and didn’t get a chance to get to grips with the diff mount mock-up.  However I should be back on it in a few days and I can’t wait.

More in the next instalment.

Ian

The real work starts now!

First post of the year and it’s only February! After what feels like an eternity, the IRS conversion starts next week.  The design work was far more complex than expected, but after a few set-backs I eventually  had a 3D model that I was happy with. 

From the 3D CAD model I was able to generate the sheet metal drawings for all of the brackets, webs and plates that will give the IRS its strength. All 57 items were all cut out of 3mm steel plate on a CNC plasma table at Northshore Classics here on the Isle of Wight.  

A company on the mainland made a few dummy bushes for me. These will be used in place of the poly-bushes while the chassis is being welded. That will save the poly-bushes from melting and ensure all of the suspension mounting points stay in alignment. 

Dummy bushes and suspension mounts

The threaded item on the left will be for the lower wishbone pick-up points which will be welded into the chassis tubes. 

Much more to follow next week.

Real progress at last

I’ve definitely been working too much. Seven days a week  with just three days off since the middle of September. One of the joys of being self-employed! 

Now that the various projects are delivered I can give the Mantula the attention it deserves.  This means there’s been quite a lot of progress considering this build normally progresses at a geological pace.

Much better than new

In the previous instalment I reported that the engine had been dispatched for a complete rebuild.  Well, it arrived back yesterday looking very smart and probably better than new. It’s still sitting on its pallet,  but I’ll get it mounted on the engine stand tomorrow. There are several important parts to attach too. 

Flywheel and clutch

The flywheel has been modified to accept the ignition trigger ring. Once that’s mounted the up-rated clutch can be installed. 

Flywheel machined to accept the trigger ring

The original clutch was Rover SD1 3.5 litre spec which wouldn’t be able to cope with the much greater torque from the modified 4.6 litre unit.

New heavy duty clutch by Helix Autosport

The front end will get a new water pump along with various brackets and sensors. More on this in a few weeks – I have to modify the serpentine belt routing so that it clears the steering linkage.

Low-profile sump

It was quite some time ago that I had the low profile sump fabricated, so it will be wonderful to finally fit the thing! That can happen as soon as it returns from getting its Zinga galvanising coating.  It’ll also have an abrasion resistant ceramic coating. I’m using the sump as a practice for getting the chassis treated.

Low profile baffled sump

When everything’s fitted I’ll squirt some Double TT into each cylinder to prevent possible condensation rust damage until first start some time next year.

Chassis modifications

The chassis is booked-in for modification during the second week of January. I still have work to do on the rear end design where I’m diverging from the standard Marcos IRS set-up a little. The 3D CAD drawing will be finished next week. I’ll then get the new suspension mounts and various brackets cut out on a CNC plasma cutter.

Inlet manifold design changes

Some time ago I showed the designs for the Jenvey throttle body adapters which I had 3D printed here on the Island.

Original undersized adapter
Inlet adapter in position on the Thor manifold

Unfortunately I made an error by severely underestimating the correct throttle size. Now rather than the original 48mm size I will be fitting 60mm or larger Jenvey items.

Here’s the revised design in Fusion 360. I will probably have to build in some strengthening webs. 

The revised adapter design

These 3D printed items are just for testing, more robust items will be fitted when I’m certain that everything works correctly.

The throttle body size error was noticed by the very helpful Daniel Lloyd from Lloyd Specialist Developments in Warminster. They’ll be setting up the Canems engine management system for me and fine tuning it on their dyno.  

That’s all for now. I’ll try to keep these updates more regular while there’s something going on.

Ian

Decision time…

Well I’ve been wasting too much time on other important stuff. The Marcos needs some attention. Some important decisions have been made this week.

Chassis modifications

Despite having found a very good welder near to where I live, I have had to look elsewhere. Weld Services no longer answer the phone and are never present at their workshop. That’s a pity because they have done some excellent work in the past.

Amazingly I may have found the perfect alternative. An automotive fabrication/repair workshop only five minutes walk from where I live! I’ve not talked to them yet, but they come very highly recommended. I had no idea that they existed. If they can do the work this will be so convenient. 

IRS saga

This really needs a whole post of its own. It’s a tale of frustration at every turn, you just wouldn’t believe how complicated this became and I’ve omitted most of the detail below. 

After buying the main IRS and chassis upgrade components from Marcos Heritage Spares nearly two years ago, I found that my fabricated rear uprights would not be strong enough and would also foul the wheel rim unless they were reduced in size and therefore made even weaker. The quote for the real Marcos designed upright from MHS was shockingly expensive, but I had no other option and ordered a set in April this year. 

The new uprights arrived about three weeks later and looked lovely at first glance. That was until I examined them more closely and found that the parts were wildly asymmetrical. I was expecting mirrored parts but these were way off.

  • The shock  mounts were in completely different locations;
  • The top wishbone mounting had insufficient clearance making them impossible to fit;
  • Worst of all, the hub mounting ring was upside-down on the near-side upright! 

I’m pleased to say that the response from Rory at MHS was faultless and he agreed to rectify the parts without any argument. I received the corrected and totally symmetrical parts on 11th June. Now I can finalise the rear end redesign safe in the knowledge that everything is built perfectly. I wonder if any other IRS uprights are as asymmetrical as my original set?

13 mm difference in vertical position.

Engine

I have been toying with the idea of ditching the Rover V8 and moving to a Chevy LS3 crate engine. It’s very tempting and the options list is really suited to my type of project. However it would be expensive and I know of one failed attempt. Reluctantly I’ve had a rare attack of common sense and will stick with the trusty old Range Rover V8. But it won’t be with the slightly tired engine that’s currently sitting in my garage. We can do better than that!

After a lot of research I have chosen a ‘Warrior’ spec 4.6 from V8 Developments. I chose this company for several reasons but mainly because of their flexible and helpful approach to my requirements. They will build an engine to suit the car and the way I want to use it. I’ll give more information in a future update. For now however I have to get hold of, or make a suitable pallet so I can get the engine to Spalding in Lincolnshire.

Back soon, plenty more to tell you as the project comes back to life.

Ian


Zinga cold galvanizing

It was always my intention to get my chassis hot-dip galvanised. But there were potential problems. The age of the chassis and the use of Waxoyl on some tubes would make the whole process more complex, or even impossible.

To work-around that problem I would have to get the entire chassis dip treated to clean it inside and out, removing rust, powder-coat and any waxy contaminants. Now that whole process doesn’t come cheap, and would seriously harm the project’s bank balance. On top of that the transport costs from the Isle of Wight to MHS in Wiltshire (for the chassis mods), then to the surface treatment company in the  Midlands followed by a trip over to the galvanisers in South Wales before returning to the Island would cost a fortune.

The budget for the project is tighter now that I’m self-employed again, every penny spent has to be worthwhile. Less cash means slower progress as I have to do more of the work myself. Where I don’t have the necessary skills, I’ll use the best local companies here on the Island. Despite only being a tiny island we have a disproportional number of skilled engineers, the only real problem is finding the people with a professional attitude. All too often you find the “that’ll do” slap dash approach and that’s no good for this project.

So far I have a great welder lined-up and hope to agree the surface prep blasting with a local company. They will media blast the chassis and then coat it with my chosen system.

Zinga

Earlier I mentioned the need to take the chassis to South Wales to be galvanised, well I have discovered something just as good, or in some cases better. The product is Zinga and its a way to zinc coat the chassis without heat. It can be applied by brush, roller or spray and gives the same cathodic protection as HDG  (Hot-dip galvanising). How can I be certain that it works? Well, other than their own marketing material, I was able to find industry reports on the product’s actual performance. It’s NATO approved too. It’s used on ocean-going ships and oil rigs where it out-performs HDG. Closer to home it was used on the structure of the London Olympic stadium and given a minimum 60 year life before re-coating. If the Mantula chassis lasts that long I’ll be long gone!

In the event of any damage the Zinga can be locally repaired. Try doing that with HDG.

Another benefit of the system is that it takes over-coating better than HDG. I’ll be using Zinga Ceram which is a two-pack ceramic coating which is said to be abrasion resistant. It comes in the full Range of RAL colours, so I just need to decide which one to choose. The traditional Marcos dull blue, or something more exciting.

I hope I don’t read like a Zinga salesman, but it just seems to be the perfect solution for my project. The only sticking point so far is the relative lack of enthusiasm from the surface blasting company. They are trying to sell me on a high zinc paint, not the same thing at all.

No turning back

Well, I’ve finally summoned the courage to start cutting bits off the chassis. I started small by removing one of the old-style seat belt brackets. Easy, let’s do something bigger. Ten minutes later the rear top radius rod mounting was history.

Near-side upper radius arm support is removed.

There’s definitely an art to using an angle grinder. Get it wrong and the damage it can do is frightening! I’m using a thin cut-off discs to slice through the unwanted parts. I follow that with a coarse 40 grit flap-wheel to get rid of the weld bead. It’s quite surprising how fast the flap-wheel ripped through the metal!  The flap wheel is so much better than the traditional solid grinding disc. I then finish with a medium flap-wheel to get a good finish. So far I’ve only made one error where the flap wheel touched the chassis in the wrong place. Otherwise this has been done without removing any tube wall thickness.

First attempt to grind away a weld

I seems impossible to remove all traces of the weld due to minor distortions to the tube wall, but I think it will be fine once the Zinga zinc and ceramic coating have been applied.

That’s all for now, back to the daily grind…

Ian

IRS development

It’s been a slow year for work on my old Mantula. The latest delay has been caused by having too much paying work to do. I can’t complain its nice to know that I can pay the bills!

One of those bills was for a whole batch of parts from Marcos Heritage Spares. They supplied the wishbones and shock absorbers for the conversion to Independent Rear Suspension. Having these parts available for accurate measurement means that I can complete the 3D CAD drawings of the entire chassis.

While I do have the basic measurements of an IRS set-up, I have an idea to make some design changes over the original Marcos design. One of the problems is regarding a known weakness were the differential top mount attaches to the chassis cross member. So, I’ll attempt to use Finite Element Analysis (FEA) in Fusion 360 to prove the strength and perfect my design. More on the results in a future update.