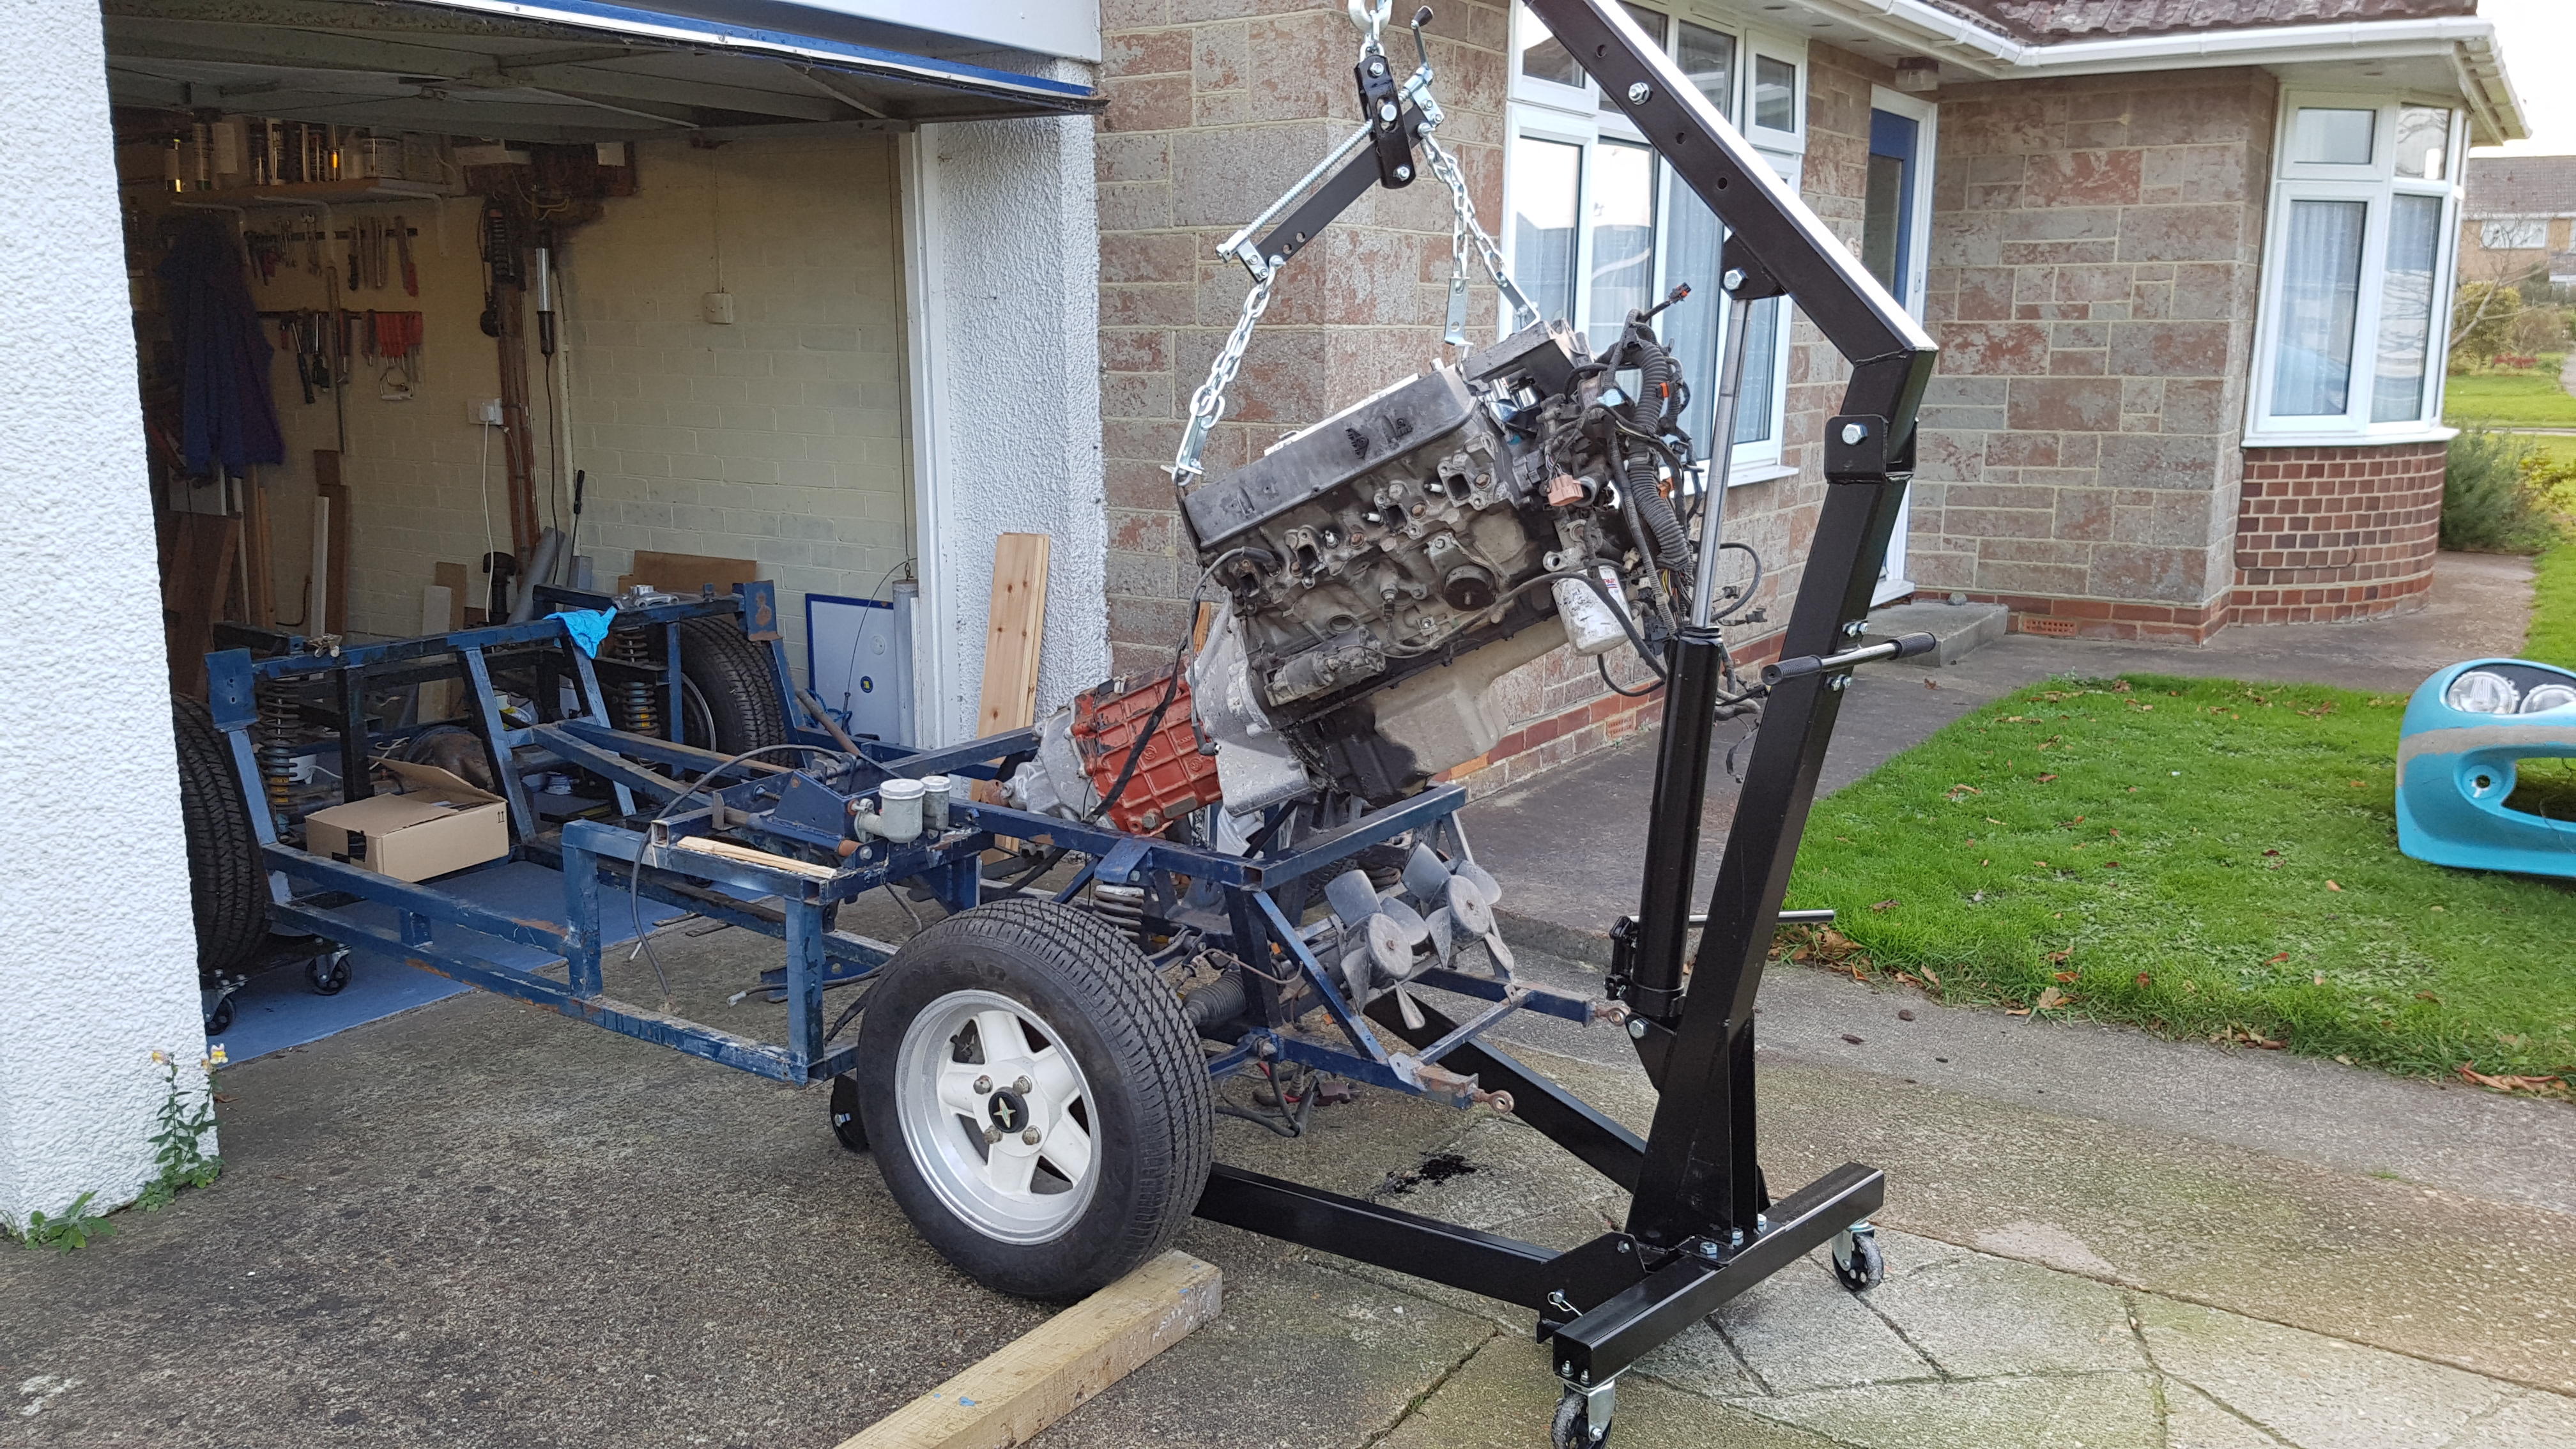
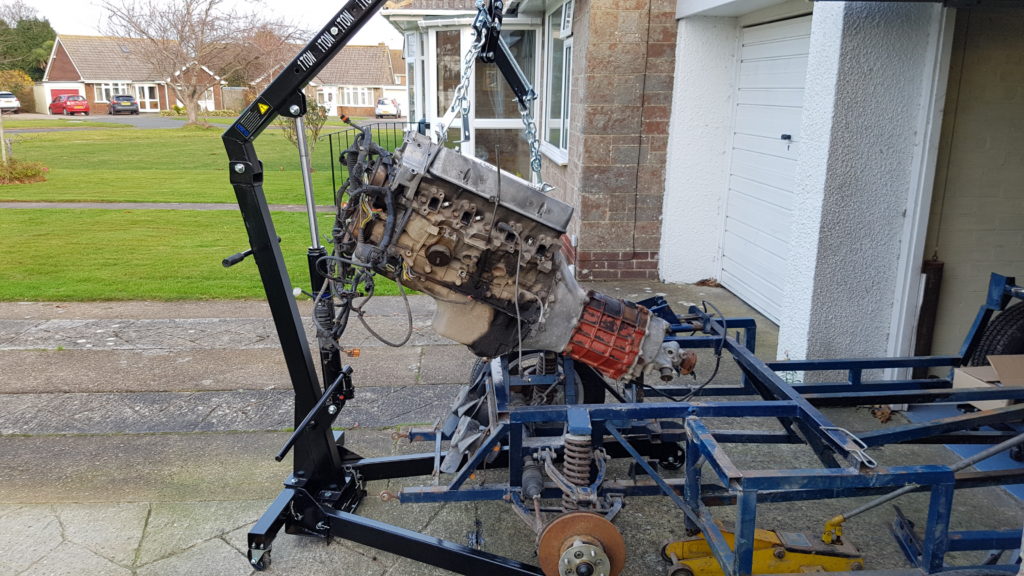
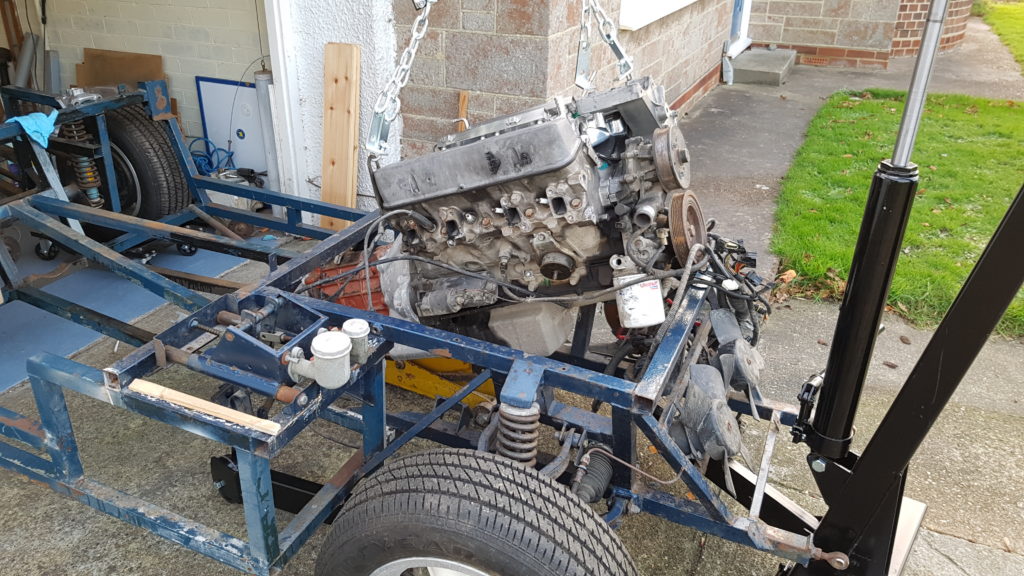
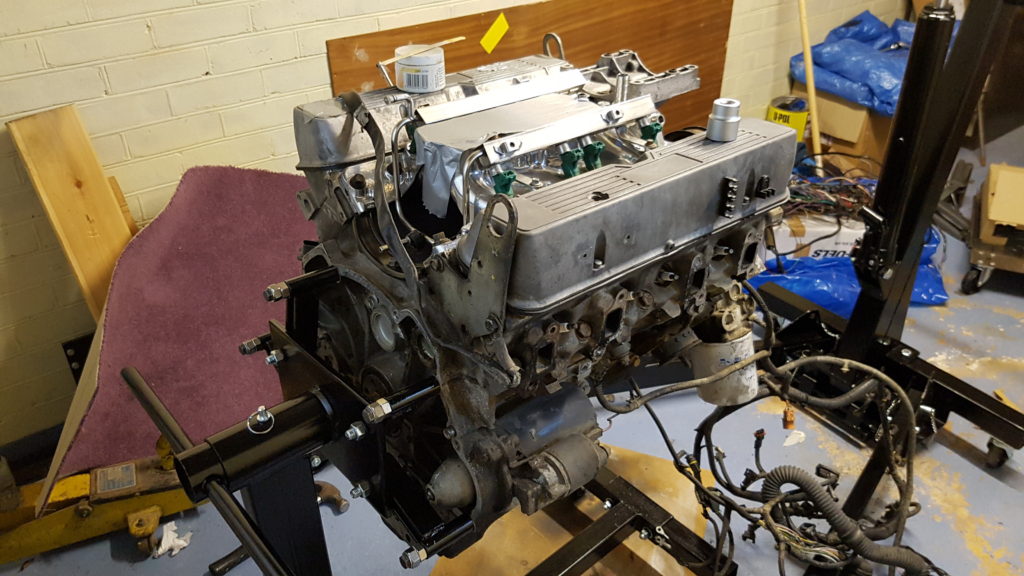
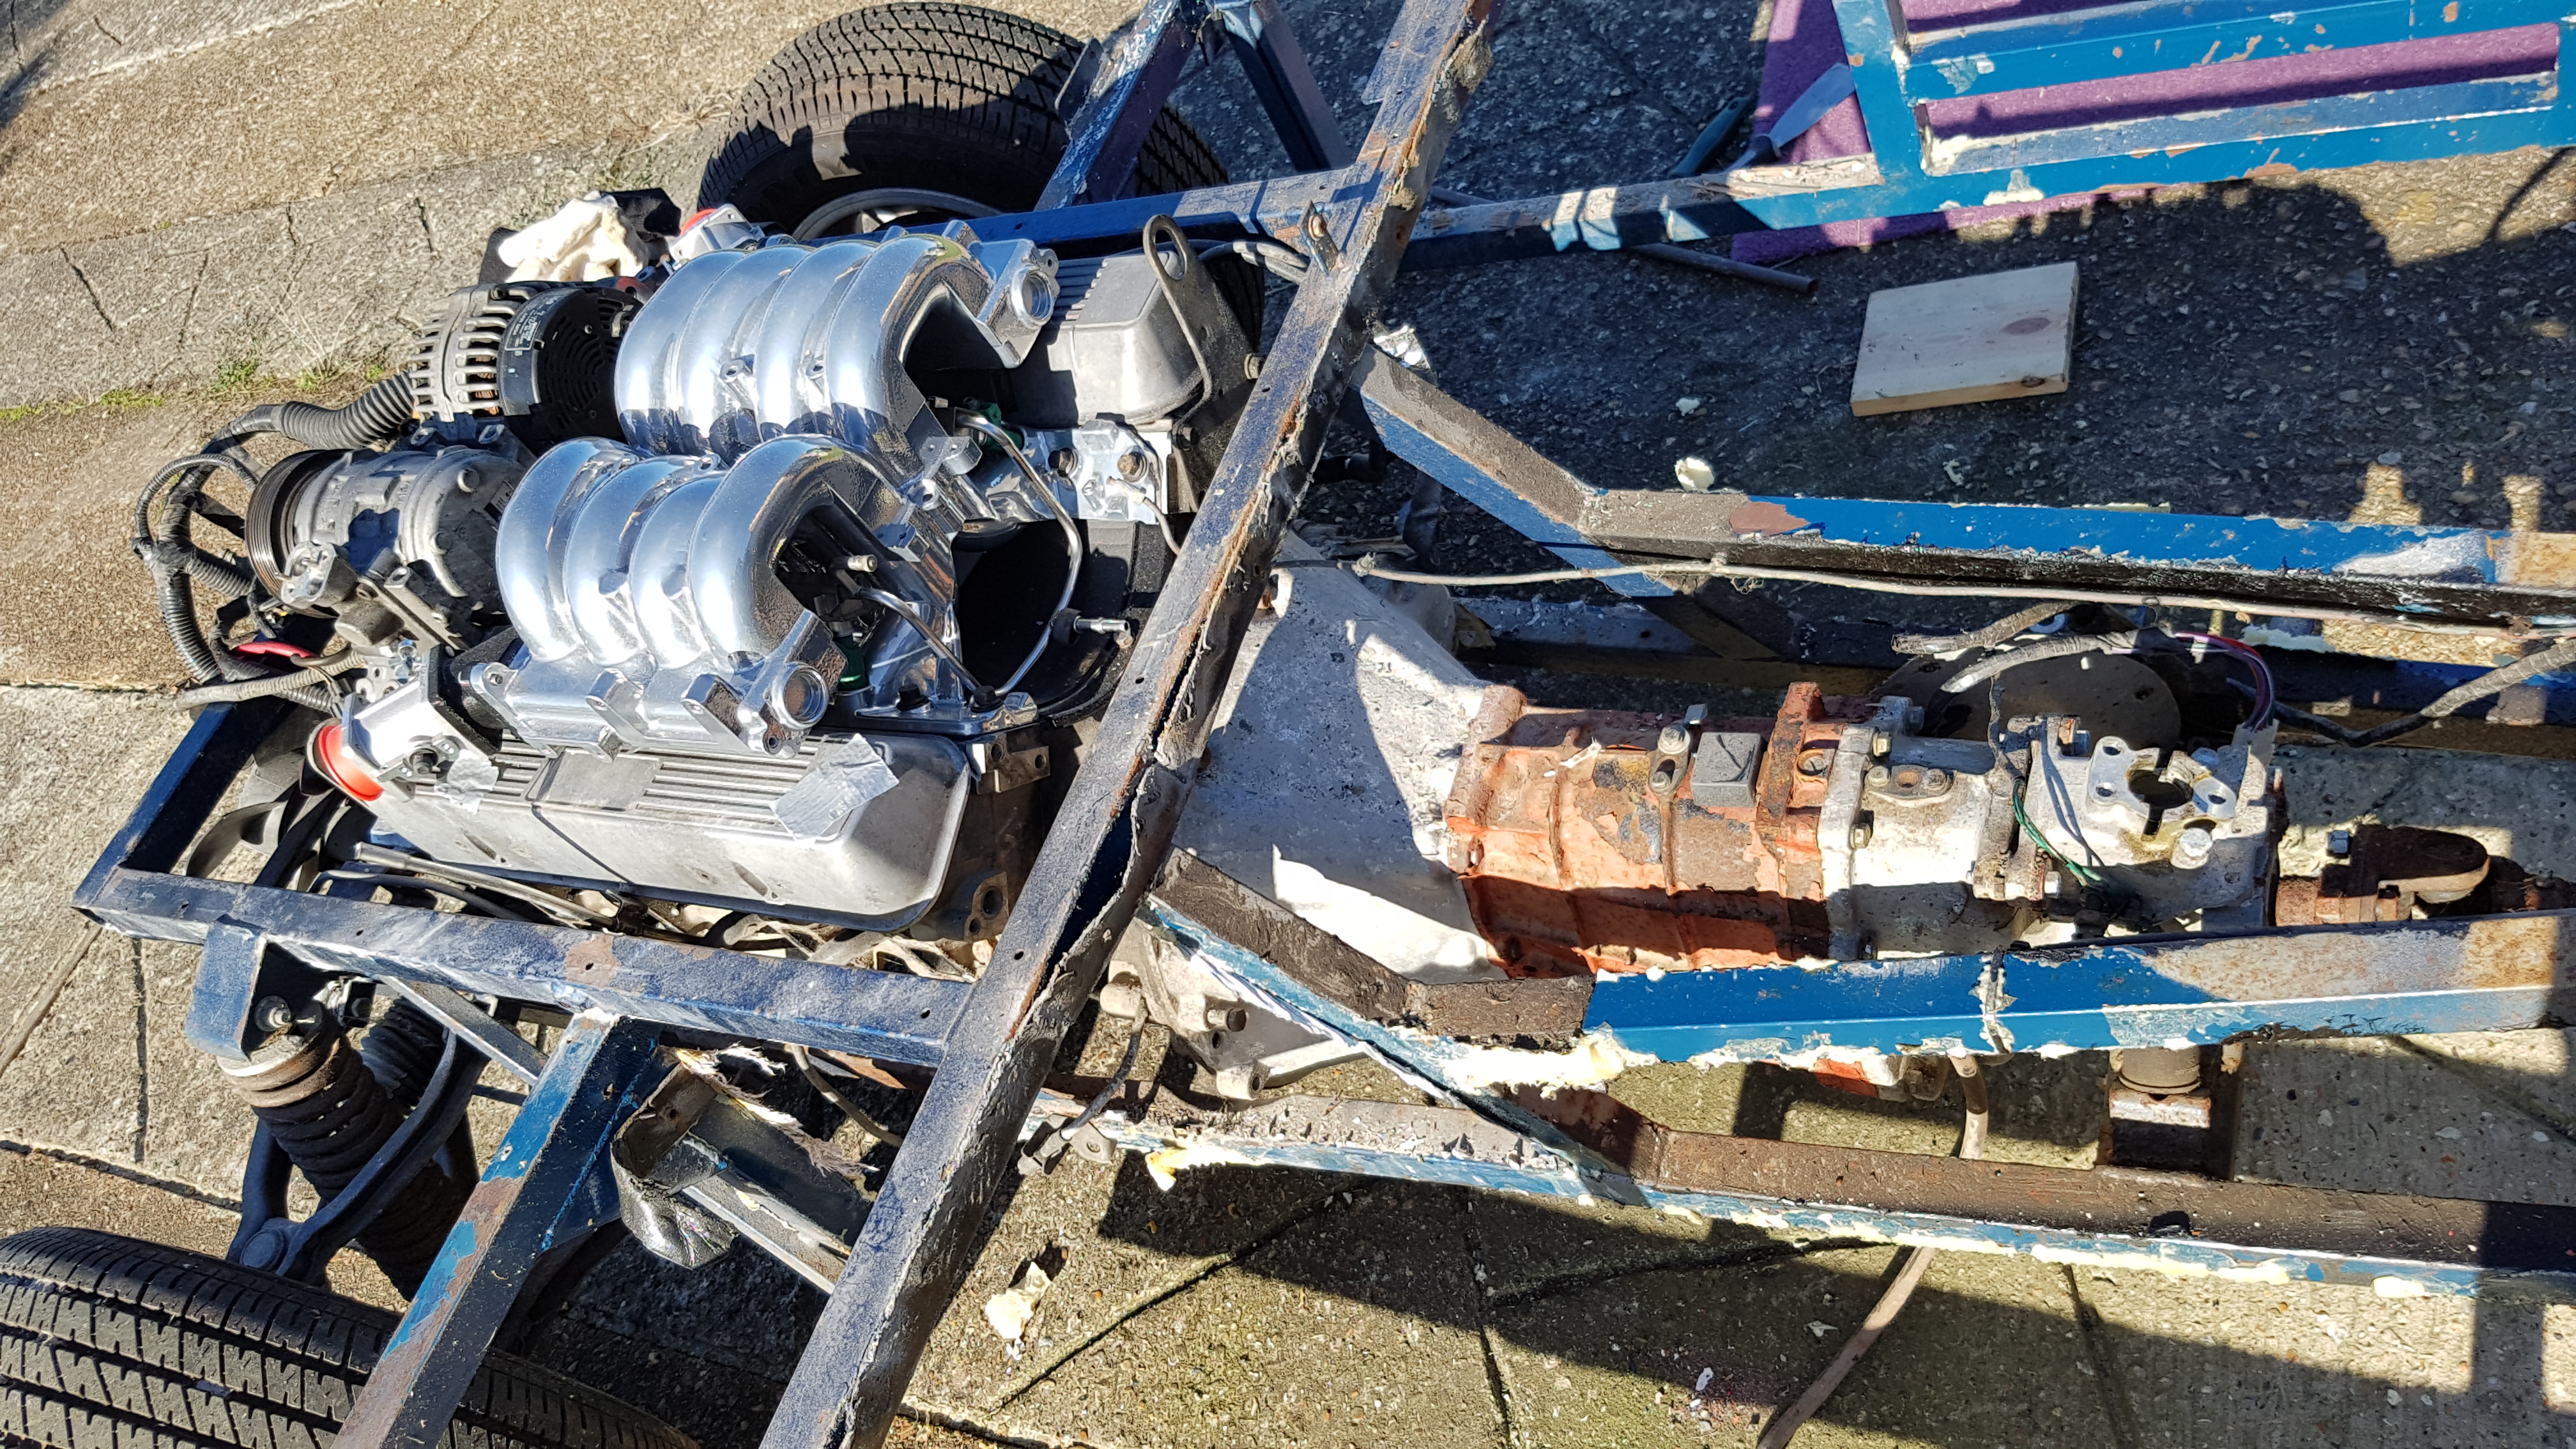
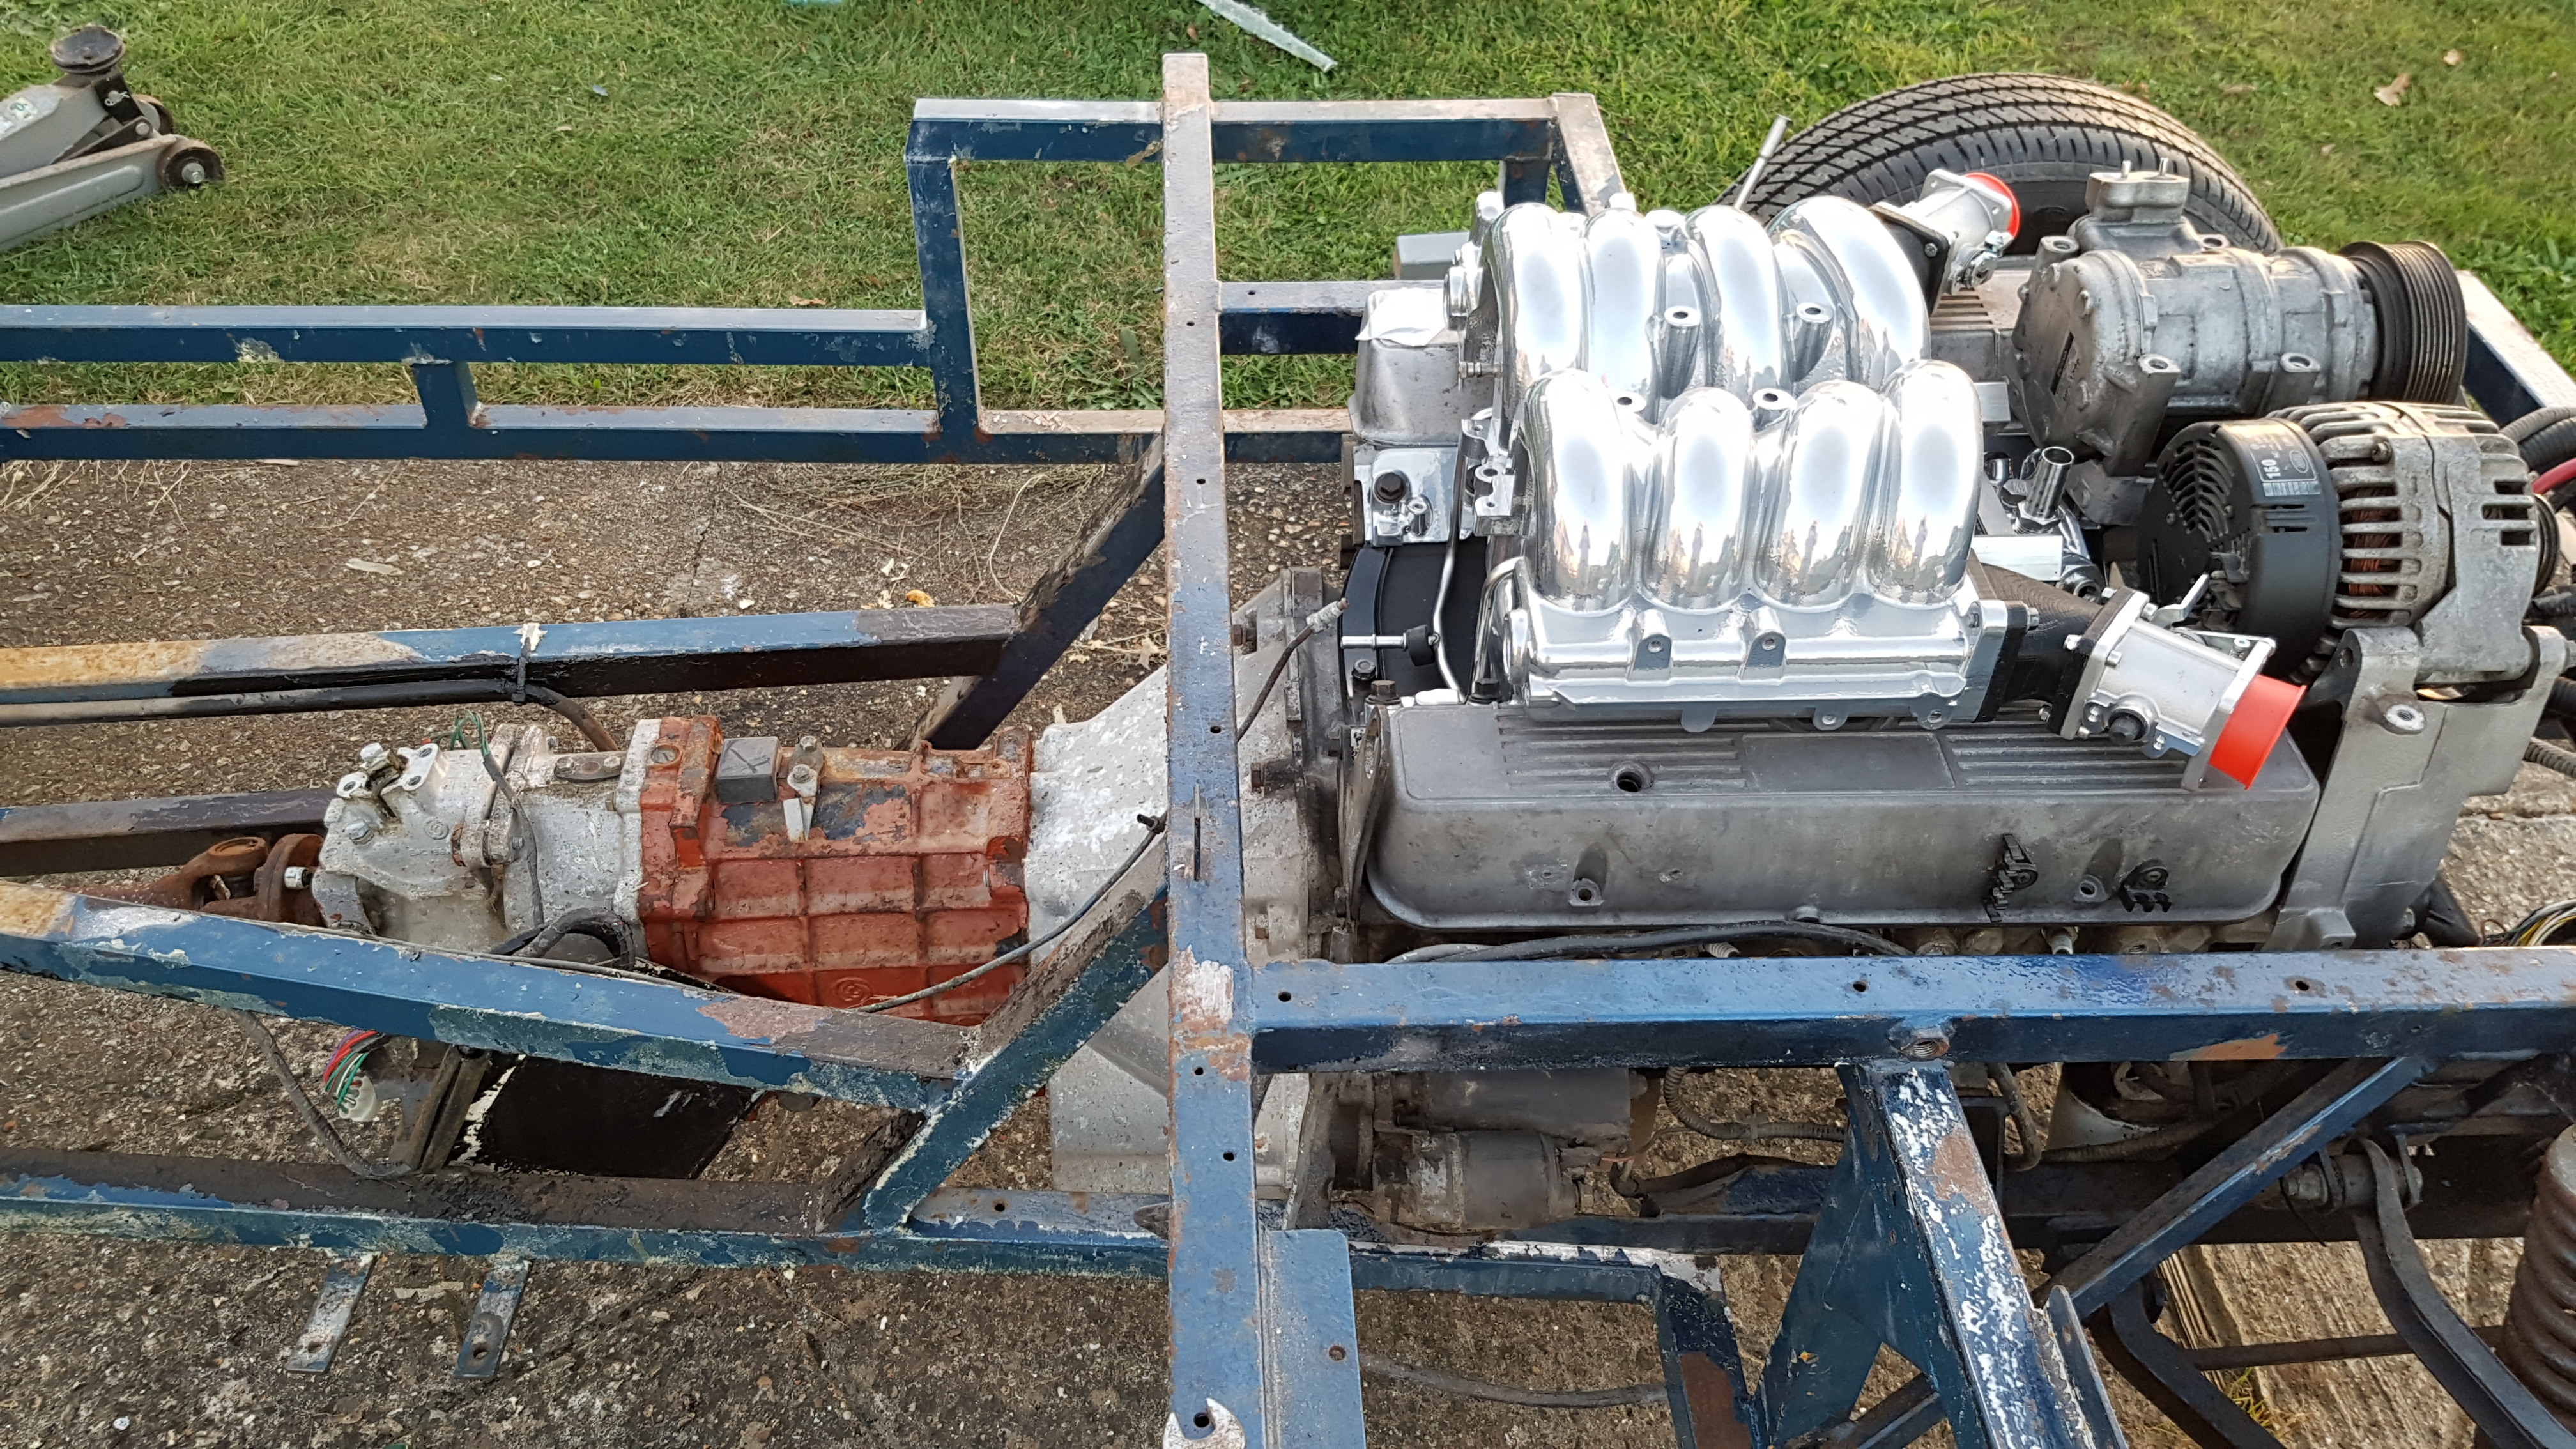
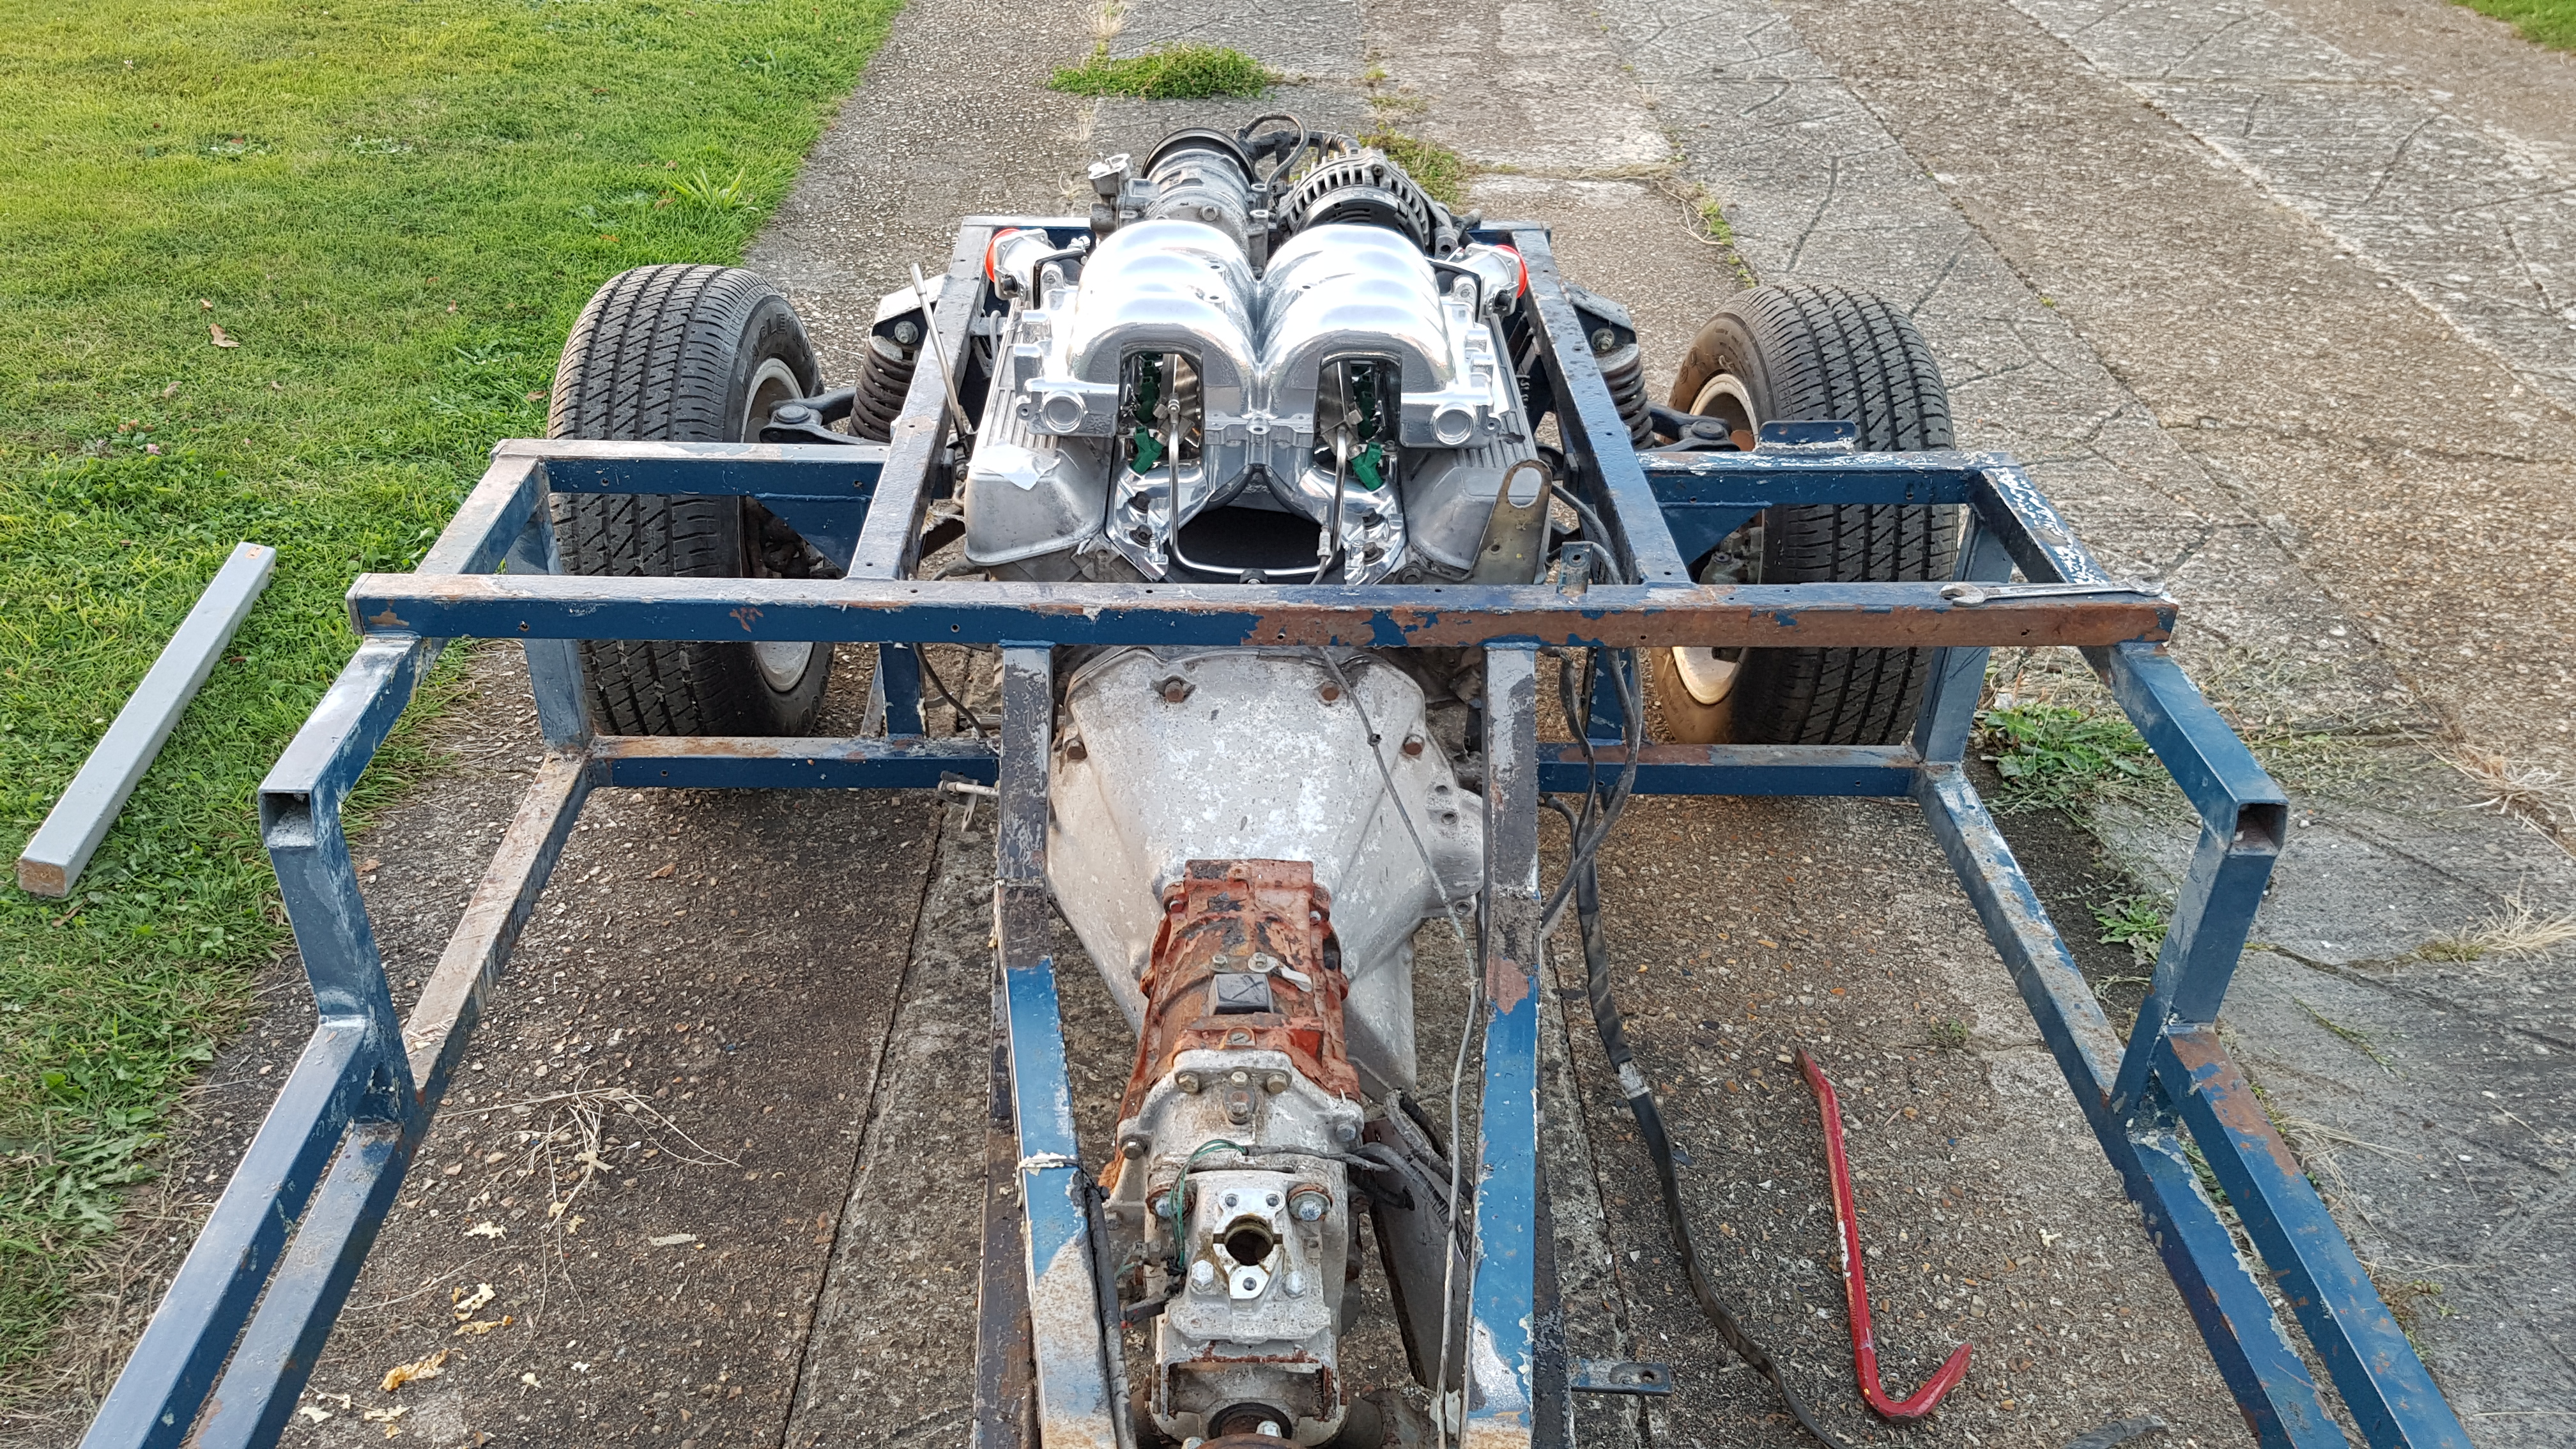
A long day on the Mantula yesterday. Engine out and on its stand ready for cleaning, painting and modification.
I was using the new Engine Crane which I bought from SGS Engineering. In the past I’ve hired engine cranes, but this is more convenient as it was available while I waited for a dry day.
The load lever makes it so much easier to set the engine at the best angle to clear the chassis rails, recommended.
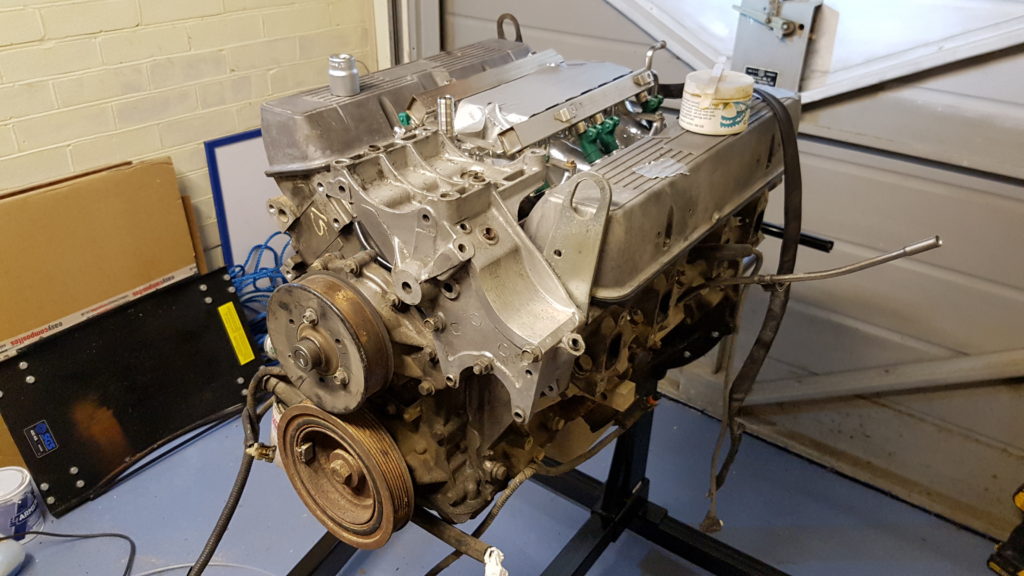
Engine Stand
Mounting the engine on the stand was the easy part. Unfortunately I discovered a broken bell-housing bolt. No problem I thought just use an ‘easy-out’ or stud extractor. So, centre punch the broken bolt head, drill out the centre and insert the extractor. Wind it in counterclockwise then watch in horror as it breaks off! Leaving a useless piece of hardened steel stuck in the engine block.
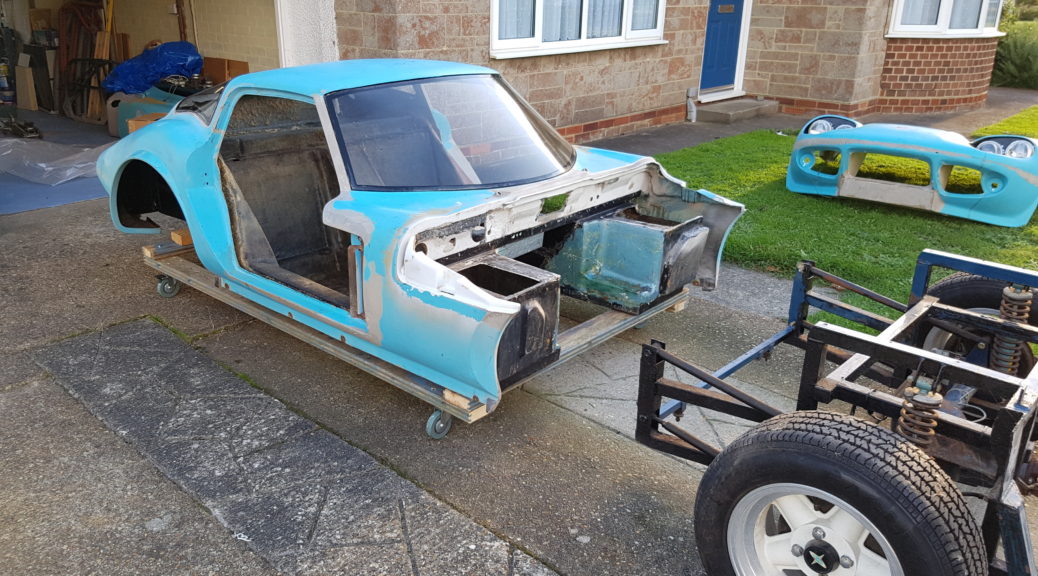
No not really. Yesterday I built a cradle for the body so that I can keep it on the front drive wrapped in tarpaulin. It’s got some large castor wheels so I can shunt it around the drive when I need to move the chassis.
The original idea was to suspend the body shell from the garage roof, but that proved to be impractical as it would limit my working space too much
For now the cradle is in the back garden. Hopefully put it into use next weekend.
Update 2016-10-08
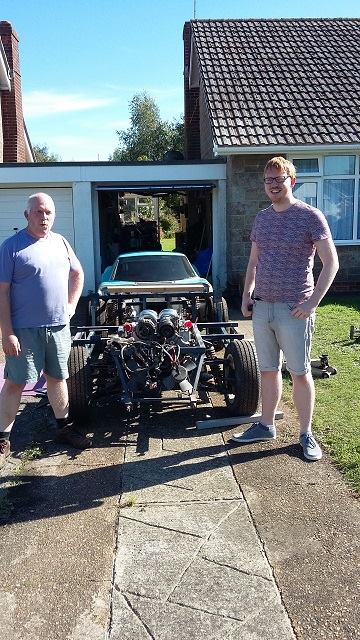
The body was moved onto the cradle today with the help of my neighbour, thanks Nick! It works well, very easy to move the body around.
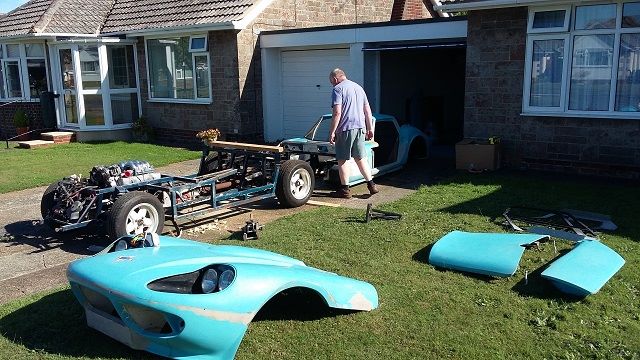
Last Sunday was a great day. Hard work but really productive. With the help of my friend, local ex-Marcos owner Derek Atkins and my son Dan we got the body off after about one and a half hours of effort.
While the body was clearly no longer attached to the chassis it wasn’t at all easy to move. It would shift about 30mm upwards then go no further. My first guess was the foam rubber strips were preventing the movement. Jacking the car up from the seat pans caused some alarming creaking but little extra movement.
Derek noticed the problem, the foot-well speaker enclosures, which I thought had been fully removed, still had enough remaining GRP and plywood to foul the chassis on the near side. The Dremel made quick work of that and the body was able to move.
Once free it was quite simple to lift the rear and pull it away. The bonded rear screen certainly helps keep the whole body construction in one piece. Without that we would have needed a couple more helpers.
Is that all there is?
I’ve always known what a Marcos chassis looks like, but to see it exposed like this was quite a shock. It just seems so insubstantial! A roll over bar may be a priority, but nothing could be done for side impact. I’m told that it’s not particularly stiff for a sports car chassis so there’s definitely some improvements to be made on that front.
A naked Mantula
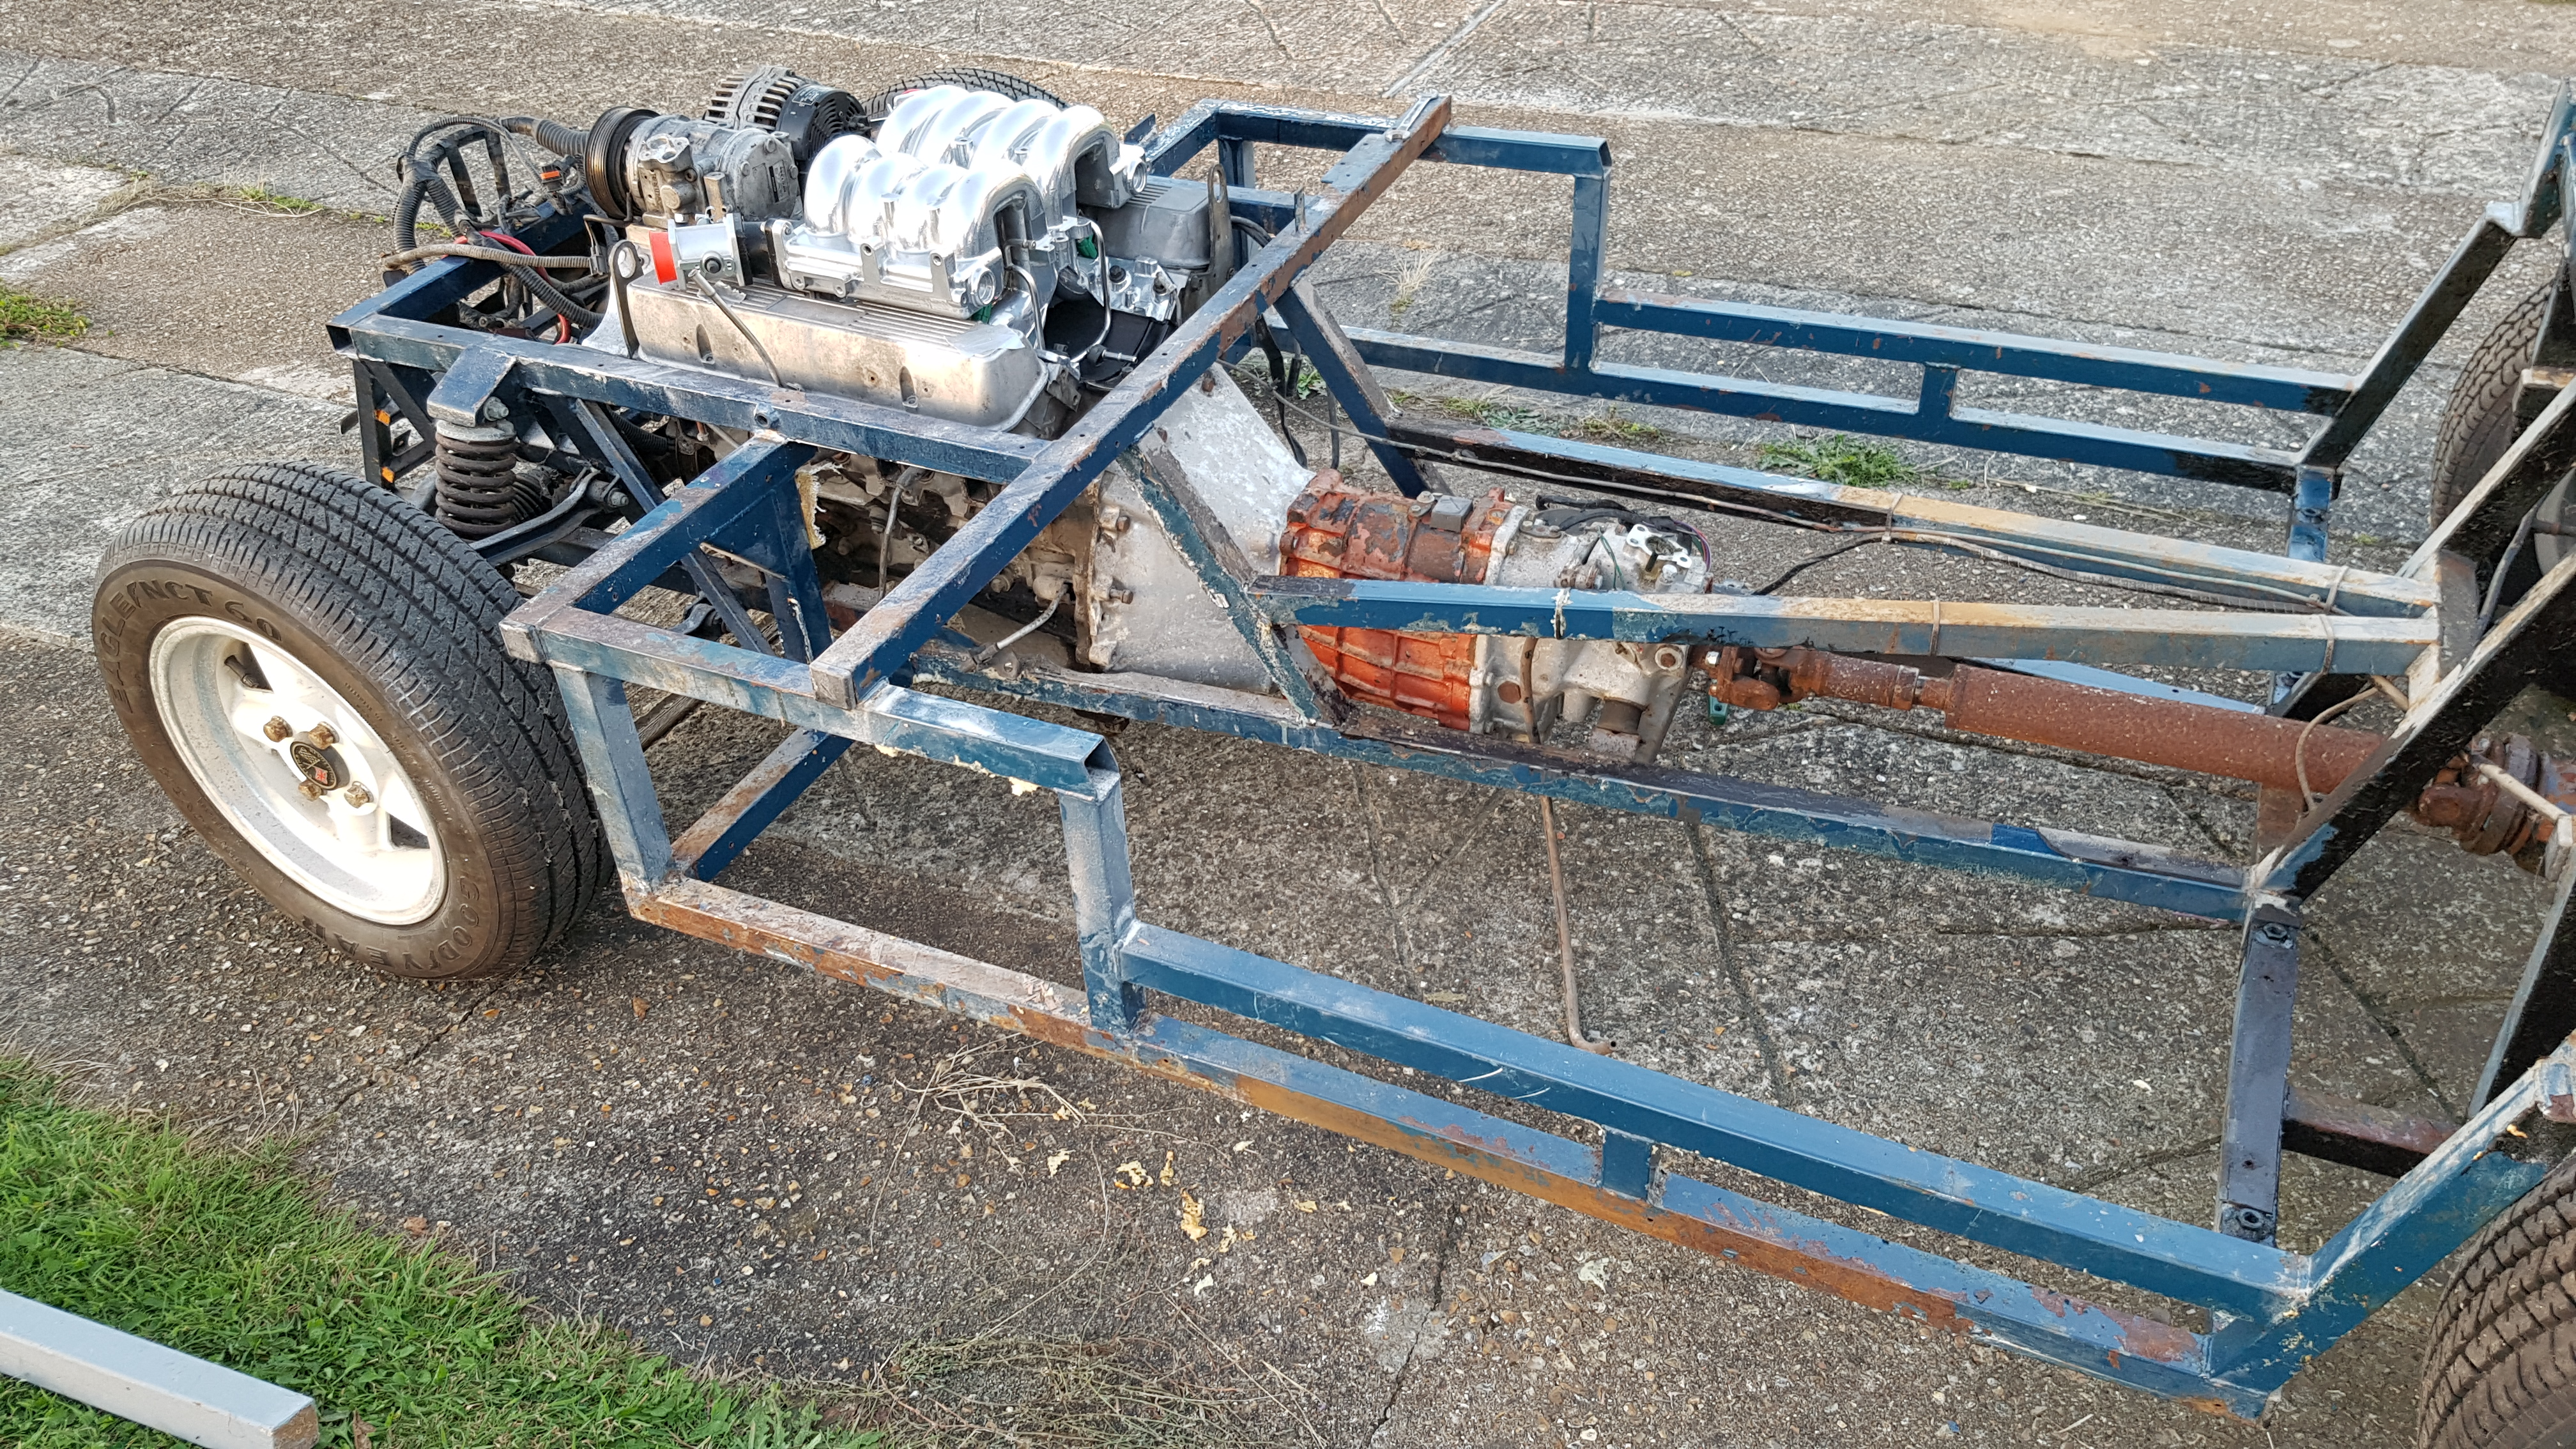
I would remove the engine next, but I have nowhere to put it right now. First I have to get the body tub safely out of the way. Then the chassis strip-down can start. While the chassis is away I’ll work on the engine.
After I took these photos I spent the rest of the day cleaning up the dirty chassis rails and removing lot of the flaking old powder-coat. It’s really not as bad as it looks considering the powder coat was flaking off almost as soon as I started the original build 32 years ago.
From my first checks every chassis tube looks sound, with only light pitting in the worst places.
Back in 1984 I had many ideas on how to ‘improve’ various design features of the Mantula. I spent many hours on redesigning areas such as the ventilation system, dashboard, the battery box, pedal box cover and filling under-body cavities to prevent chassis corrosion.
Now on reflection I think I could have done so much better, it all had to go. Actually the dash board and stronger supporting structure was quite good, but again I now know how to do it the professional way. Following a wonderful touring holiday in Canada, the last week of August has mainly involved the final parts of the strip-down. Ripping out all of those old modifications. It was a horrible job cutting out old GRP in confined spaces with a Dremel. Itchy work in such hot sticky weather!
Now it’s clean and ready for the next stage. Before the body comes off there’s some measuring to be done for the new components that I’ll be designing. Expect to see lots of carbon fibre this time…
Just a quick update this time. The body has started to move, but I’m taking it slowly. So far it shifts about 3 mm then stops. I think the foam strips between the body and chassis are working like very stubborn glue. Oh that and the expanding foam which I prefer not to talk about – I thought it would be a good idea for the longevity of the chassis side rails to use expanding foam to fill the cavity. Its done a good job to exclude moisture but is hard work to remove. 3 hours per side so far and still more to do!
Honestly I’m not complaining its better than DIY and gardening…
It’s been far too long since my last update. Various home DIY projects have kept me away from the car for months. However I’m now able to spend some time to get back on-track.
I’ve been putting some work into developing my techniques for the eventual carbon fibre parts, but that’s a post for another day. No, what I’m doing now is preparing the car for a complete strip-down to the bare chassis.
Body-off progress
Progress is slow and deliberate. It involves finding and removing all of the self-tapping screws that attach the body as well as any other fittings that are attached to the chassis through the internal body tub GRP. One of the more alarming aspects of this process is to see just how rusty the lower chassis rails are. That’s a surprise as the car has never been on the road. It was just stored in a damp garage for 14 years or so.
Many of the screws were rusted in place and would not move whatever I tried. So I got myself an excellent DeWalt impact driver which has already paid for itself on numerous jobs. All but one screw came out in a matter of seconds. The impact driver is also compact enough that I could remove all six screws on the parcel shelf under the rear screen without a problem. I’m so pleased that I could avoid removing the screen or cutting the GRP around the screw.
The big clean-up
I love working on the Marcos most of the time, but the current task is pure drudgery. Very messy too… I’ll explain – When I originally built the Mantula, I used the supplied sound deadening felt. I was finding it difficult to make it stick on reliably. So, following the advice of an experienced car upholsterer I stuck it on with some sort of black tar-like glue. It did a great job of keeping the felt in place, but all these years later how do I get rid of it? It seems to soften with a suitable solvent, but I don’t want to damage the GRP, the best I have found so far is paint brush cleaner. But it just takes forever to clean up the black gloopy mess. The smell is nasty too.
However it will eventually all be gone so I will be able to work inside the car. Unfortunately this is still going to be a destructive process as I remove all of the ‘permanent’ modifications that I made during the original build.
Demodifying
I have to admit that the build quality of my Mantula was deeply disappointing. I’m sure the body panel alignment on my car is worse than any other. Back in that first summer of ownership when the reality of Marcos ownership dawned on me I was close to despair. Nothing fitted properly and many parts were just unusable. The plywood frame that supported the dash board was lose where the grp matting had missed the plywood completely!
Worse than any of that was the state of the GRP layup. In several places there was no glass matting, just gelcoat and resin! As you can expect these areas didn’t survive very long. So I had to repair them in the best way I could. Unfortunately my repairs were not as good as I expected, so I will have to rework them. The worst areas were the drivers side scuttle gutter and the centre of the front spoiler.
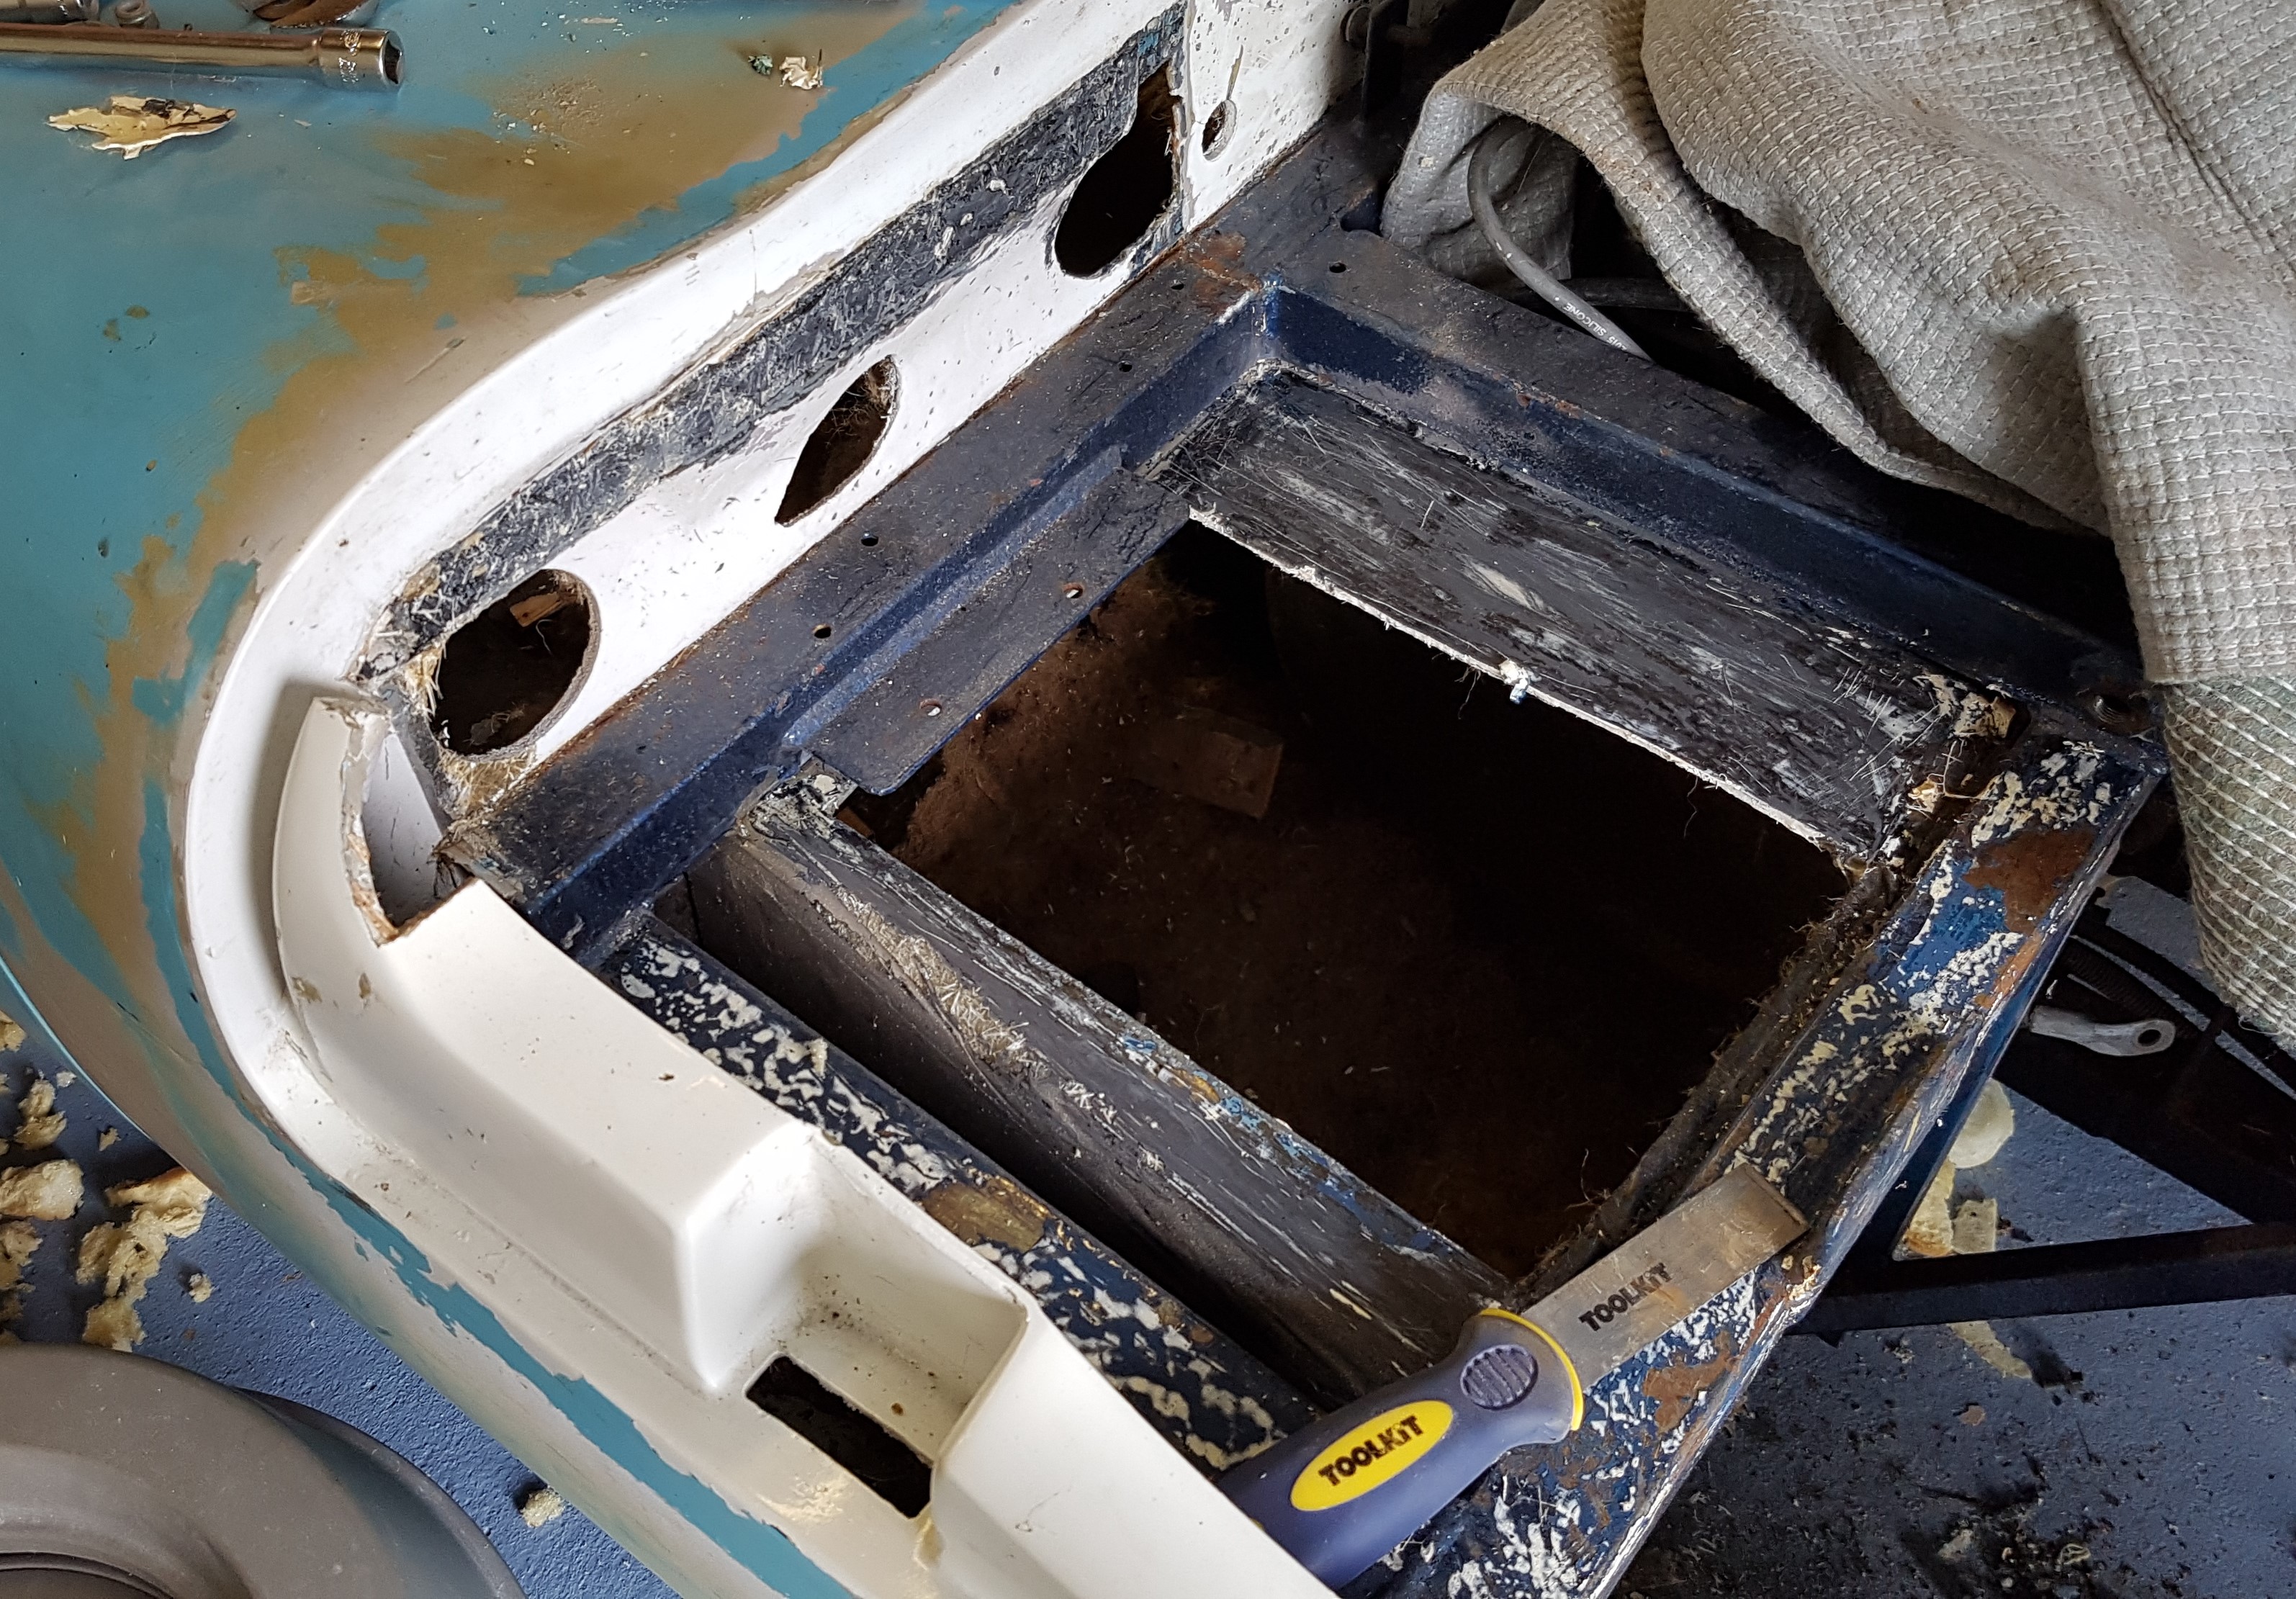
Scuttle gutter missing
In the picture above you can see where a large section of the gutter is missing. Doing a proper invisible repair won’t be easy.
Oh well, back to cleaning off the glue, more soon…